


Developing applications for the Palm OS may seem like a daunting task to a VB developer.
The traditional Palm SDK requires at least moderate knowledge of the C programming language and has a substantial learning curve. Further complicating the situation are the memory management requirements of the Palm OS and its specific API references. Now, in version 3.5, MobileVB is a well thought-out add-in for VB6 that alleviates the drawn-out development process and makes Palm OS programming a viable option for even novice VB programmers. Enhancing development effectiveness, MobileVB allows VB programmers to take advantage of existing skills without the need to learn a new programming language or another IDE.
MobileVB requires Visual Basic 6.0 with Service Pack 5 or higher. There is a free trial version of MobileVB at the AppForge Web site, www.appforge.com. You can download the free trial to follow along with this article, and because the installation process is painless, I'll skip over these minor steps and focus on how MobileVB is used within the Visual Basic IDE.
Getting Started with MobileVB
Developing a Palm OS project in MobileVB is straightforward, although if you have developed in VB before, you will find a few items that are slightly out of the ordinary. For starters, the manner in which you start VB is important. Rather than using your existing desktop icons or Start Menu shortcut, MobileVB installs its own icons. You will find these on your desktop after installation, and in the Start Menu located in the AppForge MobileVB folder.
MobileVB is a well-thought out add-in for VB6 alleviating the drawn-out development process and making Palm OS programming a viable option for even novice programmers
When you start MobileVB using one of its icons, you are given options for creating several types of applications. This option window can be seen in Figure 1. Along with the Palm OS, MobileVB provides templates for the Pocket PC, Symbian P800, and the Nokia Communicator. I'm interested in the Palm OS for this tutorial, but the basic concepts are the same for all of the devices.
MobileVB Controls
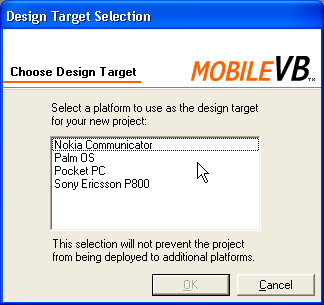
When you create a Palm OS project, MobileVB creates a blank form with the correct size for a Palm OS device. You may be tempted to begin developing a project by dragging and dropping the intrinsic VB controls, as you would normally do with a traditional Visual Basic project. But if you look further, you will see an entirely new set of controls in the General tab of your toolbox (See Figure 2). It is with these newly available controls (AppForge calls them Ingots) that you will devise your interface and construct your project.

Often, these controls provide a greater set of functions than their VB counterparts, making them much more powerful than the intrinsic controls. Table 1 details the MobileVB controls:
The VB IDE can become cluttered with the new controls, so if you prefer, you can create a new tab to which you can copy the MobileVB Ingots. To create the MobileVB tab, right-click on the General tab, select Add Tab and then name the new tab. Notice the small yellow letter “i” that allows you to distinguish between standard controls and MobileVB controls. You can now move the MobileVB controls by dragging and dropping them to the new tab.
The remaining IDE, including the Form Layout window, Property window, Project Explorer, and menus, continues to function as you would expect, although MobileVB adds an additional AppForge-specific menu with the following functions (Table 2).
Creating a New Database Application with MobileVB
Palm devices are made to collect data, so let's use MobileVB to create an application that provides standard database functions. To begin, create a new AppForge project and place several label Ingots on the 160 x 160 form created by default. When you place the first Ingot on the form, you are asked to save the project before continuing. Save the project in an empty directory. The directory is important because it is also used to store the database files. The project needs two labels with the following captions: Item and Quantity
The next step in the project is to create two text box Ingots and set their properties as follows: txtItem and txtQuantity. The Ingots are used to display information contained in the database and should have their respective captions set to nothing. An exact location is not important, but the Ingots should be placed similarly to those in Figure 3. You also need to create six button Ingots to perform a variety of input options. Create the buttons with the properties in Table 3.
The interface is nearly complete: it just needs labels that will help you browse the database. Add a label Ingot named lblRecordDisplay to the GUI and another label directly to its left. The text property of lblRecordDisplay should be set to an empty string with the label that was placed to its left set to “Records” (the second label's name doesn't play a role in the application). The final GUI should be something like Figure 4.

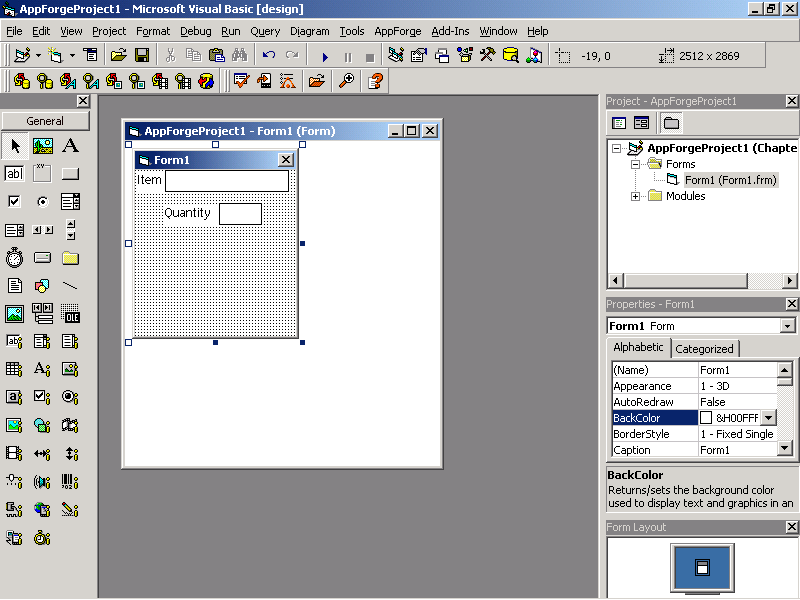
You need to create a database on the Windows desktop. Although you could use Access 97, Access 2000, or Access XP to create the database, let's use the VB Visual Data Manager add-in and create a database with the fields in Table 4. Start the VB Visual Data Manager and begin by selecting Add-ins from the Visual Data Manager menu. The main interface is displayed on execution. From this window, visible in Figure 5, you can select New and then Access 7 MDB from the File menu. Name it Inv.mdb and place it in the directory you created earlier for the project.

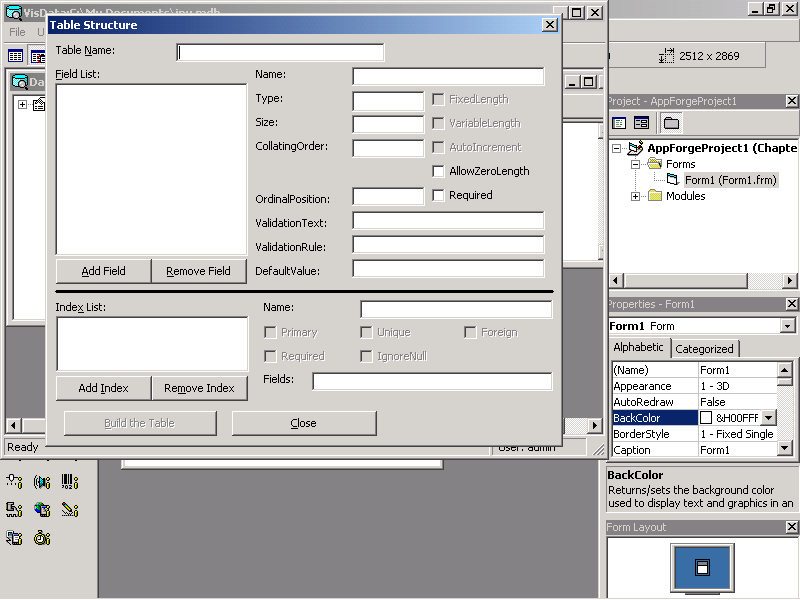
You can now right-click the Database window and select New Table from the pop-up menu. The window displayed should look like Figure 6. Enter the name “Inventory” for the Table Name and then click the Add Field button to enter the fields from Table 4. You can now click the Close button to close out of the Visual Database Manager.
After the Access database is completed, the next step is to convert it for use with MobileVB by using the MobileVB Database Converter. Start the Database Converter by selecting it from the MobileVB menu. Once you open it, you can select the Inv.mdb file you created earlier and then select Inventory from the Table menu. In order to differentiate between databases, two unique identifiers are assigned to each database. The CreatorID and Type are user-defined values that identify a database. The CreatorID is a unique identifier for a Palm OS application and is required by Palm. The address for looking up and registering CreatorIDs is http://www.palmos.com/dev/tech/palmos/creatorid/.
The CreatorID for a database should be the same as the application that accesses it. This ensures that the database is deleted when the application is deleted. In most cases, the Type should be set to DATA. If one application accesses multiple databases, the CreatorID and the Type are the same for each database.
For this example, you can use SF10 for the CreatorID, but if you have an application on your Palm device that already uses this ID, it can cause considerable troubles and you'll want to pick something else. You can also use the standard DATA value for the Type field. Click the Convert button, which converts the database to a PDB (Palm Database). Next, a dialog box displays asking if you wish to create the BAS file that accesses the database. Choose Yes. The resulting code module is added to the MobileVB project by selecting Add Module from the Project menu in VB. Make sure you keep all the files within the same directory in which the project was created.
Writing Some Code
The module you added to the project contains all the necessary code for directly accessing the Palm Database, leaving you responsible for adding the appropriate code in the VB events. When the button Ingots are clicked, an event is raised. Using these events, it's easy to add records, navigate the existing records, or delete records. Begin with the creation of a new record, which occurs when btnNew is clicked.
Along with the Palm OS, MobileVB provides templates for the Pocket PC, Symbian P800, and the Nokia Communicator.
Begin by opening the Code window to create a variable called NewRecord. The variable should be of type Boolean; that is, it holds a yes/no, true/false, or 1/0 value. Inside the btnNew_Click event, begin by setting the NewRecord variable to True. Next, set txtItem and txtQuantity to "". You'll be setting the TextBoxes to “” on several occasions and with that in mind, create a new procedure called ClearDisplay to set them. Then call the procedures as needed. The following procedures are finished:
Private NewRecord As Boolean

Private Sub btnNew_Click()
    NewRecord = True
    ClearDisplay
End Sub

Private Sub ClearDisplay()
  txtQuantity.Text = ""
  txtItem.Text = ""
End Sub
Next, handle the forward and back (<- and ->) buttons. The code is nearly identical for both items and looks like this:
Private Sub btnBack_Click()
    PDBMovePrev dbInv
    DisplayInfo
End Sub

Private Sub btnNext_Click()
    PDBMoveNext dbInv
    DisplayInfo
End Sub
The next item is the btnDelete code. Again, it uses the ClearDisplay sub procedure and the NewRecord variable. It checks to see if there is a record, and if so, deletes it. Here is the code:
Private Sub btnDelete_Click()
    If NewRecord Then
        ClearDisplay
        NewRecord = False
        DisplayInfo
    ElseIf PDBNumRecords(dbInv) > 0 Then
        PDBDeleteRecord dbInv
        DisplayInfo
    Else
        MsgBox "No records to delete"
    End If
End Sub
Before moving on, let's look at the Form_Load event. This event checks to see if the database exists and if not, creates a new one. You'll also move to the first record in the database. The code you need is in Listing 1.
At the end, the Form_Load event calls the DisplayInfo sub procedure. This procedure (in Listing 1) contains the code that actually displays the information on the screen. You only have two buttons left to deal with. The first is btnSave, which saves the database record you currently have displayed, and btnExit, which causes the program to end. The following procedures finish the application:
Private Sub btnSave_Click()
    Dim MyRecord As tInvRecord

    If NewRecord Then
        PDBCreateRecordBySchema dbInv
    End If

    MyRecord.Item = txtItem.Text
    MyRecord.Quantity = txtQuantity.Text

    PDBEditRecord dbInv
    WriteInvRecord MyRecord
    PDBUpdateRecord dbInv

    DisplayInfo
End Sub

Private Sub btnExit_Click()
    Unload Me
End Sub
Conclusion
MobileVB does a splendid job of integrating Palm development into the VB IDE, and is undoubtedly one of the easiest to use all-around development tools available for the Palm. The tools are especially easy to use for developers that are already experienced with VB, as the learning curve is nearly nonexistent. If you are a VB developer and want to write software for mobile devices like the Palm OS, look no further.
Listing 1: The Form_Load Event
Private Sub Form_Load()
If OpenInvDatabase = False Then
  'Create the database if we can't open it
   #If APPFORGE Then
    dbInv = _
    PDBCreateDatabase("Inv", Inv_TypeID, Inv_CreatorID)
   #Else
   dbInv = _
   PDBCreateDatabase(App.Path & "\Inv", Inv_TypeID, Inv_CreatorID)
  #End If

   PDBCreateTable _
     dbInv, "Inventory", "Name String, Signature String"
End If

    PDBMoveFirst dbInv
    DisplayInfo
End Sub

Private Sub DisplayInfo()
    Dim MyRecord As tInvRecord

 If PDBNumRecords(dbInv) > 0 Then
   NewRecord = False
   ReadInvRecord MyRecord

   txtItem.Text = MyRecord.Item
   txtQuantity.Text = MyRecord.Quantity

   lblRecordDisplay.Caption _
     = CStr(PDBCurrentIndex(dbInv) + 1) _
     + " of " + CStr(PDBNumRecords(dbInv))
 Else
        NewRecord = True
        lblRecordDisplay.Caption = "0 of 0"
        ClearDisplay
 End If
End Sub
Table 1: Sorting out the MobileVB Ingots (controls)
| MobileVB Control Name | What it does... |
|---|---|
| AFTextBox | Like its VB counterpart |
| AFComboBox | Reads textual input and/or prompts the user to select an item from a menu |
| AFListBox | Displays a list of varying size and content; the user can select one or more of the items in the list box to provide input |
| AFGrid | Displays text in a spreadsheet-like control from which the user can select one or more grid elements to provide input |
| AFLabel | Used like the standard VB label control |
| AFGraphicButton | Provides standard button options but can display a picture instead of a shape |
| AFButton | Similar to the VB CommandButton control |
| AFCheckBox | Provides a True/False option |
| AFRadioButton | Provides the option of selecting exactly one item from a list of items |
| AFGraphic | Displays graphics on the screen; uses the MobileVB Graphic Converter to create a proprietary .rgx or .jpg image |
| AFShape | Draws rectangles, squares, circles, and ovals |
| AFFilmstrip | Animates a series of graphics on the screen |
| AFMovie | Displays a movie on the screen after it has been converted from AVI to RMV |
| AFHScrollBar | Places a horizontal scrollbar on the form |
| AFVScrollBar | Places a vertical scrollbar on the form |
| AFSlider | Allows user input or output based on magnitude. |
| AFTone | Plays simple musical tones |
| AFScanner | Provides barcodes scanning in a variety of formats |
| AFSerial | Sends and receives data through a serial port |
| AFInetHTTP | Connects to the Internet |
| AFSignatureCapture | Reads signatures, stored as String data, for user input |
| AFClientSocket | Provides a variety of functions for performing socket-based communication |
| Sprite Field | Controls sprites and receives events during game progress |
| Sprite Control | A non-visual Ingot that eases sprites |
| AFTimer | Like the standard Timer, used to execute code at intervals |
Table 2: AppForge adds another menu with specific functionality to the Visual Basic IDE.
| AppForge-specific Menu Item | What it does... |
|---|---|
| Database Converter | Converts Microsoft Access database tables to the Palm Database (.pdb) format and generates a VB code module for the database, providing an interface for accessing and modifying the Palm Database |
| PDB Database Viewer | Displays the internal schema and data records in the Palm Database file. Also displays other useful information, including the internal database name, CreatorID, and TypeID of the database, and the number of records in the database |
| Font Converter | Converts TrueType fonts (ttf) into AppForge fonts (cmf) |
| Font Viewer | Displays the properties and characters for AppForge fonts |
| Graphic Converter | Converts bitmap files (bmp) into AppForge graphic files (rgx). |
| Graphic Viewer | Allows you to view AppForge graphic files (rgx) |
| Movie Converter | Converts AVI movies to AppForge movie files (RMV) |
| Movie Viewer | Allows you to view RMV movies |
| Universal Conduit Configuration | Configures a conduit for your application |
| Compile and Validate | Compiles and checks code for error |
| Deploy to Device | Uploads a compiled project to a handheld device |
| AppForge Settings | Applies the settings for an AppForge project |
| Open Project | Opens AppForge projects |
| Zoom Level | Opens a Zoom window, allowing you to view forms in a larger format |
Table 3: Use these settings for the Navigation buttons in the application.
| Button Name | Caption |
|---|---|
| btnDelete | Delete |
| btnSave | Save |
| btnBack | <- |
| btnNext | -> |
| btnNew | New |
| btnExit | X |
Table 4: The database contains these fields.
| Field | Type | Description |
|---|---|---|
| Item | Text | The item data |
| Quantity | Integer | Number of items |
