


Introduction to IDEs for Java development
To develop Java applications, you typically use an Integrated Development Environment (IDE). Although you can use a simple text editor with commandline tools, an IDE provides features that can make developing Java applications considerably easier. Figure 1-8 describes some of the features of the most popular IDEs.
All of the IDEs listed in this figure are either free or have a free edition. That makes them particularly attractive to students as well as programmers who are learning on their own. Most of these IDEs also run on all modern operating systems.
The first two IDEs listed in this figure, NetBeans and Eclipse, are two of the most popular Java IDEs. Both of these IDEs provide all of the features listed in this figure. For example, both of these IDEs help you complete your code and notify you of potential compile-time errors. They both automatically compile your code before you run it. And they both include a debugger that lets you perform standard debugging functions like setting breakpoints, stepping through code, and viewing the values of variables.
The third IDE listed in this figure, IntelliJ IDEA, isn’t as popular as NetBeans and Eclipse. However, we have included it here to give you an idea of the range of IDE choices that are available for Java. In addition, other Java IDEs are available that aren’t included here.
The fourth IDE listed in this figure, Android Studio, is designed for developing Android apps. It was developed by Google and IntelliJ, and version 1.0 was released in December 2014.
This book shows how to use NetBeans because we think it’s a great IDE. However, we also plan to publish an Eclipse version of this book because we think it’s a great IDE too.
See Table 1 below
Features provided by most IDEs
- A code editor with code completion and error detection.
- Automatic compilation of classes when you run the application.
- A debugger that lets you set breakpoints, step through code, and view the values of active variables.
Description
- To develop Java applications, you typically use an Integrated Development Environment (IDE) like those listed above. All of these IDEs are either free or have free editions.
An introduction to NetBeans
In NetBeans, a project is a virtual folder that contains all the folders and files for an application. The easiest way to get started with NetBeans is to open an existing project. For example, you can open any of the applications for this book after you download them from our website as described in the appendixes.
How to open a project
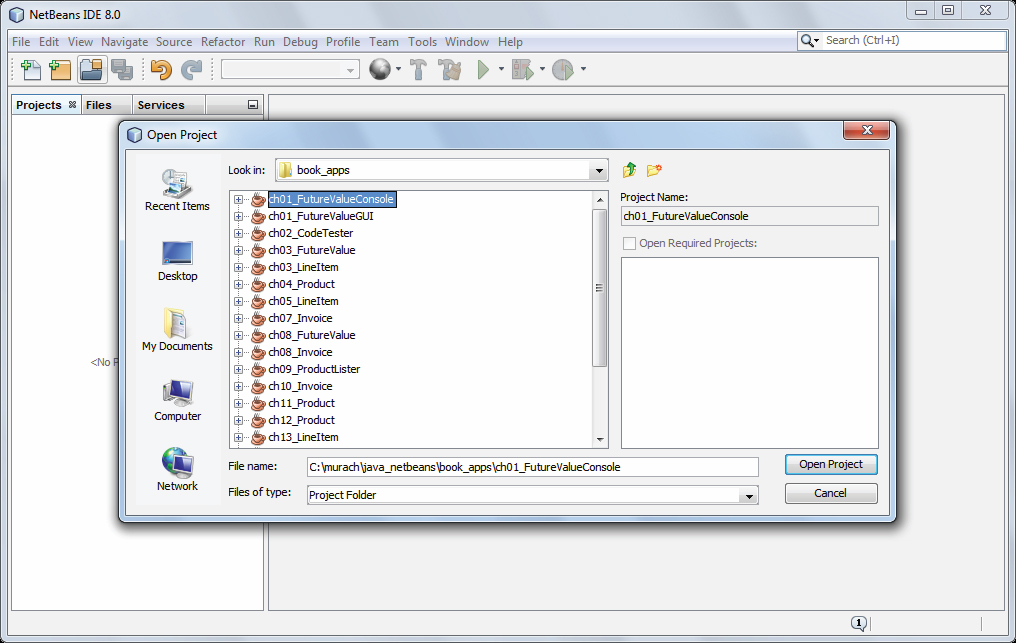
To open a project in NetBeans, you use the Open Project dialog box shown in figure 1-9. This dialog box lets you navigate to the folder that contains the project you want to open. In this figure, for example, the Open Project dialog box shows all of the existing NetBeans projects in this folder:
/murach/java_netbeans/book_apps
To clearly indicate when a folder contains a Java project, the Open Project dialog box displays a small coffee cup icon to the left of the folder name. Then, you can open the project by selecting it and clicking the Open Project button.
Description
- A NetBeans project consists of a top-level folder that contains the subfolders and files for a Java application.
- To open a project, click the Open Project button in the toolbar or select the File(Open Project command. Then, use the Open Project dialog box that’s displayed to locate and select the project and click the Open Project button.
- You can also open a project by using the File(Open Recent Project command and then selecting the project from the list that’s displayed.
