


In my previous article in CODE Magazine (https://www.codemag.com/Article/2011021/A-Simple-ExpressJS-and-TypeScript-Project), I showed you how you can build a simple ExpressJS and TypeScript project. The reason I wrote that article is because NodeJS, in some ways, is the absolute opposite of .NET in that it's not totally opinionated. This is both good and bad. It's good because the community figures out the best packages, build process, project template, etc. It's bad because to get a simple task, such as an ExpressJS website, written in TypeScript can be overwhelming if you start from scratch. To get past that initial hump so you can get a simple project template working, I wrote that article and made the code available at https://github.com/maliksahil/expressjs-Typescript.
In this article, I'll go one step further. Now that you have a basic ExpressJS and TypeScript project working, let's see what it takes to get a real-world application working. And what could be more real world than a To-Do application that saves data in a database? The starting point of this article will be the codebase https://github.com/maliksahil/expressjs-Typescript. Ensure that you get that working on your computer first.
Here's what I wish to achieve in this article:
- Add some user interface, so you'll integrate Bootstrap into your project. You may choose to use some other UI component; the concepts are probably quite similar.
- Have scripting support, and although I could write everything in plain old JavaScript, I'm going to use Vue.js. I'll discuss why Vue.js and not React or Angular later in this article.
- Enhance the application to support an API. To keep things simple: read, write, edit, and delete to-dos.
- Add database support, so the to-dos are persisted in a database.
There are still two big concerns that any real-world application needs to deal with that I haven't touched so far. The first is authentication, because it's hard to imagine any application you'd deploy that doesn't need to know something about the user. The second is deployment, because after you build this amazing application, you probably want to deploy it somewhere reliably. Let's leave those for a subsequent article.
Great! Let's get started.
Git Repo Structure
All of the code for this article can be found at https://github.com/maliksahil/expressjs-Typescript. I'm going to leave the master branch as the basic starter code. The code changes made specifically in this article will be in a branch called todoapp.
Get the Starter Code Running
I know I've covered this in depth in my previous article, but if you don't get this part working, you're going to be very lost in rest of the article. So let's get this part squared away. Use the following steps to get the starter code running on your computer. You'll need to do this on a Windows, Mac, or Linux computer that's set up to use NodeJS.
First, clone the repo:
git clone
https://github.com/maliksahil/expressjs-typescript
Next, install the dependencies:
npm install
Then, create a new .env file. To get started, you can simply clone the .env.sample file:
cp .env.sample .env
Finally, run npm start and ensure you can see the application running on localhost:8080.
If you need a walkthrough of this starter code, I highly recommend that you read my previous article in the November/December 2020 issue of CODE Magazine.
Add Bootstrap
Whenever I start up a new HTML page, I have to wonder why the defaults are so ugly. Really, who thought that Times New Roman was the best default font? Well, font faces are fascinating. Times New Roman was great for print when newspapers were printed super-fast in the middle of the night. The ink splattered and they needed a font that would be the most readable on newsprint in the 1920s. And guess what? We're stuck with it on LCD screens, where it makes no sense.
In an unrelated sidenote, the size of the reusable rockets on space shuttles have a certain width because it makes them easier to carry on train tracks. Train tracks are a certain standard width because the containers load easily on the back of a truck. The truck is a certain size because the lane and the road is a certain size. And the road is a certain size because when roads were first built by the romans, their chariots were a certain size. The chariot was a certain size because that was the size of the backsides of two horses. And as much as it bothers me, if someone in ancient Rome argued that every chariot must have a single horse, we'd be saving a lot of fuel today. The fact remains: The default look of HTML pages is ugly.
Bootstrap fixes that and gives us a great way to craft up layouts that scale gracefully across multiple screen sizes. There are many other competing frameworks, and I'm not favoring one over the other. At the end of the day, these UI frameworks boil down to some CSS and some JavaScript. Bootstrap is no different. It includes some CSS, and some JavaScript, specifically Bootstrap's own JavaScript and dependency on libraries such as jQuery and Popper.js.
Each of these can be either locally installed or sourced from a CDN. For the purposes of this article, I choose to use Bootstrap locally, and jQuery and Popper.js from a CDN.
To get started, visit https://getbootstrap.com/docs/4.5/getting-started/download/ and click the Download button to get the compiled CSS and JS for Bootstrap. Go ahead and create the unzipped contents in a folder called Bootstrap in the src\public folder. If you remember from the previous article, I have a file called copyAssets.ts in the tools folder whose job is to copy stuff from the public folder from your src to the dist folders. The final code is served out of dist. Long story short, whatever you put in public is copied over and served as a part of your website.
Now let's make the necessary front-end changes so Bootstrap gets included on the pages. Because you'd like every page on the site to include Bootstrap, create a partial view called bootstrap.ejs under the src\public\views\partials folder. You can see the code for bootstrap.ejs in Listing 1.
Listing 1: The bootstrap.ejs file
<!-- Popper.js, and jQuery -->
<script src="https://code.jquery.com/jquery-3.5.1.slim.min.js" integrity="sha384-.." crossorigin="anonymous"></script>
<script src="https://cdn.jsdelivr.net/npm/popper.js@1.16.1/dist/umd/popper.min.js" integrity="sha384-.." crossorigin="anonymous"></script>

<link href="bootstrap/css/bootstrap.min.css" rel="stylesheet">
<link href="bootstrap/css/bootstrap-grid.min.css" rel="stylesheet">
<link href="bootstrap/css/bootstrap-reboot.min.css" rel="stylesheet">
<script src="bootstrap/js/bootstrap.bundle.min.js"></script>
As can be seen, you're loading Bootstrap's files from your own project folder structure, and loading jQuery and Popper from the CDN.
With the basic underpinnings of Bootstrap done, go ahead and include it in index.ejs and about.ejs in the head element as follows:
<%- include('partials/bootstrap') %>
Now my spidey senses tell me that this isn't a great idea. If I add a client-side framework, for instance, will I continue to add more partials? Looks like some future refactoring is in order. But let's leave that for the next steps.
At this point, go ahead and run your application by issuing the following command.
npm start
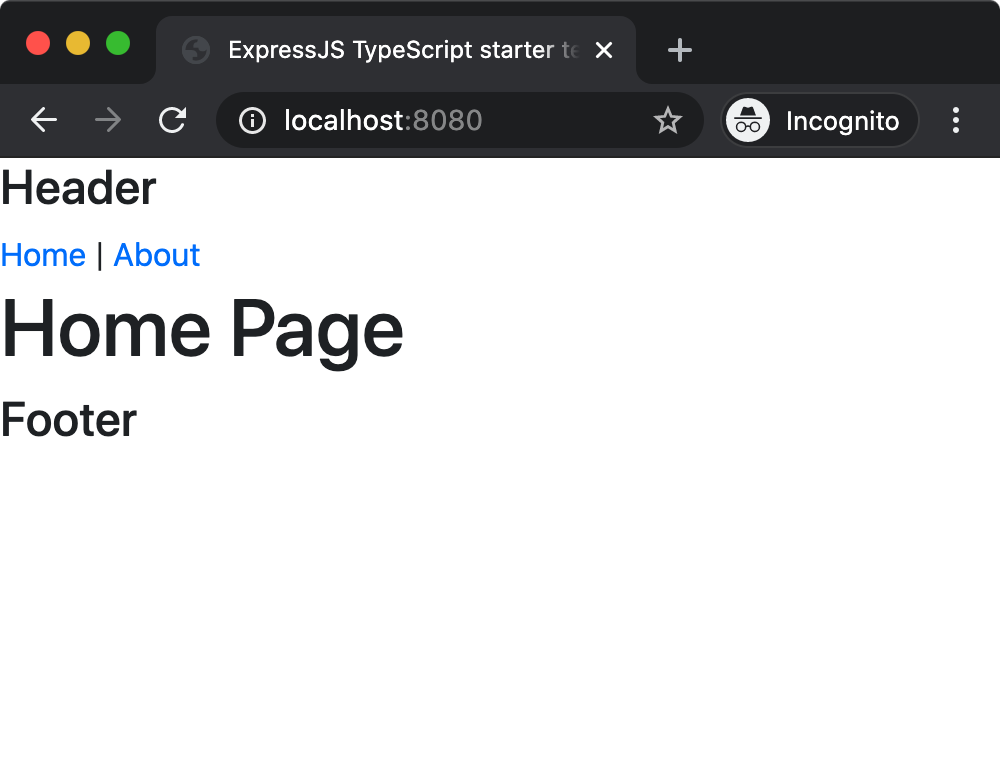
This should build your application, now with Bootstrap, running on port 8080 as you specified in your .env file. The application should look like Figure 1. Now you can make this as fancy as you want. In fact, there are a number of Bootstrap themes you can integrate just as easily, but I'm going to keep things simple and move on.
Add Client-Side Scripting
The current project structure is set up to use TypeScript for server-side scripting. That is, all express-js code and utilities, etc. are currently written in TypeScript. The project structure has currently no support for the client-side code you wish to run in the browser. Sure, you could just start adding twiddly bits of code to the .ejs files, but that won't get you far. What you really need is support for a proper client-side framework, and preferably, write the code in TypeScript.
This brings up another interesting challenge in the JavaScript world. There are just too many client-side frameworks, and none of them are perfect. Let's compare three popular frameworks and see how they suit our needs here.
The first one is Angular. Angular is a great framework, but in some ways, it feels like a science project to me. Its bootstrapping is so complicated, and the framework itself is so opinionated, that the team had to release something called Angular CLI to ease this set up process. Now, I have no doubts that Angular is very powerful, very well thought out, and incredibly well architected by people way smarter than me. But the fact remains that integrating Angular in my project is going to be a bear.
The next one is React. React has less of a curve in getting started than Angular, but nonetheless, there is a curve. React allows you to build your starter project as you choose to see fit. But still, there's a build process that's separate from the build of the application.
You could choose to use either Angular or React. In either of those cases, I'd have to separate out the build of the client-side code, and write code to copy the results of the build inside the actual project. There are many ways to achieve this. You could have two separate projects, which has the disadvantage of managing two separate projects and copying content between them. Or perhaps you could use some interesting Git tricks, such as submodules, to create a single project that appears as two separate projects.
Both approaches are perfectly valid, as long as you need the power that Angular and React offer. In this article, I want to keep things simple. Therefore, I pick Vue.js. The reason for picking Vue.js is that integrating it into the project is a matter of referencing a few JavaScript files. In fact, I won't just reference them, I'll choose to install them as a node module, and make them a part of the build process. The build process will, of course, be TypeScript-friendly. Let's do that.
I'll do this in two steps. First, add support for client-side scripting using TypeScript. Second, add Vue.js into the project.
TypeScript Client-Side Code
You've probably heard this before, but it's worth repeating. TypeScript doesn't run in the browser directly; it transpiles into JavaScript and the final transpiled code runs inside of the browser. This isn't an article about TypeScript, so without going into much further depth, let me just say that you never transpile on the fly, especially in the browser. That would be just way too slow. There's usually a build process that allows you to write TypeScript code, and then the converted JavaScript code is what finally runs in the browser. The intention, of course, is that when you finally ship your application, you ship no TypeScript code, only JavaScript code. And yes, ideally speaking, during development time, this transpilation is part of your development REPL cycle as well. In a real world project, you want to consider things such as breaking apart your code into submodules, so you aren't building the entire project every time you save a file, but breaking apart the codebase into modules is beyond the scope of this article. Here I'll focus on a single module build for the client-side TypeScript code.
With that spirit, let's make some changes to the project.
First, let's take a dependency on something that can bundle/package the application. Classically, I'd have used Webpack, but that's a very powerful and flexible tool — more than you need. To get going here, use a bundler called parcel–specifically parcel-bundler. Go ahead and install that as a devDependency in your project by issuing the command:
npm install –save-dev parcel-bundler
Verify that after you have run this command: an entry for parcel-bundler appears in the devDependencies section of your package.json. At the time of writing this article, mine installed version 1.12.4.
Let's make a few minor changes in the package.json file to ensure that you make use of this package. Add the following node under scripts:
"parcel":
    "parcel build main
    src/public/js/main.ts
    -d dist/public/js",
The purpose of this command is to instruct the parcel to use the src/public/js/main.ts file, which you will author shortly, and build and bundle it, and put the output in dist/public/js folder.
To ensure that this newly created command becomes a part of the REPL process, include it in the build script, as shown here:
"build":
    "npm-run-all clean lint
    tsc copy-assets parcel",
Next, in the src\public folder, create a new folder called js. Here, I put all my custom TypeScript code. In this folder, create a new tsconfig.json file, with contents as shown in Listing 2, and create a new main.ts file with the following line of code:
console.log('client side scripting support');
Listing 2: tsconfig.json for my client side code
{
    "compilerOptions": {
        "lib": ["es6", "dom"],
        "noImplicitAny": true,
        "allowJs": true,
        "target": "es5",
        "strict": true,
        "module": "es6",
        "moduleResolution": "node",
        "outDir": "../../../dist/public/js",
        "sourceMap": true,
        "sourceRoot": "public/js"
    }
}
Finally, you need to include it in your ejs files. Let's do some refactoring. That file you created earlier for Bootstrap, let's rename that common.ejs, because you're now increasing its responsibility from Bootstrap to all common files that you want included everywhere. Modify the about.ejs and index.ejs files to not reference bootstrap.ejs but this renamed common.ejs file instead. In this common.ejs file, add the following line of code:
<script src="js/main.js"></script>
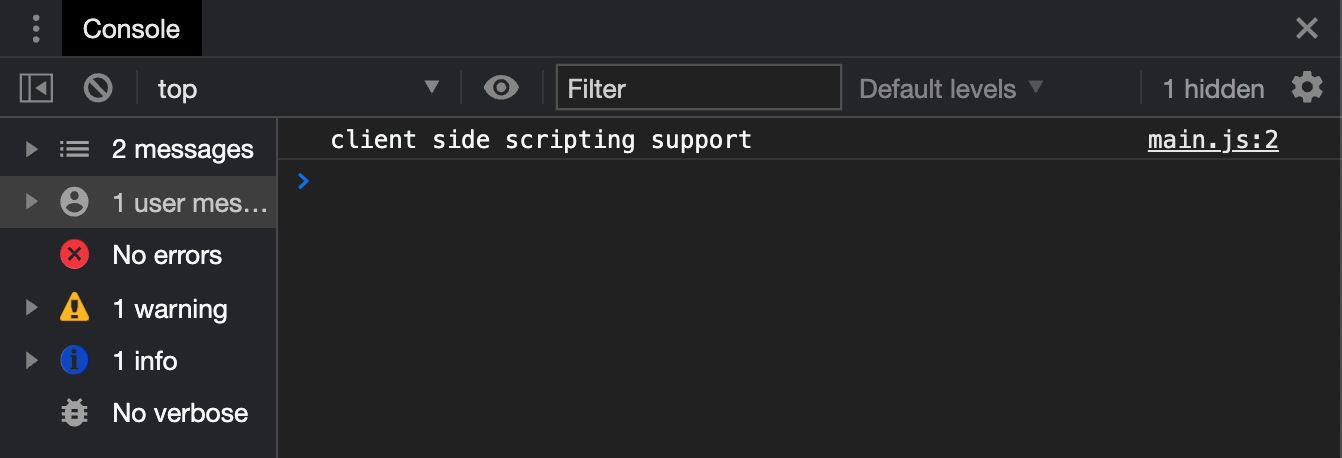
Great! The client-side scripting is now done. Let's run the project by issuing the npm start command. When your site launches on localhost:8080, verify in dev tools that you see a console.log statement output, as shown in Figure 2.
Add Vue.js
Next, let's enhance the application by adding support for Vue.js. Run the following command to add Vue.js in your project:
npm -i vue
As long as the src\public\js\main.ts references this file, it will get bundled. However, TypeScript is a bit picky. It wants us to strongly type the code, and although that may appear annoying at first, it helps keep the code clean in the long run. To add types for Vue in your project, run the following command:
npm -i --save-dev @types/vue
Finally, you need to alias “vue” so when you write a statement to import from vue, the transpiler and bundler know where to pick this “vue” from. To facilitate that, add the following node in package.json:
"alias": {
    "vue": "./node_modules/vue/dist/vue.common.js"
},
Now, you're going to make some modifications so that you can use vue.js to render a bunch of hardcoded to-dos. Modify the src \public\js\main.ts file as shown in Listing 3. The code in Listing 3 expects an element with the ID “app” and it supplies an array called todos to that app. As you can imagine, I'm going to later modify the mounted method, so this data is pulled from an API. Let's do that momentarily. For now, let's make some modifications to the index.ejs file, so my to-dos are rendered.
Listing 3: main.ts file with vue
import Vue from "vue";
// // tslint:disable no-unused-expression
new Vue({
    // eslint-disable-line no-new
    computed: {    },
    data() {
        return {
            todos: []
        }
    },
    el: "#app",
    methods: { },
    mounted() {
        this.todos = [{
            "id": 1,
            "title": "Integrate Vue.js",
            "isDone": true
        },
        {
            "id": 2,
            "title": "Refactor this later",
            "isDone": false
        },
        {
            "id": 3,
            "title": "Write an API",
            "isDone": false
        },
        {
            "id": 4,
            "title": "Get data from a database",
            "isDone": false
        }];
    }
});
Listing 4 shows the relevant part of index.ejs that renders the to-dos. Additionally, I made another minor change, which is to move the partials/common included at the end of the page, right before the body tag is closed. The reason for this is two-fold. First, it's a good idea to load all of these helper files after the page renders. This helps perceived performance. The second reason is that vue.js needs to load after the page structure is set.
Listing 4: Rendering todos
<div class="container-fluid px-lg-5" id="app">
    <div class="row" v-for="todo in todos">
        <div class="card shadow col-lg-12 col px-lg-5">
            <div class="card-body">
                <span v-if="todo.isDone">?</span>
                <span v-else>?</span>
                {{todo.id}}:{{todo.title}}
            </div>
        </div>
    </div>
</div>
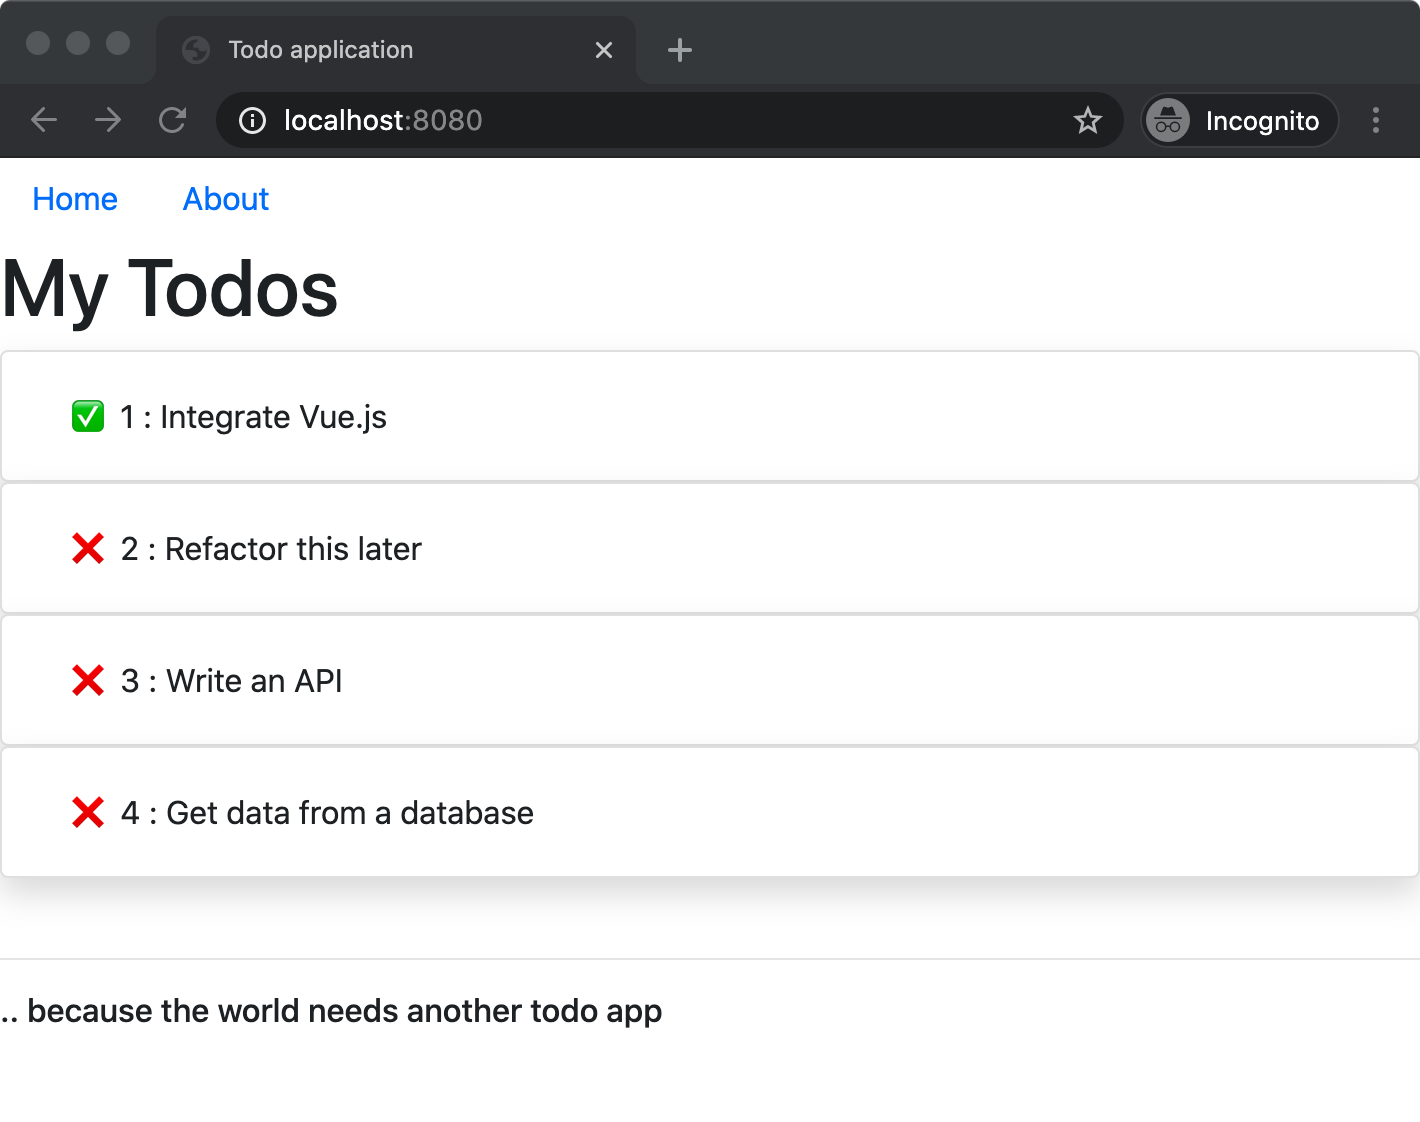
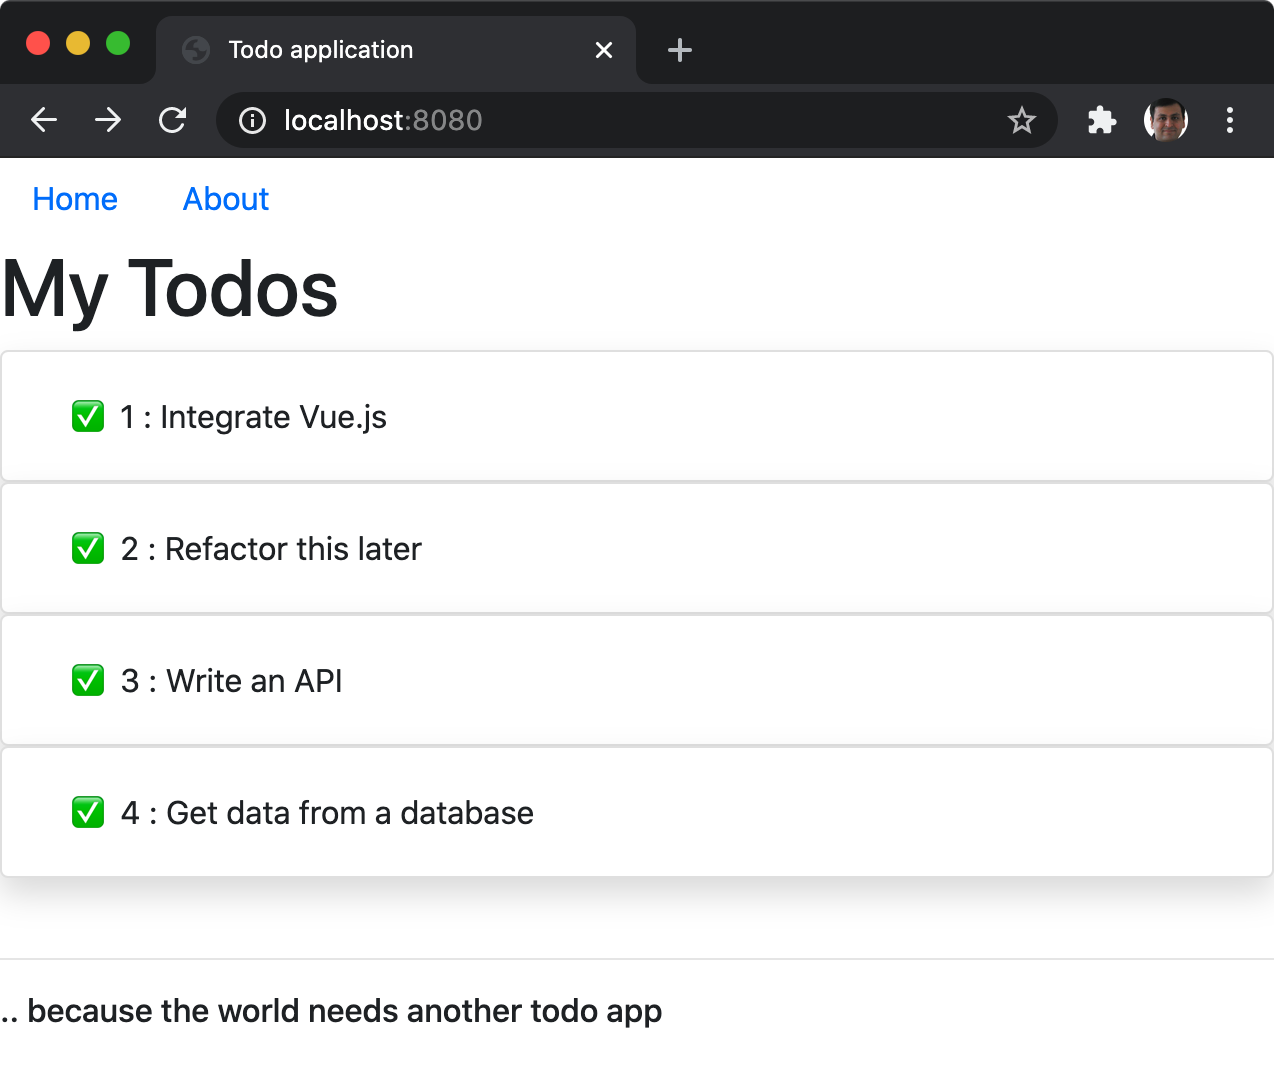
While you weren't watching, I also made some cosmetic changes to the application. You can also find the source code online in the GitHub repo, but try not to be too impressed by my designer skills. Now, when you run an npm start, you should see a beautiful application rendering out to-dos, as can be seen in Figure 3.
You're making good progress. I'm going to check in this code, and, in the associated Git repo, in the commit history, you can find exactly what the code looked like at this point.
Add API Support
I'm so far quite impressed by my application as it takes shape, but I wish the to-dos weren't hard coded. Ideally, I want them to come from a database. The first step to enable that is to get them from an API. The next step is to modify the code to add API support, and in the process, let's refactor the code into business objects that the API can return.
Refactor the Code
As the application grows more complex, I'd really love to have the power of IntelliSense, so I'm not typing big JSON objects by hand or, for that matter, praying that the database returns what I think it returned. Ideally, I'd like to have a class represent a business object that's used between both the API and the front-end. This ensures that I don't have accidental typos, such as Id vs. id, that could inadvertently break my application.
To facilitate this, add a folder called BO under the src folder. Note that I've put it at this level because I intend to share it between the front-end and the back-end. In this folder, create a new file called todo.ts with code as shown in Listing 5. This file represents the business object, a class that holds a single to-do. Note the interesting-looking constructor. This constructor simply allows you to hydrate an instance of this class by passing in an untyped JSON object that I get from any source, such as the database.
Listing 5: The Todo business object
export class Todo {
    id: number;
    title: string;
    isDone: boolean;
    constructor(props: Todo) {
        Object.assign(this, props)
    }
}
To promote reuse of this todo.ts file, I could go about importing it everywhere. But what if I have 50 business objects? It would get really boring to import 50 lines one by one in numerous files. So I use a concept called barreling, where I create another file at the same level as todo.ts, and call this file index.ts. The only responsibility of this file is to collect everything anyone could be interested in importing out of a folder or folders. Because I have only one business object for now, my index.ts barrel file looks like this:
import { Todo }  from './todo';
export { Todo }
Now let's make use of this newly created business object in the front-end code. At the top of the src\public\js\main.ts file, go ahead and import the business object as shown below:
import * as BO from '../../BO';
Modify the mounted method as shown in Listing 6.
Listing 6: Strongly typed client side code
mounted() {
    let todos: BO.Todo[] = [{
        "id": 1,
        "title": "Integrate Vue.js",
        "isDone": true
    }, {
        "id": 2,
        "title": "Refactor this later",
        "isDone": false
    }, {
        "id": 3,
        "title": "Write an API",
        "isDone": false
    }, {
        "id": 4,
        "title": "Get data from a database",
        "isDone": false
    }];
    ( <BO.Todo[]>this.todos) = todos;
}
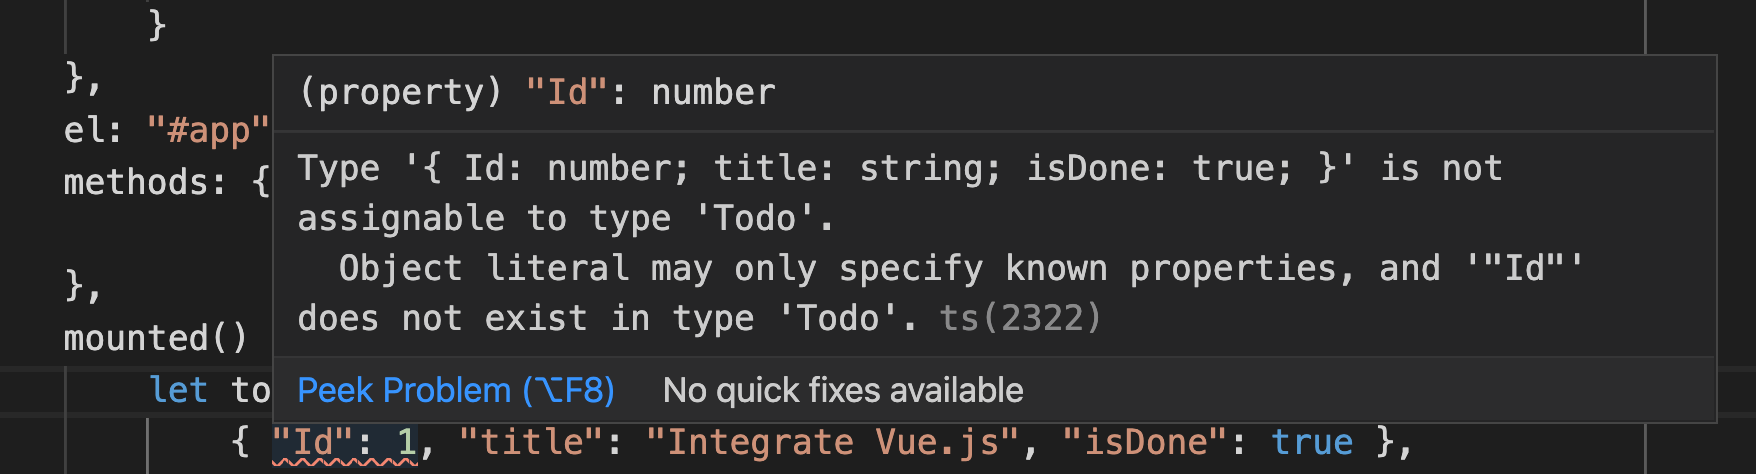
Now if you run the application, you'll see no changes. It should look exactly like Figure 3. But here's the benefit of using this business object. Try introducing a minor typo in your code. VSCode immediately catches the error at coding time as can be seen, as in Figure 4.
Now that you've refactored the code and started taking advantage of TypeScript, go ahead and check this code in. Next, you'll start incorporating this into an API.
Add API
The code is taking advantage of TypeScript in the front-end now. Let's add support for an API. This API will be exposed at /api/todos, and it will supply data to the mounted method. As you can imagine, the mounted method now has to make an HTTP call to get the data from the API. There are two steps here: the first to add the API itself and the second to make modifications to the front end code so that it calls this API.
Let's start with the first, adding the API. In the src\routes folder, add a file called api.ts. The code for this file can be seen in Listing 7, which relies on a class called DataService where I'll abstract out all calls to the database. More on that shortly. Also it exposes an API at /api/todos, where the to-dos are returned.
Listing 7: The API
import * as express from "express";
import { DataService } from "./DataService";
export const register = (app: express.Application) => {
    const apiPrefix = "/api/"
    app.get(apiPrefix + "todos", async (req: any, res) => {
        try {
            res.json(await DataService.getTodos());
        } catch (err) {
            res.json({
                error: err.message || err
            });
        }
    });
};
Let's also write up the fake DataService, which, for now, returns hard-coded data. You'll modify this later in the article to get data from a database. The code for the fake DataService can be seen in Listing 8. The eagle-eyed among you may have spotted a couple of things. First, that you're making full use of the strongly typed business object, the same business object that's now a common vocabulary between the front-end and the back-end. This is great! It eliminates so many errors. Secondly, I've marked a few things as done in my to-dos.
Listing 8: The DataService
import * as BO from "../BO";
export class DataService {
    static async getTodos(): Promise < BO.Todo[] > {
        const toReturn = [{
            "id": 1,
            "title": "Integrate Vue.js",
            "isDone": true
        }, {
            "id": 2,
            "title": "Refactor this later",
            "isDone": true
        }, {
            "id": 3,
            "title": "Write an API",
            "isDone": true
        }, {
            "id": 4,
            "title": "Get data from a database",
            "isDone": false
        }];
        return toReturn;
    }
}
To include this API in the application, modify the routes\index.ts file as follows. First, import the api class as below:
import * as api from "./api";
Then, register the API as shown below:
api.register(app);
The full code for the routes\index.ts file can be seen in Listing 9.
Listing 9: The routes\index.ts file with our API being registered
import * as express from "express";
import * as api from "./api";
export const register = (app: express.Application) => {
    // home page
    app.get("/", (req: any, res) => {
        res.render("index");
    });

    // about page
    app.get("/about", (req: any, res) => {
        res.render("about");
    });
    api.register(app);
};
Go ahead and run the application. It should look like Figure 5.
Now that you're at a logical point, go ahead and commit and push this code as I did to my GitHub repo. You can find this state of the code in the commit history under the todoapp branch.
Add Database Support
At this point, I have the front-end written in Bootstrap and Vue.js wired to the back-end API, and all using a common vocabulary using TypeScript. I'd now like to get the data from a database. There are two main steps involved here.
First, I need a database (duh!). Second, I need to modify the DataService.ts file, so it reads from this database, and doesn't return hard-coded information.
Set Up a Database
For the purposes of this article, I will use postgres. My high-level steps are to run the postgres database as a Docker container, and set up the initial to-dos in a table. If you wanted to replace postgres with another popular database, such as mssql, the steps are quite similar.
First you need to ensure that your development computer is set up to use Docker.
I'm going to define my custom docker image that's based off of the postgres image. I can do so by creating a file called Dockerfile. Choose to create this file in a separate folder called db because you don't want this to interfere with your main application. My Dockerfile looks like this.
FROM postgres:latest
ENV POSTGRES_USER pguser
ENV POSTGRES_PASSWORD p@ssword1
ENV POSTGRES_DB todosdb
COPY initdb.sql /docker-entrypoint-initdb.d/
There's a lot going on in this Docker file. First, you're basing your image on postgres:latest. Then via environment variables, you define that you'll connect using username pguser, and password p@ssword1. Finally, you'll have a file called initdb.sql, which gets copied into a specific location in the Docker container and initializes the database. You can find the contents for this file in Listing 10.
Listing 10: Setting up our database script
DROP TABLE IF EXISTS TODO;
CREATE TABLE IF NOT EXISTS TODO(id INT NOT NULL PRIMARY KEY, title varchar(200) NOT NULL, isDone boolean NOT NULL DEFAULT false);
INSERT INTO TODO(id, title, isDone) VALUES(1, 'Integrate Vue.js', true), (2, 'Refactor this later', true), (3, 'Write an API', true), (4, 'Get data from a database', true);
Now, let's define a shell script that builds the docker image, and set up the database as a running container. I created a file called setupdb.sh in the db folder, with the following contents:
docker build --tag tododb:latest .docker run -it --name tododb -p 5432:5432 tododb
Now go ahead and cd into the db folder and make this file executable.
chmod +x ./setupdb.sh
Finally, execute this file. This file should run the container in interactive mode, so you can be sure that your script ran fine, and your database is ready to go. You should see a long scrolling output, at the end of which you should see a message as shown below:
database system is ready to accept connections
It's worth pointing out that the container is running in interactive mode. This isn't how you'll run it in production. But hey, it's a Docker file, and if you've seen my various articles on Docker in CODE Magazine, you already know that you can run the Docker container as a daemon using the -d flag. There's more to deployment than that of course, and let's leave that for a future article. For now, my development mode database is ready to go.
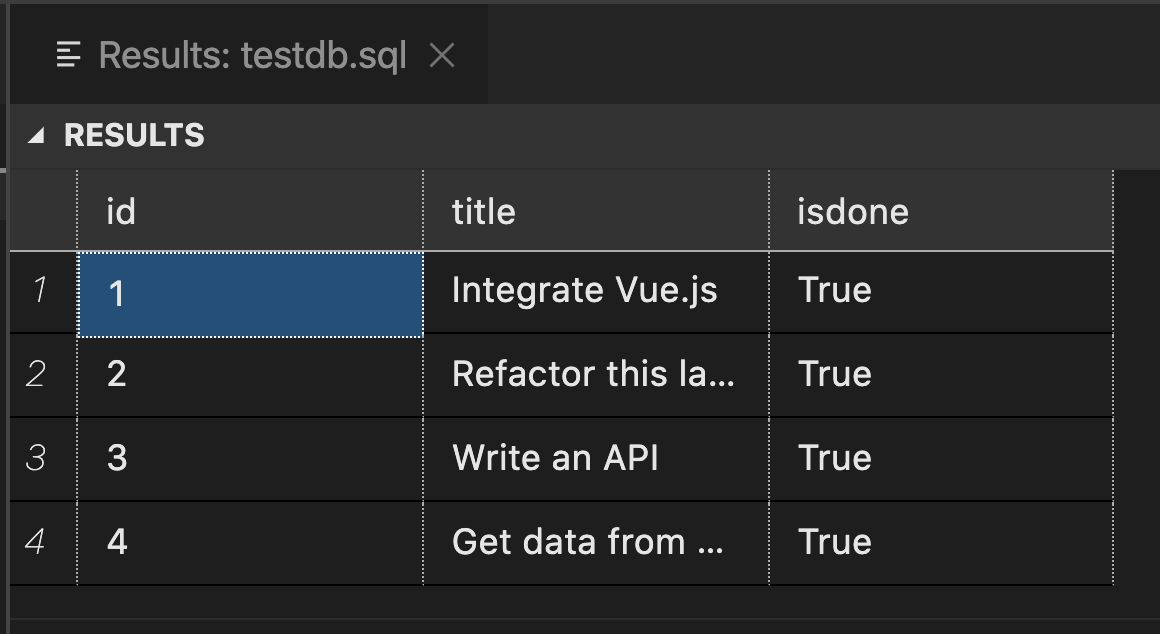
Once the database is set up, I used another file called testdb.sql and a VSCode extension to verify that I could execute the below SQL command:
SELECT * FROM TODO
The results of this command can be seen in Figure 6.
My database is now set up. I can now make appropriate changes to my code so it reads out of this database. Leave the container running. When you're done, you can CTRL_C to exit out of it and shut the container down. You can then choose to delete the container and the image if you wish.
Read from the Database
My database is now set up. For me to query the postgres database from my nodejs code, I need to take a dependency on some packages. Go ahead and run the below command in the root of your project to take such a dependency:
npm install pg pg-promisenpm install --save-dev @types/pg
Luckily for me, I've followed some good architecture advice so far, and have abstracted all my code in DataService.ts, and my business object in Todo.ts. This is a rather simple application, so I should just have to execute the following command to send the data back, right?
"SELECT id, title, isDone FROM TODO"
As you'll see shortly, that's not the case. Let's see why!
For now, let's modify the DataService.ts file as shown in Listing 11. The code here is quite simple: You're connecting to your database, executing a query, and sending back the results. Luckily for me, my SQL query returns exactly the same structure as my business object, or so I think! Go ahead and run the application, and you should see an output as shown in Figure 7.
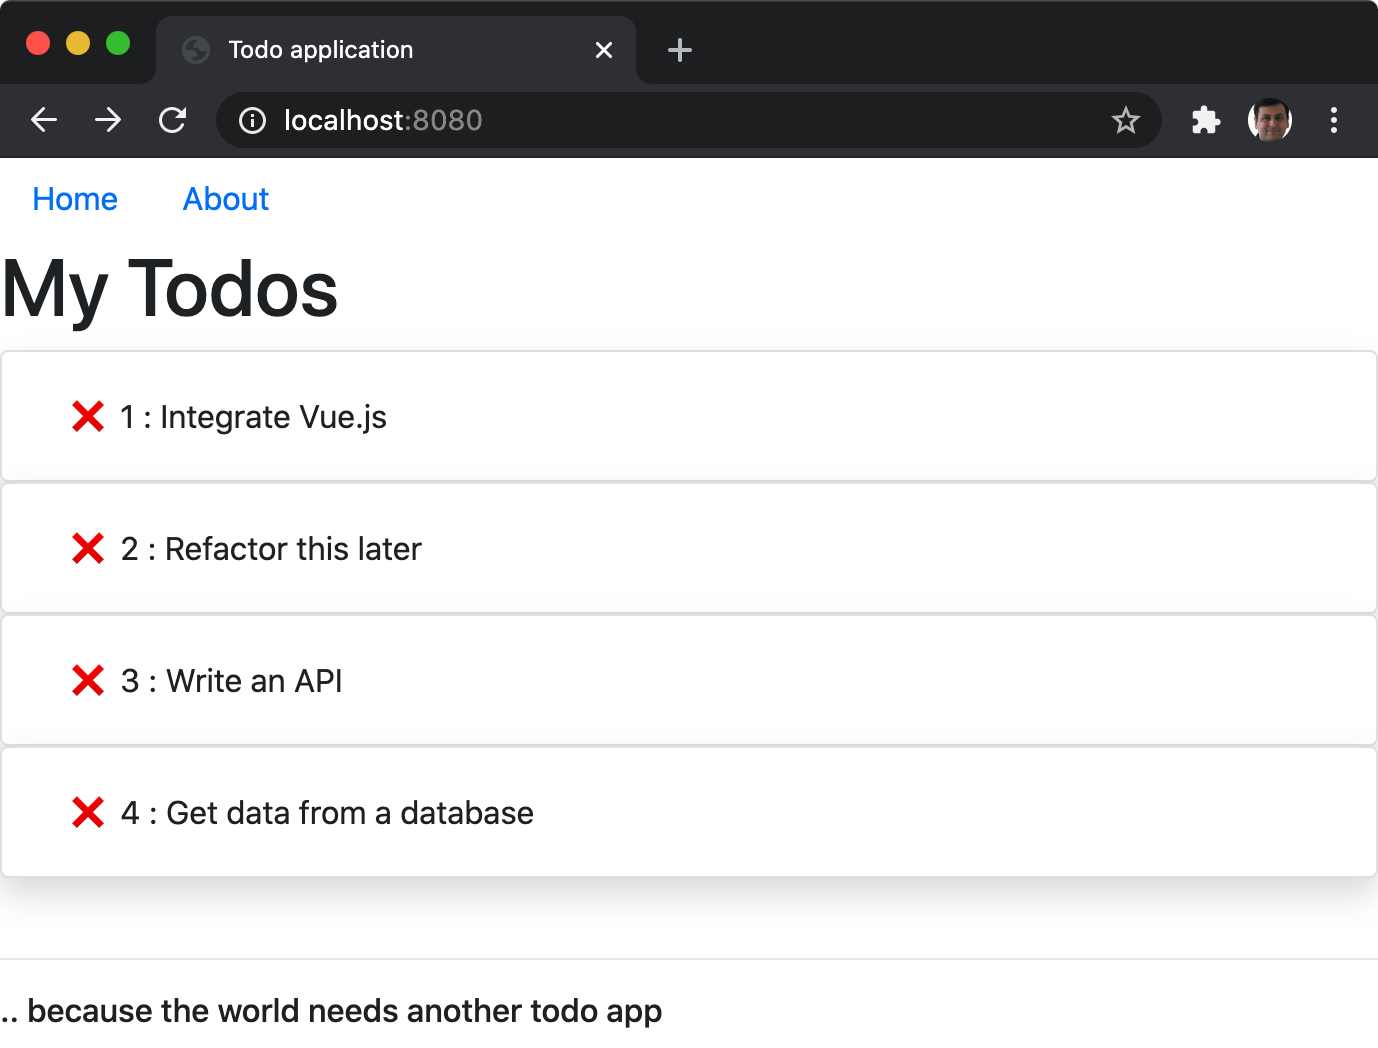
Nothing is more disappointing than finding all your to-dos marked not done, especially when you have done them. What went wrong? Well, if you pay close attention to Figure 6 and Listing 5, you should see a mismatch. The database returns “isdone” and Listing 5 is expecting “isDone”.
How frustrating! But because I followed good architecture advice, this should be easy to fix. You need to do some minor translation of isdone to isDone in the business object in todo.ts, and you need to make use of the business object in DataService.ts.
First, in todo.ts, modify the constructor, specifically after assignment, add a line to assign isdone to isDone.
constructor(props: Todo) {
	Object.assign(this, props)
	this.isDone = (this as any).isdone;
}
You may be thinking, hey isn't any a bad idea in TypeScript? Yes, it is, but only if you introduce it. Here, you've written the business object so it accepts any and returns a strongly typed object, so the rest of the code doesn't have to deal with it. Secondly, shouldn't I get rid of the isdone property? I'd say yes, you should. Otherwise, you are sending unnecessary data over the wire, and even though, thanks to IntelliSense, hopefully, you'll never use it, that property still lingers around.
To delete that property, simply add a line of code at the end of the constructor as shown below:
delete (this as any).isdone;
Great! The business object is updated. But it's not going to help you much unless you actually use it, right? If you see Listing 11, we're just sending back whatever we get from the database.
return results.rows;
Listing 11: My DataService.ts (with a bug)
import dotenv from "dotenv";
import { Client } from "pg";
import * as BO from "../BO";

export class DataService {
	static async getTodos(): Promise<BO.Todo[]> {
		dotenv.config();
		const client = new Client();
		try {
			await client.connect();
			const sql = "SELECT id, title, isDone FROM TODO";
			const results = await client.query(sql);
			return results.rows;
		} catch (err) {
			throw err;
		} finally {
			await client.end();
		}
	}
}
To take advantage of the business object, simply replace the above line with the following.
const toReturn: BO.Todo[] = [];
results.rows.forEach(row => {
	toReturn.push(new BO.Todo(row));
}) return toReturn;
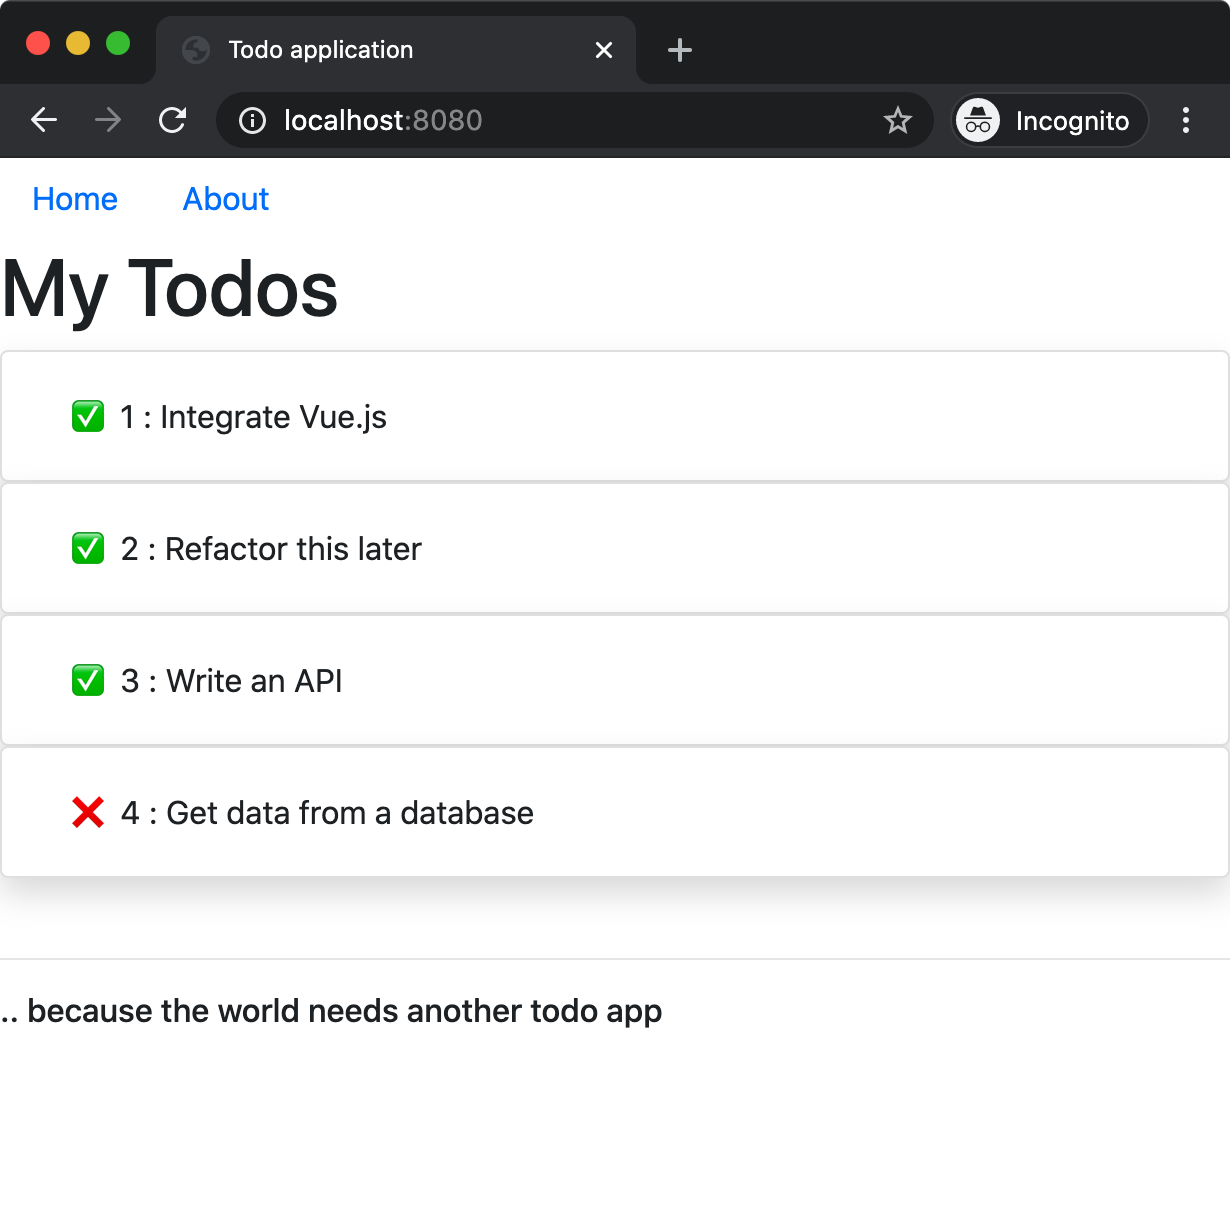
Now go ahead and run your application again, and you should see all your to-dos marked done, as shown in Figure 8.
My application is now done. Let's tie a bow on this, and check in the final code. You can find the final code at https://github.com/maliksahil/expressjs-typescript/tree/todoapp and the commit history, as shown in Figure 9, will let you get the code at each matching step in this article.

Summary
Building an application from scratch brings an inexplicable joy. I feel like an artist carefully painting each stroke with the right colors to get exactly what I want. The challenge, of course, is when you have a vision of a final painting: How do you go from a blank canvas to your vision? Although this article was just a simple to-do app, the intention was to walk you through every nitty gritty detail, so you get the full joy of painting such a work of art.
There are many other things I wish to talk about here before I really end. For instance, I want to talk about adding authentication and therefore perhaps making this application understand concepts such as roles. Any real-world application would need that, right? And I'd also like to talk about deployment. Can I containerize this application? Can I deploy such a container to on-prem or Azure or AWS? Can I take advantage of Kubernetes to build a production-worthy resilient application?
I hope to touch on those topics in future articles. Until then, happy coding.
