


I spend a very large portion of my day in front of this screen and on this keyboard. I'm also a very lazy person. You put these two together, and I'm always looking for opportunities for efficiency. There are only two ways I can achieve more. The first is to find some sucker to do my job, and we all know how limited that is. The second is to automate what I do. Not everything can be automated, but the more I can do from terminal, the more I can turn that into scripts. And those scripts are my key to enjoying being lazy.
Now that you know my secret, I thought this would be a perfect opportunity for me to share some of the tips and tricks that I find useful on the Unix terminal. In my day-to-day job, I use a Mac. But many of these trips will also apply to Windows subsystem for Linux. Also, before you dismiss this article as a PowerShell fan, consider this, if you have any interest in containerization, at least in today's environment, you can't escape the Unix terminal.
With that background, let's get started. Here are some of my favorite productivity hacks on the Unix terminal.
Tab Completion
Tab completion helps me fill both commands and parameters. For instance, if I wish to type “mount”, I just type “mou” and hit tab, and it completes it to “mount”. If I type just “mo” it shows me all the possibilities, which, in this case, on my computer, is 63 possibilities. So typically, out of muscle memory, I end up remembering mou<tab> to complete the mount command. Okay, I saved one keystroke, not a big deal. But type “host” and have it complete to hostname saves me three keystrokes. Still not impressed?
Where tab completion is really useful is in filling out parameters. On the Unix subsystem, you have a special folder called the home folder. Typically, when you launch terminal, you land in your home folder. On my computer, that happens to be /Users/sahilmalik. In this folder, I have many folders, but three of them start with the letter “D”, namely Desktop, Documents, and Downloads. And inside the Documents folder, is a folder called “Developer” where I put all my code stuff. So if I want to jump into the Documents/Developer folder, I simply type “cd D/D” and hit tab, and it autocompletes to “cd Documents/Developer”. And if there are multiple long folder names that match my specified criterion, it prompts me to pick from the choices with tab, as shown in Figure 1.

Here's a practical example of where I find this useful. I have multiple external monitors connected to my Mac, and they all connect through the Thunderbolt 3 connection. The problem is that when the Mac wakes up, it frequently confuses the left monitor for the right. Imagine this: I'm running late for a meeting, and I want to quickly swap the right monitor for the left. The usual workflow to do this would be to start system preferences, go to displays, and carefully align the monitors properly again. Instead, I just wrote a script to do that. And it lives inside the documents/developer/scripts folder, it's called “setscreens.sh”. So now my workflow is to simply run “D/D/s/s” and hit tab, and voila, my monitors are all set properly. Right there, I saved five minutes.
Switching Directories Like a Pro
Ah, my favorite command “cd”, change directory, I use it a lot. To use cd, you simply type:
cd <directoryname or path>
If the directory name is within the directory you're in, you'll switch to it. Or you can specify multiple hierarchies, like:
cd d/d/s <tab>
This pairs cd with tab completion and supercharges your workflow. But wait! There's more.
You can type cd ~ at any point to switch back to the home directory, no matter where you are. This is an easy way to get back home quickly. The tilde (~) character is a shortcut for home.
But you can also “bookmark” directories and get back to them easily using pushd and popd.
For instance, look at the flow shown in Figure 2.

In Figure 2, I started in my home folder and navigated to Documents/Developer/scripts. Then I ran pushd, which put my home folder and the ~/Documents/Developer/scripts in a stack that the terminal now remembers for me. Effectively, I have bookmarked it. Now I can navigate somewhere else, such as /bin, and when I'm done with my work there. I type popd, to go back to where I was. This allows me to navigate between folders nicely.
A sample workflow could be, hey, I'm in the middle of something big and complex here, but darn it, I need to hop into that other folder and do something, without having to type in this long complex deep path I'm already in. No big deal, pushd, do work, popd.
In reality, on my MacOS, I simply type OPTION_T to get a new tab, a new terminal instance. But this is very useful when ssh'ed into some docker container far away.
But I'm not done yet. Here's another super useful command.
cd -
That is “cd minus”. That simply returns you to the folder you just came from.
Finder and Terminal
Can I say this? I'm not a huge fan of Finder. I find the user interface clunky, basic things like column resizing doesn't work well enough, and it has its own mind when it comes to sorting things. All that aside, a graphical user interface is useful sometimes. Practically speaking, sometimes when I'm in Finder, I wish I could open the same folder in terminal easily. The reverse is also true; when I'm in terminal sometimes I wish I could open that folder in Finder. Both of these are achievable, and here's how.
When you're in terminal in a certain folder, to open that folder in Finder, you simply issue the following command.
open .
Running this command opens the current folder in Finder. You can also replace the dot with any other folder you wish. With tab completion, this becomes very productive. The open command can be used for opening applications as well. For example, if I want to open Microsoft Teams, I simply issue a command, as shown below.
open -a 'Microsoft Teams'
I find this incredibly useful when paired with another command called “at”. Now, “at” lets me schedule a command to be run at a certain time. I don't know what your working style is, but my day is usually full of meetings. And unfortunately, that leaves me with 30-minute gaps that are very precious. The last thing I want in those gaps are interruptions via notifications. What I typically like to do is that for those 30 minutes, I quit Outlook, I quit Teams, I turn my phone off, and I focus. However, I don't want to be late for my next meeting. So I simply execute a command as below.
open -a 'Microsoft Teams' | at 1130pm
This launches Microsoft Teams at 11:30 p.m. sharp. This way, I'm not bothered by notifications, and I don't miss my meeting. Bliss. Now, I haven't yet been able to figure out how to not only open Teams, but also join a meeting for me, and speak intelligently on my behalf. If you do figure that out, I'd be very interested.
Note that for the “at” command to work on MacOS, you first need to enable the “atrun” daemon.
But let's get back to the reverse workflow, which is to be able to open a folder in terminal from Finder. Note that I have pinned Terminal and VSCode in my finder, as shown in Figure 3.
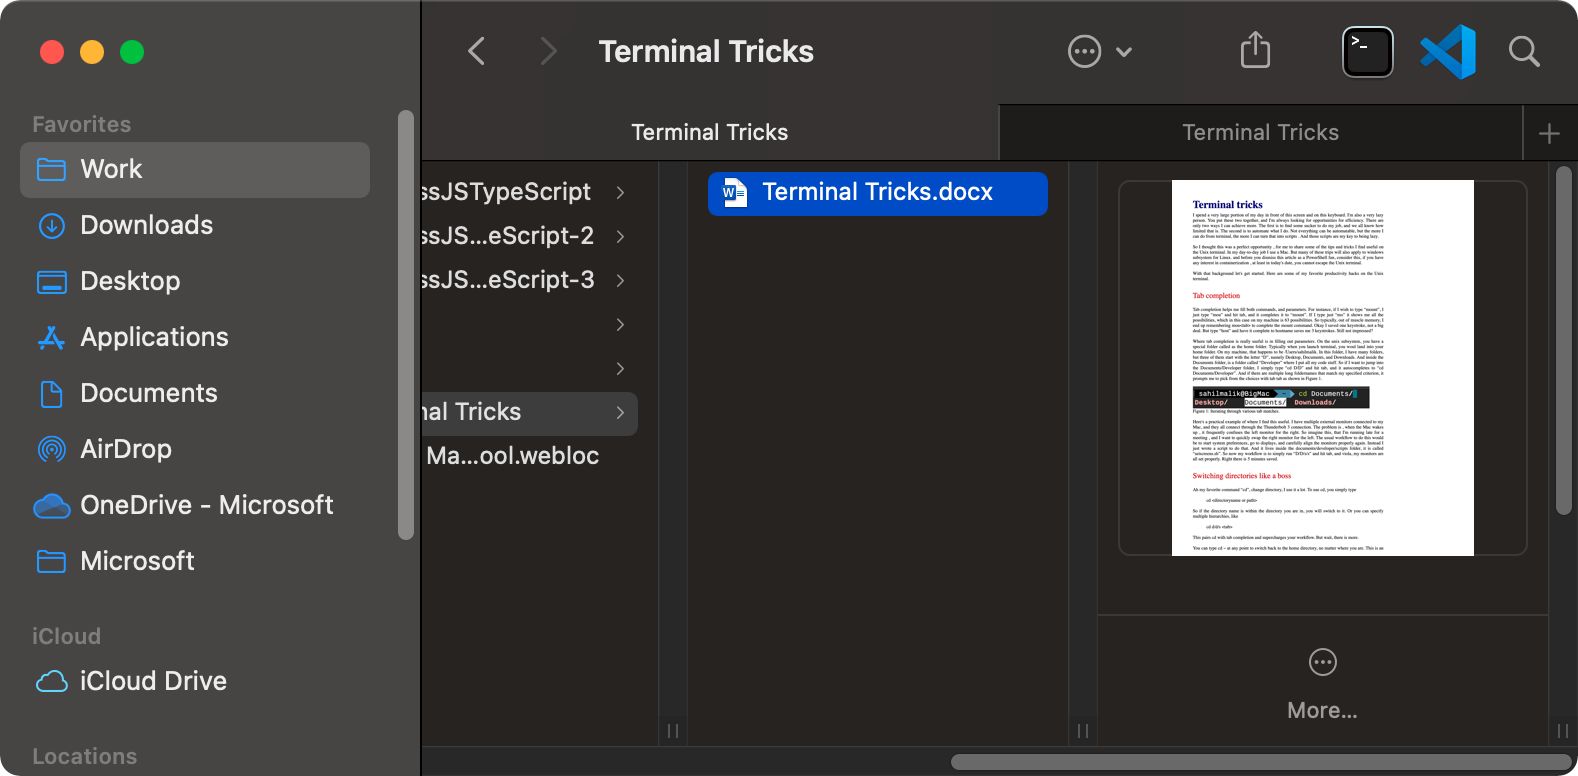
Pinning is easy. Just drag and drop the application to an open area in your Finder's toolbar. What this lets me do now, is I can drag and drop a folder onto the terminal icon, and the terminal simply opens up in that folder. I can also drag and drop a folder or file in VSCode to open it directly.
This trick lets me open terminal easily in any folder, but what if I already have a terminal window open? And I want it to switch to an open folder I have in Finder? That's easy! Type “cd” and simply drag and drop a folder from Finder into the terminal and boom - it fills the path out for you!
Numbering Output
Have you ever been screensharing with a friend and find it hard to communicate because you just couldn't point your finger on the screen? In this new remote work-from-home culture, this is a common problem. I'm running some complicated command, and I want to quickly communicate with my friend that, hey, look at line number 28. In terminal output, this can be a little difficult, so I have to take my hand off of the keyboard use the mouse cursor and maybe select a part of the screen. Sure, that works but is there a better way?
Here's a command that you must be very familiar with.
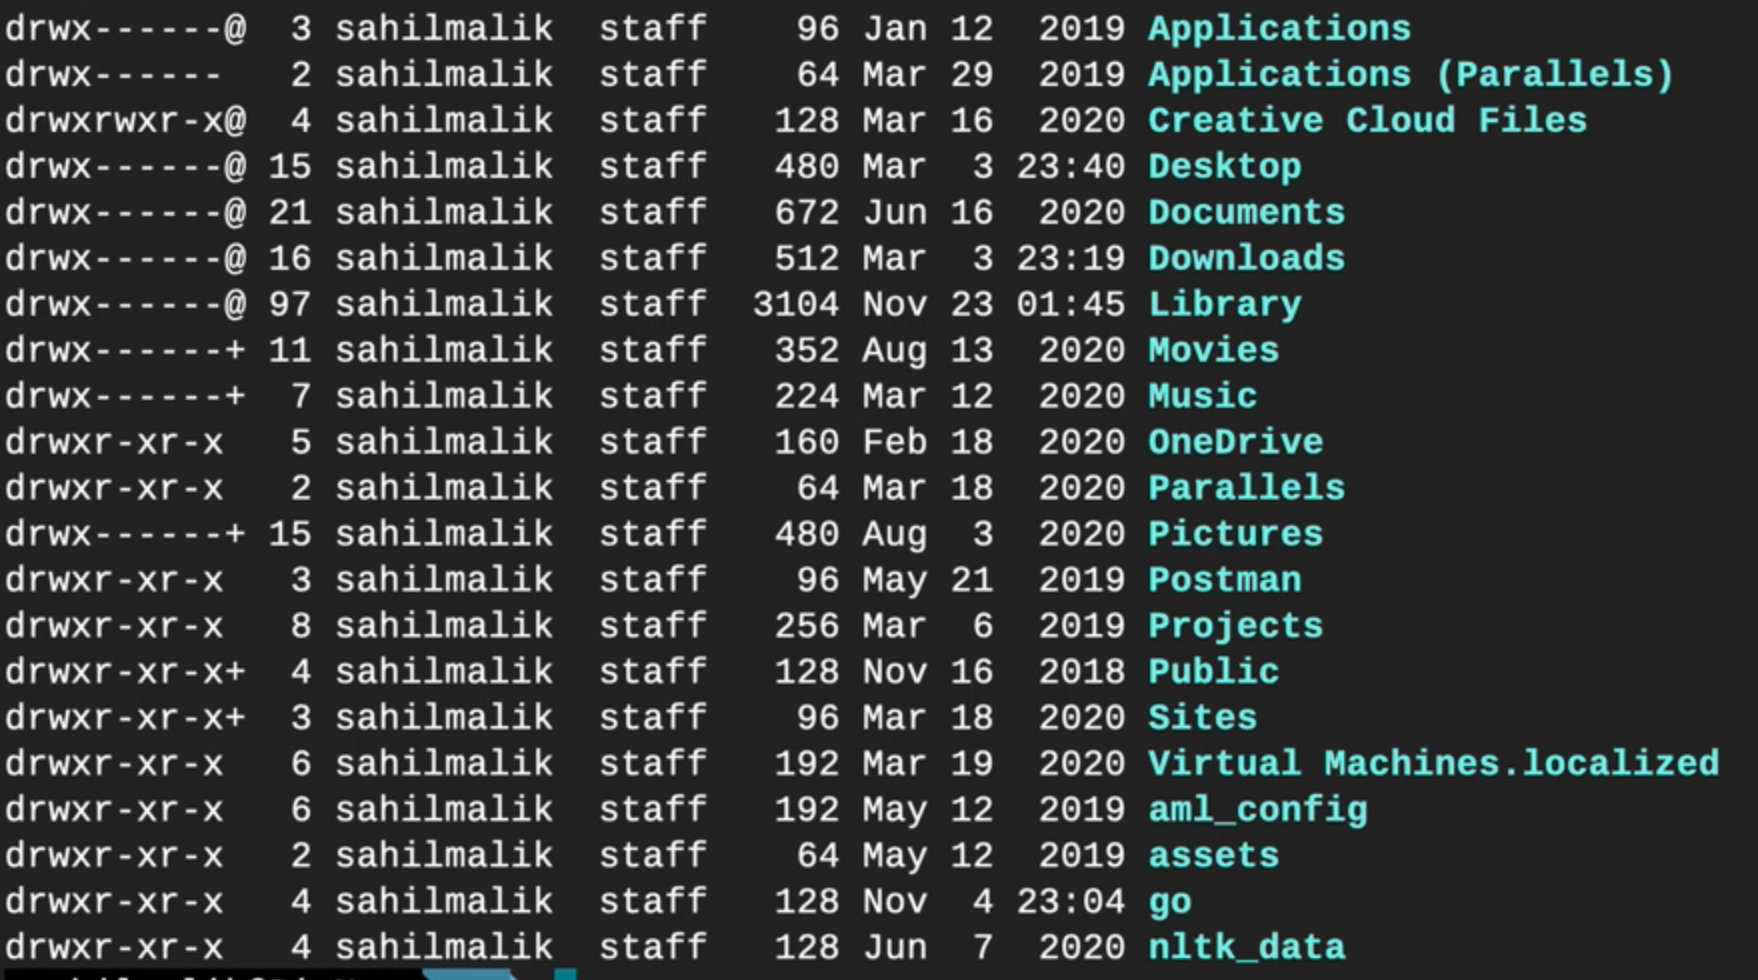
ls -l
This command lists all files in a directory in long form. That means that it produces output that includes things like who created the file, when the file was created, the permissions mass, the file size, etc. In fact, this command is executed so commonly that Unix has a shorthand for it:
ll
Executing this command should produce output as shown in Figure 4.
This output looks great, but I want to quickly add line numbers to this output. This is easy: Simply issue a command, as shown below.
ll | nl
This executes the first command, “ll”, pipes its output to the second command “nl”, and that produces line numbers, as shown in Figure 5. Of course, you can use this with any other command as well.
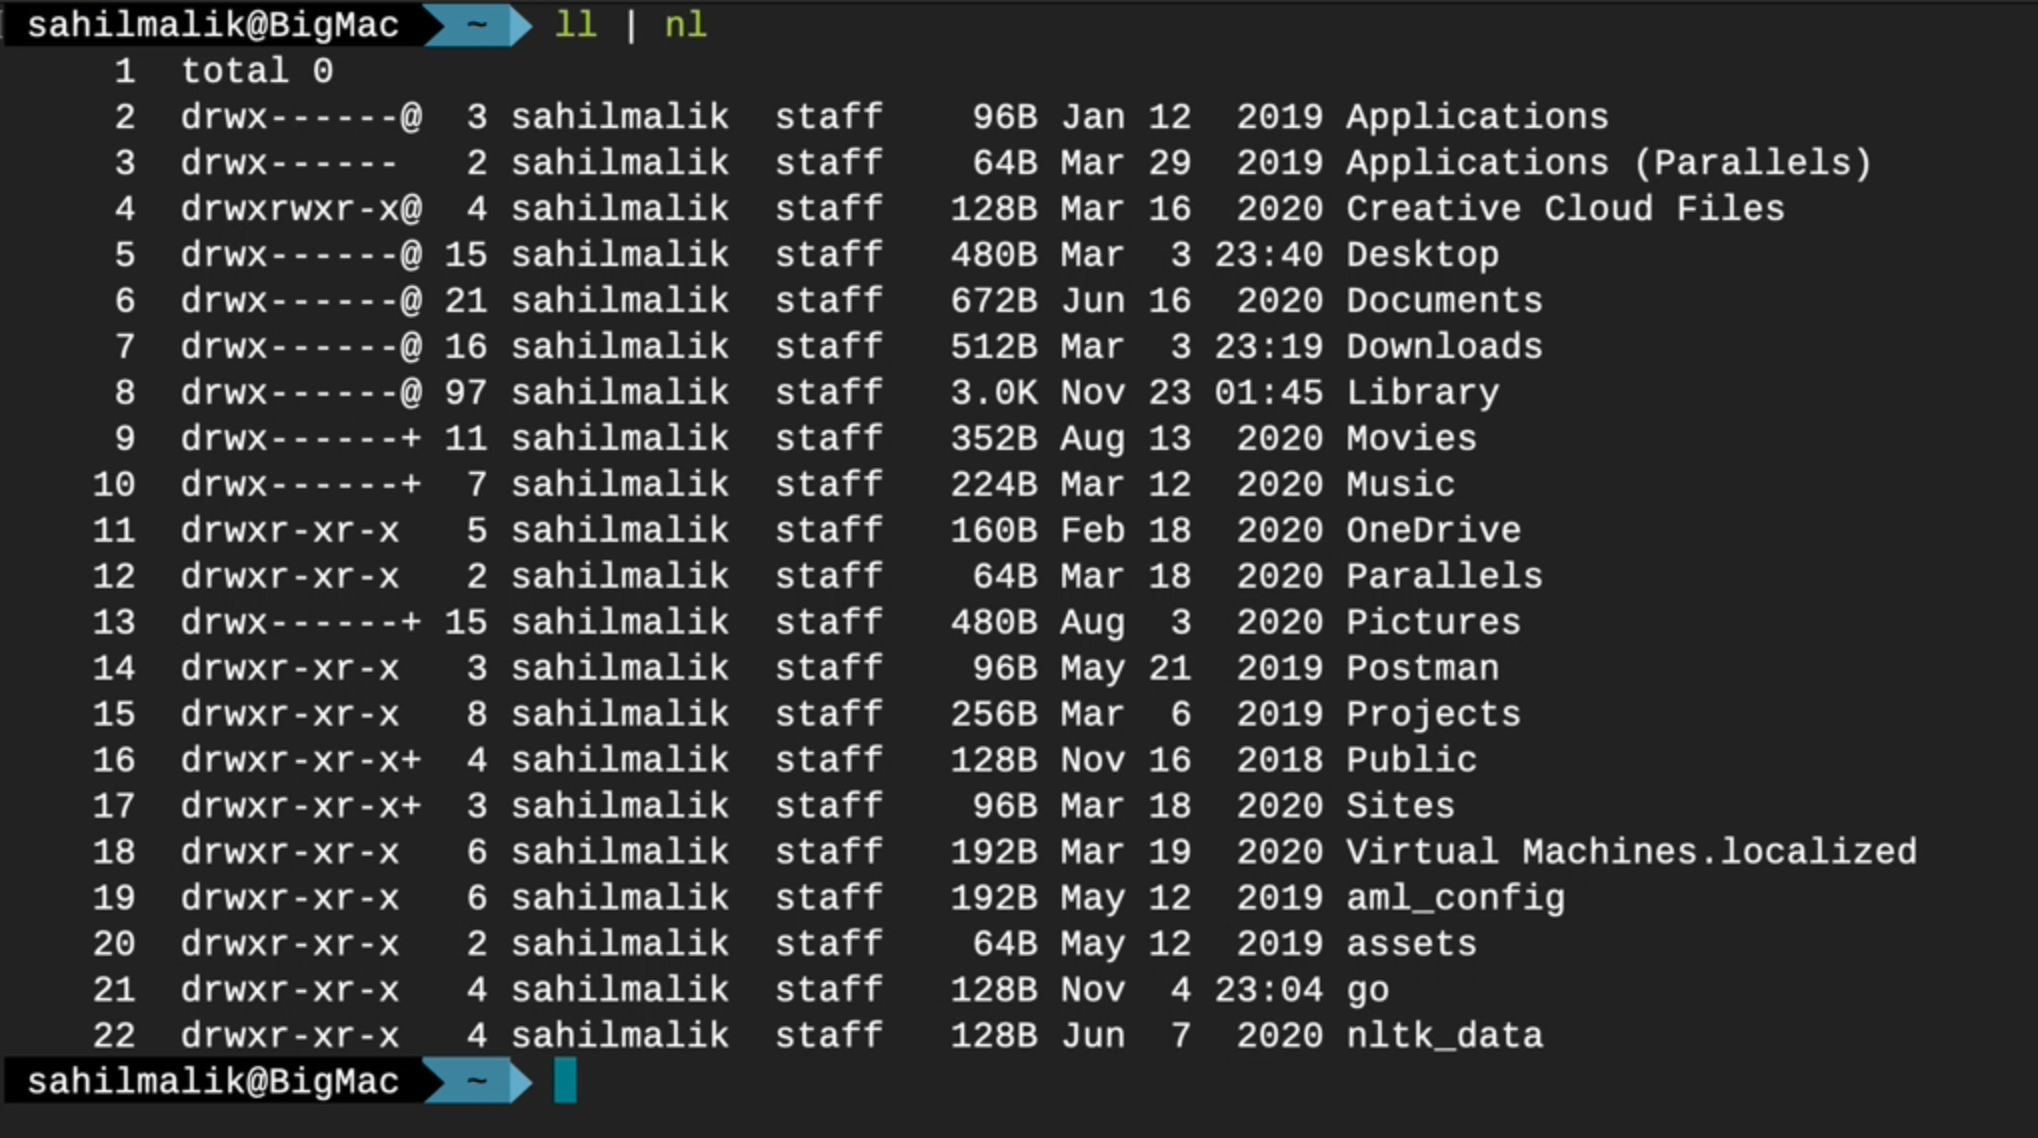
Where I find this useful is if there's a big file, for example a code file, and I want to quickly add line numbers before emailing a code snippet to somebody. I find it very useful to use this command in combination with another command, “cat”, to quickly produce an output that contains line numbers.
Running Multiple Commands
Modern development, no matter what platform you pick, has one common thing: you have to do a bunch of commands and watch a whole bunch of ASCII fly by before you can do anything useful. For instance, in a NodeJS-based project, before I can do anything useful with code, I have to run npm install. Then I have to run npm start. And then I can open things in VSCode and start looking at code. Now, the lazy person that I am, I like to automate all this. This way, I can run one single command, hit the bathroom, and by the time I'm back, things are ready to go.
Essentially, I like to run multiple commands and queue them up. Here's how you do that:
command 1 ; command 2 ; command 3;
You simply queue them up with semi-colons in the middle. For instance in a node JS space project, I find myself doing this quite often:
npm install ; code . ; npm start;
The above sequence of commands installs all node packages, opens the current folder in VSCode, and then runs npm start.
But what if I wish to stop this execution if one command errors out? Then I simply modify the sequence of commands as below:
command 1 && command 2 && command 3;
Now if command 2 fails, command 3 will never execute.
I find this technique extremely useful when I'm working with TypeScript. For example, let's say that I wish to run the TypeScript compiler, and I want to lint the code as well. If either of these steps fail, I wish to not start the project. In such a circumstance, I like to run these commands with the && characters between them. Effectively, this means that if compilation or linting fails, stop.
You can also run command b if command a fails, as below.
command a || command b
Unix also lets you background/foreground commands. If I wish to run npm install but I don't want to wait for it to finish before starting VSCode so I can start looking at the code, I can run a command like this:
npm install & ; code .
This command starts npm install. While it runs, it also starts VSCode, so you can start looking at the code while npm install does its thing in the background. You can imagine that this is my favorite way to open NodeJS-based projects. And if you're a Python programmer, the same applies when you run this:
pip install -r requirements.txt & ; code .
In either scenario, the “&” character is responsible for sending the process to background. And there are ways to foreground background tasks, etc.
Checking Your CPU Temperature
This is a Mac OS-specific trick, but I use it so often that it's worth mentioning. I should also mention that you can check any system metric using this technique with just a few tweaks.
I spend a lot of time in Microsoft Teams. And I have a love/hate relationship with it. As much as I hate the user interface, and the fact that it consumes more power than the average nuclear power plant can produce, it beats sitting in an airplane. I'm not kidding. As soon as I start up Microsoft Teams and start a full screen video conference call in 4K, my MacBook Pro turns into a MacBook hot air. This and for many other reasons sometimes force me to keep an eye on the temperature of my CPU. Jokes aside, a real serious usage of this is when I'm trying to train an AI model. It's quite easy to overheat your laptop to the point that it simply shuts down. Not only does that ding your productivity, but you're probably damaging your laptop by then too.
Here's how you can check your computer's CPU temperature.
powermetrics --samplers smc |
grep -i "CPU die temperature"
Unfortunately, when I run this command, I see the output shown in Figure 6.

That's no big deal; simply modify your command as below, and you should see the CPU temperature being written out as shown in Figure 7, after you provide your sudo password of course.
sudo powermetrics --samplers smc |
grep -i "CPU die temperature"

I find that powermetrics is an incredibly useful tool. Just type the code below to see what powermetrics lets you do.
powermetrics -h
It lets you track almost everything at the hardware level that you may care about. Network, CPU, GPU, battery, disk, and so much more. Now what could you do with such incredible amount of data? How about, if my CPU heats up, turn a fan on by invoking a wifi switch? I'm serious. The day I die, I'll continue to live on this planet with all the scripts I've written.
You Can Sudo Like a Boss
In the previous trick I showed, I had to type a fairly wordy command. And the OS simply told me, sorry, you must run it as a super user. How annoying. I have to type the whole thing again!
No, not really. You simply hit the up cursor key, CTRL_A to get to the start of the line, type sudo<space>, and hit enter.
Actually, there's an even easier way. Unix terminals include a shortcut called !! that repeats the previous command. So you simply run the code below, to re-execute the previous command as sudo.
sudo !!
There are days I wonder why computers don't come with a clutch pedal though. You know, depress clutch to sudo? But until that happens, this is quite useful.
Keyboard Shortcuts
I just mentioned a short cut in the previous tip, CTRL_A to go back to the start of the line. The reality is that here are many shortcuts. Too many to remember frankly. For instance, CTRL_T swaps the last two characters near your cursor. So “test” becomes “tets”. I'm sure that's useful on some planet where typos rule. But here are some shortcuts that flow through my fingers and that I find most useful.
CTRL_A takes you the start of the line and CTRL_E takes you to the end.
CTRL_L clears the screen so I don't have to type “clear scr”.
CTRL_U cuts everything backward from the cursor, and CTRL_K cuts everything after. I remember this by the country United Kingdom, and U is on the left of K on the keyboard.
And of course, there are the cursor keys. OPTION_RIGHTARROW moves word by word to the right side, and OPTION_LEFTARROW does the reverse.
And if you're writing a complex command and you mess up, instead of CTRL_Z to undo, you type CTRL_underscore (so CTRL_SHIFT_MINUS). This is effectively undo.
And of course, my favorite shortcut, tab.
There are many other shortcuts. But these are the ones that I've gotten most used to.
Command History and More
Sometimes we type long complex commands, or commands with parameters that are very specific and hard to remember. Don't you ever wish you could find that command you just typed two minutes ago? That is a job for command history.
To see what commands you typed recently, you simply issue the command below.
history -10
This shows the last 10 commands you typed. Of course, if you omit the number and type just “history”, it shows you all commands that you've typed in the current session.
Although that's great, it's still annoying to copy and paste the command and retype it. So there's an even better shortcut. You simply type CTRL_R. This prompts you to type in some characters of that long complex command you just figured out a moment ago. And it prompts you to find it, as shown in Figure 8. This makes it much easier to find older commands.

Here's a practical usage for this. The command you see in Figure 9 downloads historical stock price data for Microsoft.

Although this works, the output is CSV, which can be hard to align with all the columns. Now I know that there's another command I can use called “columns” to format this output by turning the output into columns and replacing commas with tabs. This makes it a lot more readable, except I don't want to write, or remember that huge curl command.
The solution is simple. First CTRL_R, and restore the curl command, and then simply add “| column -t -s ,” as shown in Figure 10. This should produce a clean output, with not too many keystrokes.

An In-Flight Recorder
Let's face it, we've all been there. When your eyes are red, you haven't had much sleep, your brain is full of goat cheese, and you have a deadline. Half brain dead, you ssh into a production server, run something, and BOOM. Now you wish you knew exactly what happened.
Now, I've never done this because I'm responsible. Seriously, whenever anything messed up in my previous job, I was responsible. But evidence is good nonetheless. So here is a command that you'll find immensely useful:
script
When you start your terminal session, run this command. Now everything you do is recorded, both inputs and outputs. And when you're done, just type “exit” and it creates a file with the entire history.
Where I find this useful is enabling this to autorun on ssh. This way, if anyone connects and does something, I have a log of what happened. It's great for blaming the interns.
And So Many More…
This article could be endless, so let me end with a mixed bag of a few other terminal commands and tricks I find very useful.
To back up a folder, I use a command called “ditto”.
To work with the clipboard, I use pbcopy and pbpaste. For instance, the below command copies the contents of a file.
pbcopy < somefile.txt
You can also use pbcopy and pbpaste as piped commands, which lets you easily export the output of a command and, let's say, paste it into a document or email.
Finding files is always something we end up doing. You can find a file by a pattern, as below.
find . -name "filanem.txt"
Alternatively, you can search for text within files as below.
grep -r "sometext" .
On MacOS, you can tap into the power of spotlight, right on terminal, as below.
mdfind -onlyin . "sometext"
You'll find that mdfind is super fast and usually my go-to in many instances.
Another command I find quite useful is “du” or disk usage. For instance, the below command lets me find the largest files on my disk:
sudo du -k ./* | awk '$1 > 500000' | sort -nr
What this command does is run du to find files, piping that output to awk, which looks at the second column and filters stuff for > 50megabytes, which then sorts in reverse order.
This article will never end if I don't stop now.
Summary
Being productive cannot be underestimated. We all have a lot to do, and we all have finite time and finite keystrokes in our fingers. How do we do more with less? No matter what platform you're on, if you must deal with the Unix terminal in any way shape or form, I hope some of these tips and tricks were pertinent to you.
This article was slightly different than my usual articles. Did you learn anything new here? What's your favorite terminal trick? Do you have any new ones to share that I don't know about? If you do, please tweet them to me. I look forward to hearing from you.
Until then, CTRL_D.
That exits the current shell, or sends an EOF to the current running process, if you were wondering.
