


ASP.NET Core 2.1 is the latest update to Microsoft's open source and cross-platform Web framework for .NET and is now available for production use. As you can see in Anthony Chu's article (Build Real-time Applications with ASP.NET Core SignalR) ASP.NET Core 2.1 now includes support for real-time Web applications with SignalR. In additional to SignalR, ASP.NET Core 2.1 includes a variety of new features and improvements that help make Web development with .NET fast, reliable, and secure. Let's take a look at getting started with ASP.NET Core 2.1 and what features are new in this release.
Get ASP.NET Core 2.1 with .NET Core 2.1
ASP.NET Core 2.1 is available with .NET Core 2.1. To set up your development computer to use ASP.NET Core 2.1, you'll need to install the .NET Core 2.1 SDK from https://dot.net/core. The .NET Core 2.1 SDK includes the .NET Core 2.1 runtime and the .NET Core command-line interface (CLI) for creating and working with .NET projects and solutions. In addition to carrying ASP.NET Core 2.1, .NET Core 2.1 includes loads of new functionality that's also worth checking out:
- Improved build performance
- A turbo-charged HttpClient
- Creation and sharing of .NET Core global tools
- New runtime types for efficient memory usage (
Span<T>,Memory<T>, and friends) - Alpine Linux support
- ARM32 support
- Brotli compression support
- New cryptography APIs and improvements
- SourceLink compatible package building capabilities
- Tiered JIT compilation
To use ASP.NET Core 2.1 (or any .NET Core 2.1 project) with Visual Studio on Windows, you'll need to install Visual Studio 2017 Update 7 or later. On a Mac, you'll need Visual Studio for Mac 7.5 or later. Note that .NET Core 2.1 is not yet included with Visual Studio, so you still need to separately install the .NET Core 2.1 SDK.
After you've installed the .NET Core 2.1 SDK, you can check that you now have the correct version by running dotnet –version from the command-line. The displayed version should be 2.1.300.
Create Your First ASP.NET Core 2.1 App
Once you've installed the .NET Core 2.1 SDK, you can create your first ASP.NET Core 2.1 by running dotnet new web -o WebApp1. You can then run the app by changing to the directory of the new app and running dotnet run. Once the app is built and running, browse to http://localhost:5000 to see “Hello world!” rendered in the browser.
If you look at the generated project file (WebApp1/WebApp1.csproj) it should look like this:
<Project Sdk="Microsoft.NET.Sdk.Web">

    <PropertyGroup>
  <TargetFramework>netcoreapp2.1</TargetFramework>
    </PropertyGroup>

    <ItemGroup>
  <Folder Include="wwwroot\" />
    </ItemGroup>

    <ItemGroup>
  <PackageReference Include="Microsoft.AspNetCore.App" />
    </ItemGroup>
</Project>
The generated project is set up to use the Web SDK (Microsoft.NET.Sdk.Web), which contains convenient tasks and targets for things like Web publishing and Razor (.cshtml) compilation. The project is also set up to target .NET Core 2.1 (netcoreapp2.1). There's a single package reference that brings in ASP.NET Core, called Microsoft.AspNetCore.App, which enables roll-forward semantics for servicing updates. The version of the Microsoft.AspNetCore.App package doesn't need to be specified because it's inferred by the Web SDK to match the version of ASP.NET Core bundled with the .NET Core SDK.
HTTPS by Default
You may have noticed from the console output that in addition to listening on http://localhost:5000, the running app is also listening on https://localhost:5001. This is because ASP.NET Core 2.1 now enables HTTPS by default in development and has features that simplify setting up HTTPS in production.
Securing Web apps with HTTPS is more important than ever before. Browser enforcement of HTTPS is becoming increasingly strict. Sites that don't use HTTPS can be labeled as insecure. Browsers are also starting to enforce that new and existing Web features must only be used from a secure context. New privacy requirements, like the Global Data Protection Regulation (GDPR), require the use of HTTPS to protect user data. By using HTTPS during development, you're better prepared to run your app under HTTPS in production.
When you first ran any command from the .NET Core 2.1 SDK, it set up a development certificate for you. ASP.NET Core uses this development certificate to listen on HTTPS to see if the certificate is present. Initially, the development certificate is untrusted, so if you try to browse to https://localhost:5001, your browser will likely complain about the certificate.
To set up trust for the certificate on Windows or Mac OS, run dotnet dev-certs https -trust. On Windows, a dialog pops up to confirm that you want to trust the certificate. On Mac OS, the certificate gets added to your keychain as a trusted certificate. On Linux, there isn't a standard way across distros to trust the certificate, so you'll need to perform the distro-specific guidance for trusting the development certificate.
HTTPS Enforcement
ASP.NET Core 2.1 also includes features for enforcing HTTPS at runtime. You can redirect all HTTP traffic to HTTPS and direct browsers to enforce access to your site over HTTPS using the HTTP Strict Transport Security (HSTS) protocol. The ASP.NET Core project templates enable these HTTPS enforcement features for you.
To create a new ASP.NET Core Web app that has HTTPS enforcement enabled, run dotnet new razor -o WebApp2 from the command-line, which generates a new ASP.NET Core project using ASP.NET Core Razor Pages. If you run the app and browse to the site, you should see that all HTTP requests are redirected to HTTPS. This redirection is handled using the new HTTPS redirection middleware, which is configured in the app's Startup.Configure method.
The call to app.UseHttpsRedirection() handles redirection of all HTTP request to HTTPS if the current app is listening on HTTPS. If HTTPS is being handled externally from the app, you can manually specify the HTTPS port using the ASPNETCORE_HTTPS environment variable or in code via the options pattern.
The HSTS middleware is also added via the app.UseHsts() call, but only when running in non-development environments. This is because HSTS enforcement is set up in the browser per host, and you probably don't want HSTS enforcement for all localhost requests.
Razor Class Libraries
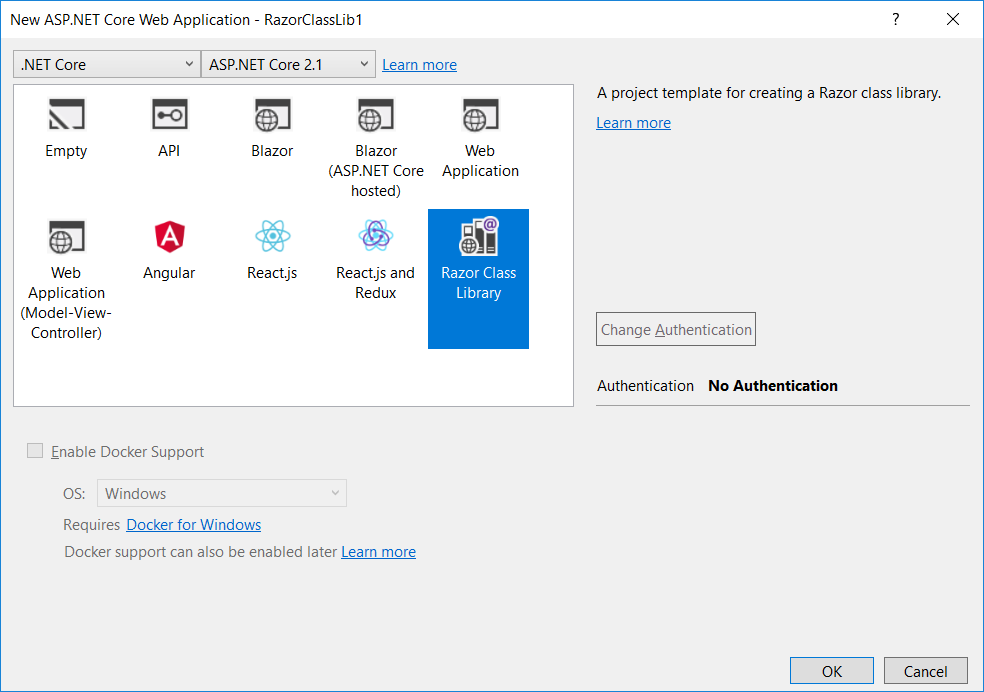
ASP.NET Core helps you write dynamic UI-rendering logic using a mixture of HTML and C# called Razor (cshtml). Razor class libraries are a new feature in ASP.NET Core that let you compile Razor views and pages into reusable class libraries that can be packaged and shared. You can create a new Razor class library by running dotnet new razorclasslib from the command-line or using the new project template in Visual Studio, as shown in Figure 1.
Once the Razor class library is referenced by the app, any views or pages it contains will then become part of the app. The app can tweak and customize the prebuilt UI by overriding specific views, pages, or partials in the application. For example, you can add a Razor class library to your app with the following page (Areas/MyFeature/Pages/Page1.cshtml):
@page
@model RazorClassLib1.MyFeature.Pages.Page1Model

<h1>Page1 from Razor class library</h1>

<partial name="_OverrideMe" />
This code uses the following partial view (Areas/MyFeature/Pages/Shared/_OverrideMe.cshtml):
<h2>Override me</h2>
After you reference this Razor class library from the app, you can browse to /MyFeature/Page1 and see the page, as shown in Figure 2.
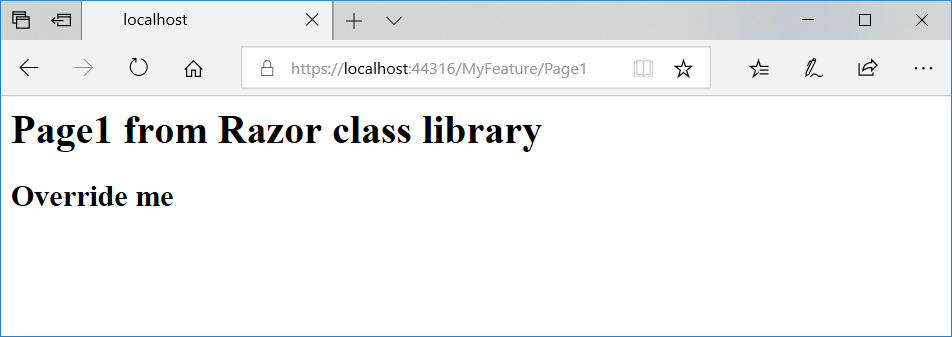
The page doesn't have any layout specified, so it doesn't look like the rest of the app. To specify that the content of the Razor class library should use the app's layout, you can add a _ViewStart.cshtml to the app using the same folder hierarchy as the library (Areas/MyFeature/Pages/_ViewStart.cshtml):
@{
    Layout = "/Pages/Shared/_Layout.cshtml";
}
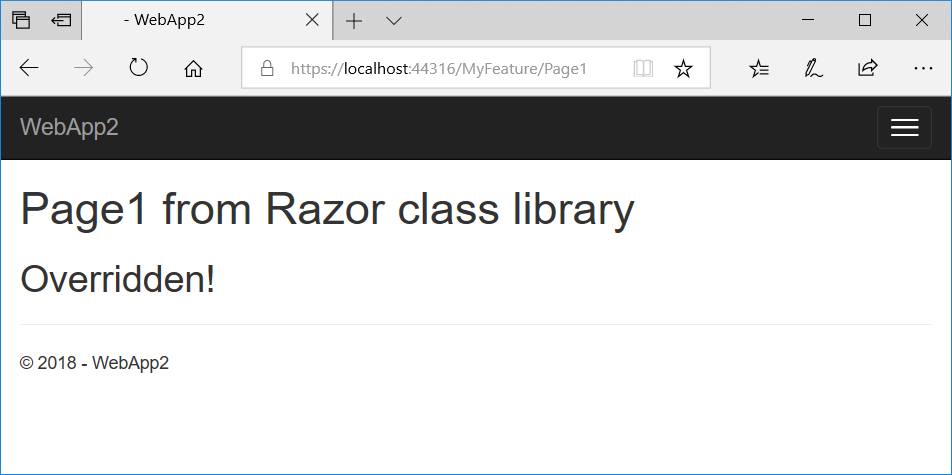
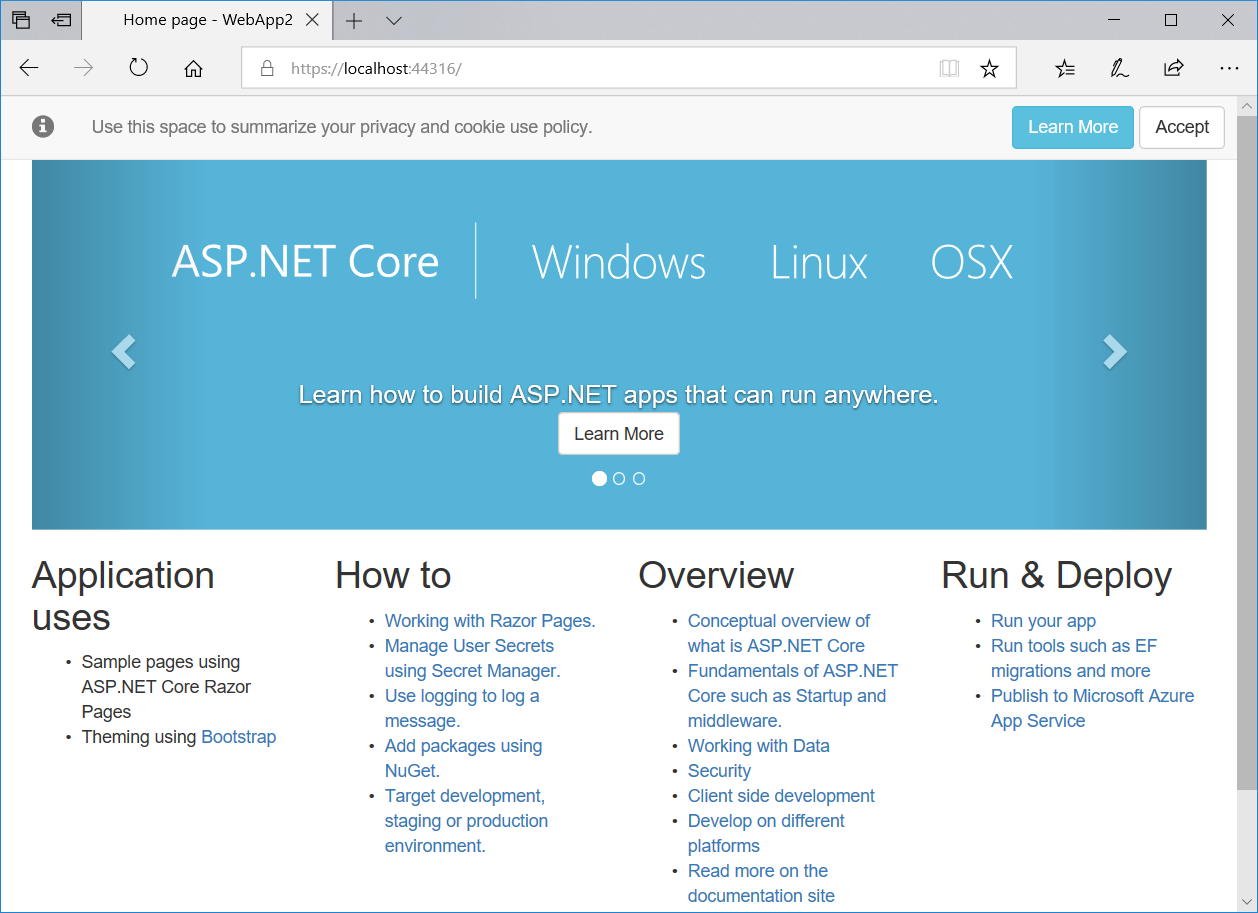
If you rerun the app, the page from the Razor class library now picks up the app's layout, as shown in Figure 3.

You can also override specific pages, views, and partials in the Razor class library. To override the partial view used by the page, add the following partial view to the app (Areas/MyFeature/Pages/Shared/_OverrideMe.cshtml):
<h2>Overridden!</h2>
Refresh the page and you should see the change shown in Figure 4.
To share a Razor class library, run dotnet pack on the library project and then publish the produced NuGet package to your favorite feed.
Identity UI Library
In previous releases of ASP.NET Core, the ASP.NET Core Identity UI logic for registering new users, handling logins, and managing user accounts could only be added to a new project on project creation, resulting in dozens of files and hundreds of lines of code being added to the new project. If you started a new project without identity and then decided it was needed, there was no way to add it other than to create a new project with identity and copy the code over. Because the code was part of the application, maintaining the identity UI code was the responsibility of the app owner, as Microsoft has no way to patch it other than to advise users to update their code.
Adding identity support to an existing application is now as easy as adding the identity UI package and configuring the required services.
ASP.NET Core 2.1 includes a Razor class library implementation of the ASP.NET Core Identity UI. Adding identity support to an existing application is now as easy as adding the identity UI package (Microsoft.AspNetCore.Identity.UI) and configuring the required services. Any patches or updates to the identity UI can be handled using the normal servicing mechanisms. To help with customizing the many pages that make up the identity UI, ASP.NET Core 2.1 also includes an identity scaffolder that can be used to add identity to an existing project and to override specific pages.
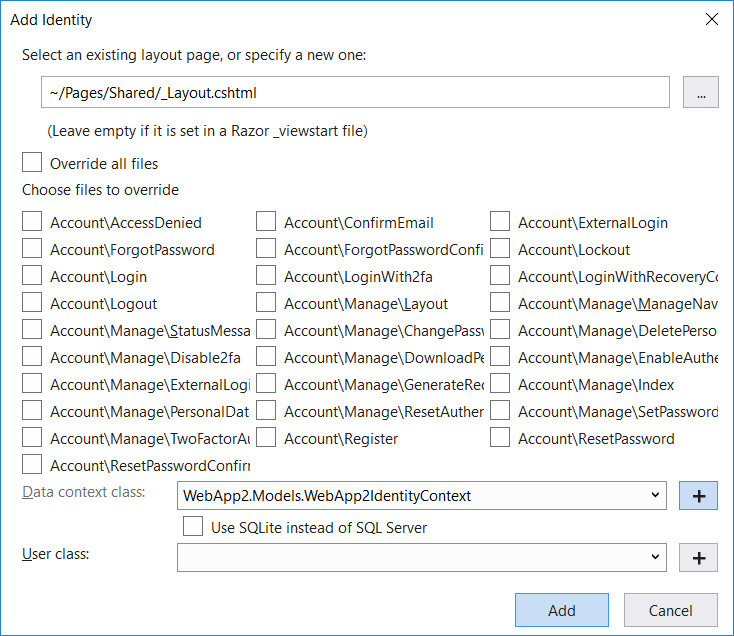
To add identity support to an existing ASP.NET Core project, right-click on the project and select Add > New Scaffolded Item. In the Add Scaffold dialog, choose the Identity scaffolder and select OK. The Add Identity dialog appears, as shown in Figure 5, and gives you lots of options for customizing the scaffolded identity code. You can select an existing layout, choose which pages you want to override, and create a data context class for storing the identity data with an optional custom user class.
After the identity scaffolder has finished running, a new Identity area has been added to your application with an IdentityHostingStartup class that adds the required identity-related services to the application. The ScaffoldingReadme.txt file contains instructions to set up the database and any additional required middleware. Once you've added the generated login partial to your layout, the app is ready to start registering and logging in new users.
Privacy and GDPR Compliance
Protecting the privacy of users is important for any website that handles user data. ASP.NET Core 2.1 makes it easier to comply with the latest privacy requirements, including the EU General Data Protection Regulation (GDPR). In addition to enabling HTTPS by default, ASP.NET Core apps are equipped with infrastructure for managing cookie consent and deleting and exporting user data.
When you browse to your app for the first time, the cookie consent UI appears, providing a link to the app's privacy policy page and an option to consent to the use of cookies on the site, as shown in Figure 6. You can configure which cookies are considered essential to the app's functionality and which cookies should only be used once the user has given their consent.
Logged-in users also have the option to delete their data or export it through the user profile page in the identity UI, as shown in Figure 7.

[ApiController] and ActionResult<T>
ASP.NET Core 2.1 introduces new Web API controller-specific conventions that make it easier to build clean and descriptive Web APIs. The following Web API-specific conventions can be applied to a controller using the new [ApiController] attribute:
- Automatically respond with a 400 when validation errors occur; there's no need to check the model state in your action method.
- Infer smarter defaults for action parameters:
[FromBody]for complex types,[FromRoute]when possible, and otherwise[FromQuery]. - Require attribute routing; actions aren't accessible by convention-based routes.
You can also now return ActionResult<T> from your Web API actions, which enables returning arbitrary action results or a specific return type (thanks to some clever use of implicit cast operators).
You can check out a Web API controller that uses these new conventions in Listing 1.
Listing 1: A controller using the new Web API controller conventions and ActionResult<T>
[Route("api/[controller]")]
public class ProductsController : Controller
{
    private readonly ProductsRepository _repository;

    public ProductsController(ProductsRepository repository)
    {_repository = repository;}

    [HttpGet]
    public IEnumerable<Product> Get()
    {return _repository.GetProducts();}

    [HttpGet("{id}")]
    public ActionResult<Product> Get(int id)
    {
        if (!_repository.TryGetProduct(id, out var product))
        {
            return NotFound();
        }
        return product;
    }

    [HttpPost]
    public ActionResult<Product> Post(Product product)
    {
        _repository.AddProduct(product);
        return CreatedAtAction(nameof(Get),
        new { id = product.Id }, product);
    }
}
IHttpClientFactory
ASP.NET Core applications also need to be able to make requests to HTTP endpoints. The HttpClient API is the preferred way to send HTTP requests in .NET, but its usage suffers from a few pitfalls. First, to make efficient use of network connections on the server, HttpClient instances typically need to be re-used instead of creating new instances and then throwing them away. Also, creating new HttpClient instances throughout your code makes it difficult to configure them in any sort of reasonable and cross-cutting way.
ASP.NET Core 2.1 provides HttpClient instances as a service through the new IHttpClientFactory interface. You can centrally configure multiple named or typed HttpClients in your Startup.ConfigureServices method, including specifying base addresses and default headers. You can also configure an outgoing request-handling pipeline using a message handler that can deal with concerns like retry logic and circuit breakers.
Configuring a named HttpClient for a specific Web API looks like this:
services.AddHttpClient("Example", client =>
{
    client.BaseAddress = new Uri("https://api.example.com/");
});
You can then request this specific HttpClient in your code using the IHttpClientFactory service.
public ExampleModel(IHttpClientFactory factory)
{
    Client = factory.CreateClient("Example");
}
You can also define typed clients that get injected with specifically configured HttpClient instances. For example, here's how you might set up a typed client for calling the GitHub API:
services.AddHttpClient<GitHubClient>(client =>
{
    client.BaseAddress = new Uri("https://api.github.com");
    client.DefaultRequestHeaders.Add("Accept", "application/vnd.github.v3+json");
    client.DefaultRequestHeaders.Add("User-Agent", "James Bond");
})
.AddTransientHttpErrorPolicy(policy =>
    policy.WaitAndRetryAsync(3, count =>
    TimeSpan.FromSeconds(Math.Pow(2, count))));
The typed GitHubClient then gets the configured HttpClient injected in its constructor. Like this:
public class GitHubClient
{
    public GitHubClient(HttpClient client)
    {
        Client = client;
    }

    public HttpClient Client { get; }

    public async Task<GitHubUser> GetUser(string username)
    {
        var result = await Client.GetAsync($"/users/{username}");
        result.EnsureSuccessStatusCode();
        return await result.Content.ReadAsAsync<GitHubUser>();
    }
}
You can then inject the typed client into your controllers or pages:
public class ContactModel : PageModel
{
    public ContactModel(GitHubClient ghClient)
    {
        GhClient = ghClient;
    }

    public GitHubClient GhClient { get; }
    public string Message { get; set; }
    public async Task OnGet()
    {
        var user = await GhClient.GetUser("danroth27");
        Message = $"Name: {user.name}," + "Company: {user.company}";
    }
}
To set up output messaging handling, you can add message handlers to your HttpClient instances generated by the factory. For example, you could add retry logic using the messaging handler you implemented yourself.
services.AddHttpClient("Example", client =>
{
    client.BaseAddress = new Uri("https://api.example.com/");
})
.AddHttpMessageHandler(() => new MyRetryHandler());
ASP.NET Core 2.1 provides integration with Polly, a .NET resilience and transient-fault-handling library that allows you to express policies such as Retry, Circuit Breaker, Timeout, Bulkhead Isolation, and Fallback in a thread-safe manner. This integration is provided through the Microsoft.Extensions.Http.Polly package. For example, using Polly to add retry logic with an exponential back-off looks like this:
services.AddHttpClient<GitHubClient>(client =>
{
    client.BaseAddress = new Uri("https://api.github.com");
    client.DefaultRequestHeaders.Add("Accept", "application/vnd.github.v3+json");
    client.DefaultRequestHeaders.Add("User-Agent", "James Bond");
})
.AddTransientHttpErrorPolicy(policy =>
    policy.WaitAndRetryAsync(3, count =>
    TimeSpan.FromSeconds(Math.Pow(2, count))));
Performance
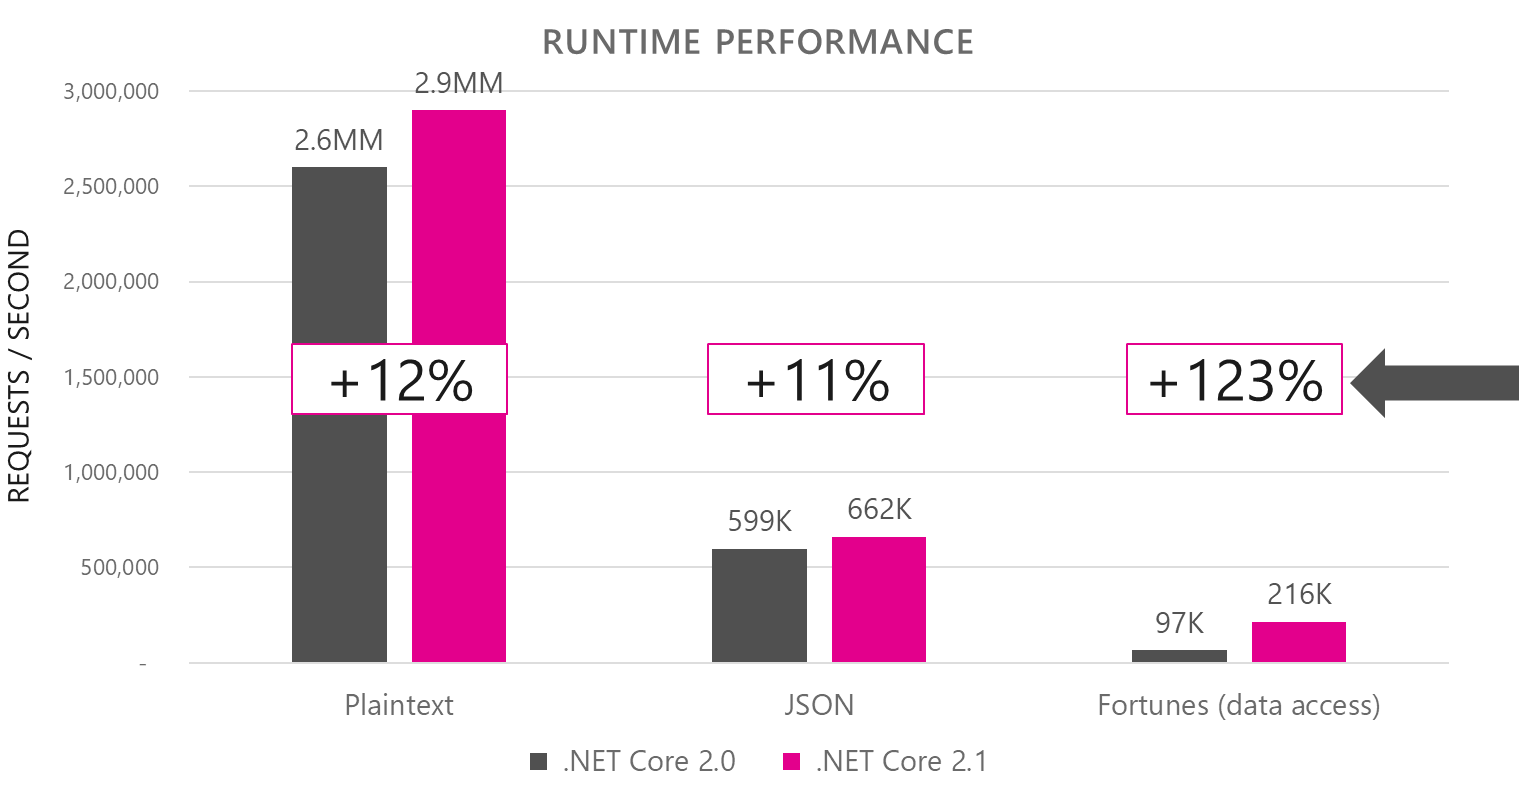
ASP.NET Core benefits from runtime performance improvements in .NET Core 2.1, including some dramatic improvements in data access performance. One of the ways that .NET Core performance is measured and compared to other frameworks is using the public TechEmpower benchmarks. In internal lab runs at Microsoft, .NET Core 2.1 throughput performance is 10% greater than .NET Core 2.0 for the plain text and JSON scenarios, and a whopping 123% greater for the more realistic data access scenario, solidifying .NET Core's position as one of the fastest frameworks available (see Figure 8).
Summary
ASP.NET Core and .NET Core have come a long way since they first shipped two years ago. ASP.NET Core 2.1 is now a very complete and feature-rich offering for building cross-platform Web and server applications. In addition to the features discussed in this article, ASP.NET Core 2.1 includes lots of other improvements, including improved testability of MVC applications and better integration with single-page application frameworks like Angular and React. Whether you are already on the .NET Core train or thinking about jumping on board for the first time, ASP.NET Core 2.1 is worth a look.
