


HTTP content retrieval is an important component for applications these days.
Although .NET reduces the need to explicitly retrieve content from the Web through built-in mechanisms in the Web Services framework, ADO.NET and the XML classes, there are still many needs to retrieve Web content directly and manipulate it as text or data downloaded into files. In this article, I will describe the functionality of the HttpWebRequest and HttpWebResponse classes and provide an easy to use wrapper class. The class simplifies the HTTP access and provides most of the common features in a single interface while still providing full access to the base functionality of the HttpWebRequest class. In the process, I will describe some sticky issues like string encoding and Cookie handling and some related topics like implementing events and running multiple threads to service Web requests.
The
HttpWebRequestand HttpWebResponse are powerful classes, providing easy access to most HTTP functionality with relatively little code.
Last week I decided I needed a good, useful project to throw at .NET to continue my learning curve while actually building something I can use. A few years back I wrote a Web Monitoring package that monitors a set of Web sites and sends out alerts when the sites are down and not responding. The application has been showing its age and, since it was developed using C++, it has a clunky user interface that's not very maintainable. I thought this would be a good ‘training’ application to re-build for .NET. This application exercises HTTP functionality built into the .NET Framework, requires setting up and running multiple threads, hooking up events, managing a small set of data without a database backend, and finally provides a Windows Form user interface (UI). In the future, converting this application to work as a Windows service would also be a nice feature. This application lets explores a wide variety of features of a programming environment. In this month's article, I'll describe a few of the features I needed to build, specifically focusing on the HTTP retrieval mechanism.
New HTTP tools in .NET
The .NET Framework provides new tools for retrieving HTTP content that are both powerful and scalable in a single package. If you've ever worked in pre-.NET applications and tried to retrieve HTTP content, you probably know that there are a number of different tools available: WinInet (Win32 API), XMLHTTP (part of MSXML) and the WinHTTP COM library. These tools invariably all worked in some situations, but none of them really fit the bill for all instances. For example, WinInet can't scale on the server with no multi-threading support. XMLHTTP was too simple and didn't support all aspects of the HTTP model. WinHTTP, which is the latest Microsoft tool for COM, solves many of these problems, but doesn't work at all on Win9x, making it a bad choice for a client tool integrated into broadly distributed applications.
The.NET Framework simplifies HTTP access with a pair of classes: *HttpWebRequest* and HttpWebResponse. These classes handle most of the functionality provided through the HTTP protocol in a straightforward manner. The task of returning content from the Web requires very little code (see Listing 1).
Listing 1: Simple retrieval of Web data over HTTP.
string lcUrl = "http://www.west-wind.com/TestPage.wwd";

// *** Establish the request
HttpWebRequest loHttp = (HttpWebRequest) WebRequest.Create(lcUrl);

// *** Set properties
loHttp.Timeout = 10000;  	// 10 secs
loHttp.UserAgent = "Code Sample Web Client";

// *** Retrieve request info headers
HttpWebResponse loWebResponse = (HttpWebResponse) loHttp.GetResponse();

Encoding enc = Encoding.GetEncoding(1252);  // Windows default Code Page

StreamReader loResponseStream = new StreamReader(loWebResponse.GetResponseStream(),enc);

string lcHtml = loResponseStream.ReadToEnd();

loWebResponse.Close();
loResponseStream.Close();
Pretty simple, right? But beneath this simplicity lies a lot of power, too. Let's start by looking at how this works.
Start by creating the HttpWebRequest object, which is the base object used to initiate a Web request. A call to the static *WebRequest.Create()* method is used to parse the URL and pass the resolved URL into the request object. This call throws an exception if the URL passed has invalid URL syntax.
The request portion controls how the outbound HTTP request is structured. As such it handles configuration of the HTTP headers, the most common of which are expressed as properties of the HttpWebRequest object. A few examples are UserAgent, ContentType, Expires and even a Cookies collection that map directly to header values that are set when the response is sent. Headers can also be set explicitly using the Headers string collection, to which you can add either a whole header string or a key value pair. Generally, the properties address all common headers, so you'll rarely need to resort to setting headers explicitly, most likely only to support special protocols (for example, SoapAction for SOAP requests).
The code Listing 1, does nothing much with the request other than set a couple of the optional properties?the UserAgent (the client ‘browser,’ which is blank otherwise) and the Timeout for the request. If you need to POST data to the server, you'll need to do a little more work?I'll talk about this later.
Streaming good deals
Once the HTTP Request is configured for sending the data, a call to GetResponse() sends the HTTP request to the Web Server. At this point, the request sends the headers and retrieves the first HTTP result buffer from the Web Server.
When the code performs the *GetResponse()* call, only a small chunk of data is returned from the Web server. The first chunk contains the HTTP header and the very first part of the data, which is simply buffered internally until read from the stream itself. The data from this initial request is used to set the properties of the HttpWebResponse object, so you can look at things like ContentType, ContentLength, StatusCode, Cookies and much more.
Next, a stream is returned using the *GetResponseStream()* method. The stream points at the actual binary HTTP response from the Web server. Streams provide you with a lot of flexibility in handling how data is retrieved from the Web server. As mentioned, the call to GetResponse() returned only an initial internal buffer. To retrieve the actual data and read the rest of the result document from the Web server, you have to read the stream.
The code in Listing 1 uses a *StreamReader* object to return a string from the data in a single operation. Since a stream is returned, I could access the stream directly and read smaller chunks to provide other information, such as the progress status of the HTTP download.
Also notice that when the StreamReader is created, I explicitly provide an encoding type?in this case, CodePage 1252, which is the Windows default codepage. This is important because if the data is transferred as a byte stream and without the encoding, it will result in invalid character translations for any extended characters. CodePage 1252 works fairly well for English or European language content, as well as binary content. Ideally, you will need to decide at runtime which encoding to use. For example, a binary file probably should write a stream out to a file or other location rather than converting to a string, while a page from Japan should use the appropriate Unicode encoding for that language.
The following code is useful for testing the CodePage and setting a default. For more information about encosing refer to the Encoding sidebar.
Encoding enc;
try
{
    enc = Encoding.GetEncoding(Response.ContentEncoding);
}
catch
{
    enc = Encoding.GetEncoding(1252);
}
This example uses the StreamReader object, which provides an easy mechanism to retrieve the contents of a stream into strings or arrays of characters. It also provides the handy ReadToEnd() method, which retrieves the entire stream in a single batch. The operation of reading the stream is what actually retrieves the data from the Web server (except for the initial block that was read to retrieve the headers). In this case, a single read operation is called and retrieves all of the requested data. If you wanted to provide feedback, you can also read the data in chunks using the StreamReader's Read() method, which lets you specify the size of the data to read. You would run this in a loop and provide whatever status info you need on each read. With this mechanism, you can retrieve the data and provide progress information.
POSTing data
The example above only retrieves data, which is essentially an HTTP GET request. If you want to send data to the server, you can use an HTTP POST operation. POSTing data refers to the process of taking data and sending it to the Web server as part of the request payload. A POST operation both sends data to the server and retrieves a response from the server.
Posting uses a stream to send the data to the server, so the process of posting data is pretty much the reverse of retrieving data (see listing 2):
Make sure you use this POST code immediately before the *HttpWebRequest.GetResponse()* call. All other manipulation of the Request object has no effect, as the headers get sent with the POST buffer. The rest of the code is identical to what was shown before?you retrieve the Response and then read the stream for the result data.
POST data needs to be properly encoded when sent to the server. If you're posting information to a Web page you'll have to make sure to properly encode your POST buffer into key value pairs and use URLEncoding for the values. You can utilize the static method *System.Web.HttpUtility.UrlEncode()* to encode the data. In this case, make sure to include the System.Web namespace in your project. Note this is necessary only if you're posting to a typical HTML page?if you're posting XML or other application content, you can just post the data as is. This is all much easier to do using a custom class like the one included in this article. This class has an AddPostKey method and, depending on the POST mode, it will take any parameters and properly encode them.
To send the actual data in the POST buffer, the data has to be converted to a byte buffer first. Again, we need to properly encode the string. Using the static *Encoding.ASCII* object with the GetBytes() method, which returns a byte array, you should then set the ContentLength property so the server can handle the size of the data stream. Finally, you can write the POST data to the server using an output stream returned from HttpWebRequest.GetRequestStream(). Simply write the entire byte array out to the stream in one *Write()* method call with the appropriate size of the byte array. This writes the data and waits for completion. As with the retrieval operation, the stream operations actually cause data to be sent to the server, so if you want to provide progress information you can send smaller chunks and provide feedback to the user, if needed.
Beyond the basics
The basic operation of using HttpWebRequest and HttpWebResponse is straightforward. But if you build typical applications that use HTTP access quite a bit, you'll find that you have to set a number of additional properties, such as object properties. One nice feature of the .NET Framework is the consistency of common objects that are reused by many areas of the framework.
If you use authentication in your ASP.NET applications, the objects used on the server have the same interface as on the client side. In this section, I'll address the topics of authentication, proxy configuration and using Cookies. All of these are standard objects used by HttpWebRequest and HttpWebResponse.
Authentication
User authentication is a very common security measure for Web applications. Web authentication usually consists of either basic authentication (which is application driven and typically prompts the user for an operating system account) or NTLM (integrated file security).
To authenticate a user, you use the Credentials property:
WebRequest.Credentials = new NetworkCredential("username","password");
If you're using basic authentication, only the username and password are meaningful, while with NTLM you can also pass a domain name. If you're authenticating against an NTLM resource (permissions are set on the server's file system) from a Windows client application, you can also use the credentials of the user who is currently logged on like this:
WebRequest.Credentials = CredentialCache.DefaultCredentials;
HttpWebRequest handles navigation of the Authentication HTTP protocol requests, so an authenticated request operates like any other if it validates. If the request fails due to authentication, an exception occurs.
Proxy Server Configuration
If you want to build a solid Web front end into a client application, you have to deal with clients that sit behind a firewall/proxy. Luckily, HttpWebRequest makes this fairly painless with a *WebProxy* class member that handles proxy information. To configure a proxy, you can use code like the following:
//  pass Proxy string and bypass local machine
WebProxy loProxy = new WebProxy(
  "http://proxy-server.mine.com:8080",true);

// ** ByPassList
string[] cByPass = new string[2];
cByPass[1] = "http://someserver.net";
cByPass[2] = "http://192.0.0.1";

loProxy.BypassList = cByPass;

// ** Proxy Authentication
loProxy.Credentials = new NetworkCredential("proxyusername","pass");

Request.Proxy = loProxy;
How much detail is provided to the Proxy object depends on the particular proxy server. For example, a bypass list is not required and most proxies don't require a username and password, which means you don't need to provide the credentials.
WebProxy can cram all the parameters into the constructor as well, like this:
Request.Proxy = new WebProxy("http://proxy-server.mine.com:8080", true,cBypass,new NetworkCredential(...) );
However, I would advise against this because your application will likely have to check which objects to set and pass based on the option the user requires.
HTTP Cookies
HTTP Cookies are a state management implementation of the HTTP protocol and many Web pages require them. If you're using remote HTTP functionality to drive a Web site (following URLs and the like), you will have to support cookies in many cases.
Cookies work by storing tokens on the client, making the client responsible for the management of any cookie created. Normally, a browser manages all of this for you, but in this case, there's no browser for an application front end, so we're responsible for tracking this state. This means that when the server assigns a cookie for one request, the client must retain it and send it back to the server on the next request where it applies (based on the Web site and virtual directory). HttpWebRequest and HttpWebResponse provide the container to hold cookies, both for the sending and receiving ends, but they don't automatically persist them, so that becomes your responsibility.
Because the Cookie collections are nicely abstracted in these objects, they are fairly easy to save and restore. The key is to have a persistent object reference to the Cookie collection and then reuse the same cookie store each time.
To do this, let's assume you are running the request on a form (or some other class). You first create a property called Cookies:
CookieCollection Cookies;
On the Request end of the connection, before the request is sent to the server, you can then check whether there is a previously saved set of cookies. If so, you use them:
Request.CookieContainer = new CookieContainer();
if (this.Cookies != null && this.Cookies.Count > 0)
    Request.CookieContainer.Add(this.Cookies);
If you previously retrieved cookies, they were stored in the Cookies property and then added back into the Request's CookieContainer property. CookieContainer is a collection of cookie collections, which enables you to store cookies for multiple sites. For this article, we will track a single set of cookies for a single set of requests.
On the receiving end, once the request headers have been retrieved after the call to GetWebResponse*(),* you then use the following code:
// ** Save the cookies on the persistent object
if (Response.Cookies.Count > 0)
   this.Cookies = Response.Cookies;
This saves the Cookie collection until the next request, when it is then reassigned to the Request and sent to the server. Note that this is a very simplistic cookie management approach that will work only if a single cookie or single group of cookies is set on a given Web site. If multiple cookies are set in multiple different places on the site, you will have to retrieve the individual cookies and store them into the Cookie collection. Here's some code that demonstrates this:
if (loWebResponse.Cookies.Count > 0)
   if (this.Cookies == null)
   {
      this.Cookies = loWebResponse.Cookies;
   }
   else
   {
      // If we already have cookies update list
      foreach (Cookie oRespCookie in
               loWebResponse.Cookies)
      {
         bool bMatch = false;
         foreach(Cookie oReqCookie in this.oCookies)
         {
            if (oReqCookie.Name == oRespCookie.Name)
            {
               oReqCookie.Value = oRespCookie.Name;
               bMatch = true;
               break;
            }
         }
         if (!bMatch)
            this.Cookies.Add(oRespCookie);
      }
   }
}
This should give you a good starting point for cookies. Remember that this code still doesn't deal with domains and virtual paths and also doesn't deal with saved cookies. However, for most applications, the above code should be sufficient.
Wrapping it up
By now, you're probably getting an idea of the power provided by the HttpWebRequest object. While using these objects is a straightforward process, it does require a fair amount of code and knowledge of a number of classes.
Since I use HTTP access in just about every application I create, I decided to create a wrapper class, called wwHttp, that simplifies the process quite a bit (the class is included in the code download for this article). Rather than creating two separate Request and Response objects, I will use a single class with one object using simple string properties. The class handles setting up POST variables for you, creating any authentication and proxy settings from strings rather than objects and managing cookies. In addition, it provides an optional simplified error handler that sets properties instead of throwing exceptions. It does this while also allowing access to the base objects.
For example, you can pass in a WebRequest object and retrieve a reference to both the Request and Response objects. Therefore, you can get the best of both worlds with simplicity and without having to give up any of the features of the framework classes. The class also provides several overloaded methods for returning strings, streams and running output to a file. The class can also be set up to fire events at buffer retrieval points, such as when data is downloaded to provide feedback in a GUI application.
Start by adding the namespace:
using Westwind.Tools.Http;
Using the class, you can retrieve content from a Web site as simply as this:
wwHttp loHttp = new wwHttp();

loHttp.Username = "ricks";
loHttp.Password = "password";

loHttp.ProxyAddress = "http://proxy-server.hawaii.rr.com:8080";

loHttp.AddPostKey("Name","Rick Strahl");
loHttp.AddPostKey("Company","West Wind Technologies");

// enable automatic tracking for 5 cookies loHttp.HandleCookies = true;

string lcHtml = loHttp.GetUrl("http://www.west-wind.com/TestPage.wwd");
Most of those property settings are optional, but just about everything in the class is accessible with simple strings. AddPostKey() automates the creation of UrlEncoded strings. Several different POST modes are supported, including UrlEncoded (0), Multi-Part (2) and raw XML (4) POSTs.
A corresponding *GetUrl()* method has several different signatures. You can pass in an optional preconfigured WebRequest object, so if you need to override some unexposed properties you can do so. For example:
HttpWebRequest oReq = (HttpWebRequest)WebRequest.Create(lcUrl);
oReq.Expires = -1
oReq.Headers.Add("SoapAction", "http://west-wind.com/soap#Method");

wwHttp Request = new wwHttp();

string lcHTML = Request.GetUrl(oReq);
wwHttp also exposes Error and ErrorMsg properties that check for error conditions:
lcHtml = Request.GetUrl(lcUrl);

if (Request.Error)
    MessageBox.Show(Request.ErrorMsg);
else
    this.txtResult.Text = lcHtml;
Explicit error retrieval is the default, but you can use the ThrowExceptions property to enable the class to pass exceptions to your code.
Firing events
Other versions return a StreamReader object, and yet another version, GetUrlEvents(), fires an *OnReceiveData* event whenever data arrives in the buffer. The event provides a current byte and total byte count (if available) as well as two flags, Done and Cancel. The Done flag indicates when the request is finished, while the Cancel flag enables your code to stop downloading data.
To run with the event enabled, you just hook up an event handler to the event:
HttpWebRequest loHttp = new wwHttp();

loHttp.OnReceiveData += new wwHttp.OnReceiveDataHandler(this.loHttp_OnReceiveData);

string lcHtml = loHttp.GetUrlEvents(this.txtUrl.Text.TrimEnd(),4096);

this.txtHTML.Text = lcHtml;

loHttp.OnReceiveData -= new wwHttp.OnReceiveDataHandler(this.loHttp_OnReceiveData);
Make sure to disconnect the handler at the end of your request, or set it up in a static location that runs only one time. The event handler method can then do some work with the data in the OnReceiveDataArgs object returned to you, as shown in Listing 3.
Listing 3: Implementing the wwHttp::OnReceiveData event
private void loHttp_OnReceiveData(object sender, wwHttp.OnReceiveDataEventArgs e)
{
   if (e.Done)
      MessageBox.Show("Download Complete!");

   else if (e.NumberOfReads == 20)
   {
      MessageBox.Show("Cancelling... too large.");
      e.Cancel = true;
   }
   else
      this.oStatus.Panels[0].Text = e.CurrentByteCount.ToString() + " of  " + e.TotalBytes.ToString() + " bytes read";
}
Using the event is easy; however, creating the event on the wwHttp class is a bit more involved and requires three steps:
First, the actual event needs to be defined on the class:
public event OnReceiveDataHandler OnReceiveData;
Second, the event's arguments need to be wrapped into a class that contains the arguments as properties:
public class OnReceiveDataEventArgs
{
   public long CurrentByteCount=0;
   public long TotalBytes = 0;
   public int NumberOfReads = 0;
   public char [] CurrentChunk;
   public bool Done = false;
   public bool Cancel = false;
}
Third, a public delegate needs to be created to act as the method signature for the Event to be called:
public delegate void OnReceiveDataHandler(object sender, OnReceiveDataEventArgs e);
You only need to define this delegate if you want to pass custom parameters. If no parameters are required, you can just define your event using the standard System.EventHandler delegate. These three pieces make up the event interface.
To fire the event, you can simply run your code and call the function pointer that the user assigned to the event. Listing 4 demonstrates how the Response loop is read and how the event is fired on each update cycle.
Listing 4: Reading the Response Stream and firing events
StreamReader oHttpResponse = this.GetUrlStream(Url);
if (oHttpResponse == null)
   return "";

long lnSize = BufferSize;

// *** Use StringBuilder to create the result string
StringBuilder loWriter = new StringBuilder((int) lnSize);

// *** Create the argument structure used as event parm
OnReceiveDataEventArgs oArgs = new OnReceiveDataEventArgs();
oArgs.TotalBytes = lnSize;

while (lnSize > 0)
{
    lnSize = oHttpResponse.Read(lcTemp,0,(int)BufferSize);
    if (lnSize > 0)
    {
        loWriter.Append(lcTemp);
        lnCount++;
        lnTotalBytes += lnSize;

        // *** Raise an event if hooked up
        if (this.OnReceiveData != null)
        {
            /// *** Update the event handler
            oArgs.CurrentByteCount = lnTotalBytes;
            oArgs.NumberOfReads = lnCount;
            oArgs.CurrentChunk = lcTemp;

            // *** Call the event method
            this.OnReceiveData(this,oArgs);

            // *** Check for cancelled flag
            if (oArgs.Cancel)
                goto CloseDown;
        }
    }
} // while
The key is the delegate OnReceiveData (see the Delegates Sidebar for more on delegates). It acts as a function pointer, which points to the assigned method on the form in the example above. From within the stream-reading loop, this method is called every time a new buffer is retrieved.
We can walk and chew gum at the same time!
Events are cool, but they're not all that useful if you're running in blocking mode as I've shown. HttpWebRequest and HttpWebResponse can also be run in asynchronous mode by using the BeginGetResponse and EndGetResponse methods. Most of the stream classes provide this mechanism, which enables you to specify a callback method to collect output retrieved from these requests (you can also send data asynchronously this way).
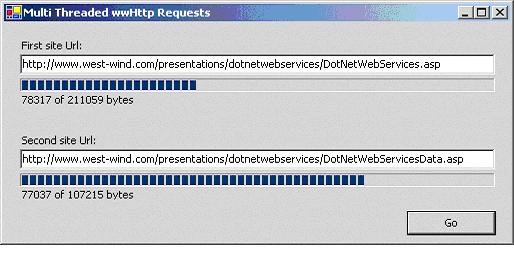
However, after playing with this for a while and then looking at the native thread support in the .NET Framework, it turned out to be easier to create a new thread of my own and encapsulate the thread operation in a class. The following example runs multiple wwHttp objects on a couple of threads simultaneously while also updating the form with information from the OnReceiveData event. Figure 1 shows what the form looks like. While retrieving HTTP requests, the main form thread is still available to perform other tasks. This results in the form remaining active while HTTP requests are retrieved.
This process is surprisingly simple in .NET, partly because .NET makes it easy to route thread methods into classes. This makes it easy to encapsulate thread processing and create a packaging mechanism for passing data into a thread to keep that data isolated from the rest of the application.
Make sure you add the *System.Threading* namespace to all forms that use threads. Listing 5 defines the thread handler class that fires the HTTP request with the FireUrls() method.
Listing 5: Implementing a Thread class
public class GetUrls
{
    public string Url = "";
    public wwHttpMultiThread ParentForm = null;
    public int Instance = 1;

    public void FireUrls()
    {
        wwHttp oHttp = new wwHttp();
        oHttp.OnReceiveData += new wwHttp.OnReceiveDataHandler(this.OnReceiveData);
        oHttp.Timeout = 5;
        string lcHTML = oHttp.GetUrlEvents(this.Url,4096);
        if (oHttp.Error)
            this.ParentForm.lblResult.Text = oHttp.ErrorMsg;
    }

    public void OnReceiveData(object sender, wwHttp.OnReceiveDataEventArgs e)
    {
        if (this.Instance == 1)
            this.ParentForm.lblResult.Text = e.CurrentByteCount.ToString() + " bytes";
        else
            this.ParentForm.lblResult2.Text = e.CurrentByteCount.ToString() + " bytes";
    }
}
There's nothing special about this class. In fact, any class would do as a thread handler (as long as you write thread-safe code). This simplified implementation includes a reference back to the Parent Form, which makes it possible to access the status labels on the form. The Instance here is used to identify which request is updating which form control. The code here is very much like code I've previously shown using the wwHttp object. Notice that this code assigns the event handler a method of the thread action class. This method then calls back to the Parent Form and updates the labels.
Listing 6 details the calling code on the form that creates two threads to call the FireUrls method:
Listing 6: Creating and running the Thread
private void cmdGo_Click(object sender, System.EventArgs e)
{
   GetUrls oGetUrls = new GetUrls();
   oGetUrls.Url = this.txtUrl.Text;
   oGetUrls.ParentForm = this;

   ThreadStart oDelegate = new ThreadStart(oGetUrls.FireUrls);
   Thread myThread = new Thread(oDelegate);
   myThread.Start();

   GetUrls oGetUrls2 = new GetUrls();
   oGetUrls2.ParentForm = this;
   oGetUrls2.Url = this.txtUrl2.Text;
   oGetUrls2.Instance = 2;

   ThreadStart oDelegate2 = new ThreadStart(oGetUrls2.FireUrls);
   Thread myThread2 = new Thread(oDelegate2);
   myThread2.Start();
}
To start a thread, call the ThreadStart function, which takes a function pointer (basically a reference that points at a specific method in a class) as an argument. This returns a delegate that can be used to create a new thread and start it running with this pointer. You can pass either an instance variable of a static address or a static class method. In most cases, you'll want to use a method of a dynamic instance object variable because it gives you the ability to fully set up the instance by setting properties that you'll need as part of the processing.
Think of the actual thread implementation class as wrapper used as the high-level calling mechanism and parameter packager to your actual processing code. If you need to pass data back to some other object, you can make this instance a member of another object. For example, I could have made this object part of the form, which would then enable the form to access the members of the 'thread' class and share the data.
Creating threads and running them is very easy, but make sure you manage your data to prevent access of shared data from different threads at the same time. Shared data needs to be protected with synchronization of some sort. In fact, you can see why this is an issue if you click the Go link on the sample form a few times while downloads are still running. You'll see the numbers jump back and forth as multiple threads update the same progress indicators on the form. As multiple instances are writing to the controls at the same time, the code will eventually terminate. The workaround for this is to use synchronized methods to handle the updates or to use separate forms to display the update information (a new form for each request). The topic of synchronization is beyond the scope of this article, so I'll cover basic multi-threading concepts in a future article.
The Web at Your Fingertips
This cliché has been overused, but I can say that .NET really delivers on this promise in a number of ways. While it's true that you could do all of this and most other Internet related things before, .NET brings a consistent model to the tools. In addition, you get support for advanced features like easy-to-implement multi-threading, and event support (although it is somewhat complex). This makes it easy to create complex applications that utilize the tools in ways that were either previously not possible or took a lot more work.
With .NET, the tools are there to access the Web very easily, whether it's through the high-level tools or the lower-level network protocol classes. The HttpWebRequest class is a fairly easy and powerful implementation that provides an excellent balance between flexibility and ease of use. For me, creating the wwHttp class has been an exercise in understanding and utilizing the HttpWebRequest and HttpWebResponse classes. I hope you find this class useful, if not “as is,” then as an example of several techniques that frequently need to be accomplished with HTTP requests. Of course, this class is not complete and some features will need expansion in the future, but it's good starting point.
As always, if you have questions or comments, I and all of the Component Developer Magazine editors and writers welcome them at:
http://www.west-wind.com/wwthreads/default.asp?Forum=Code+Magazine
