


Apple's Swift language has taken the world by storm. In only six months, the Swift language has acquired a large amount of market share of the programming language search options. In my November/December 2014 issue of CODE Magazine article, I discussed the syntax of the Swift language and how it has been inspired by many different languages, including C#, Go, Ruby, and Small Talk. In this article, I'll be taking a practical look at Swift by implementing a Flickr Search application.
This article covers the development journey of a single-view iOS project to a searchable Flickr Feeds application. During this journey, I'll cover the best practices of consuming a JSON response from Flickr and how to efficiently download images in the background thread. I'll also cover how to strengthen the relationship between Objective-C and Swift by integrating a third-party Objective-C library into the Swift project. Finally, at the end of the article, you'll perform an overall refactoring of the project to make sure your implementation is clean and crisp.
Creating a New iPhone Project Xcode 6
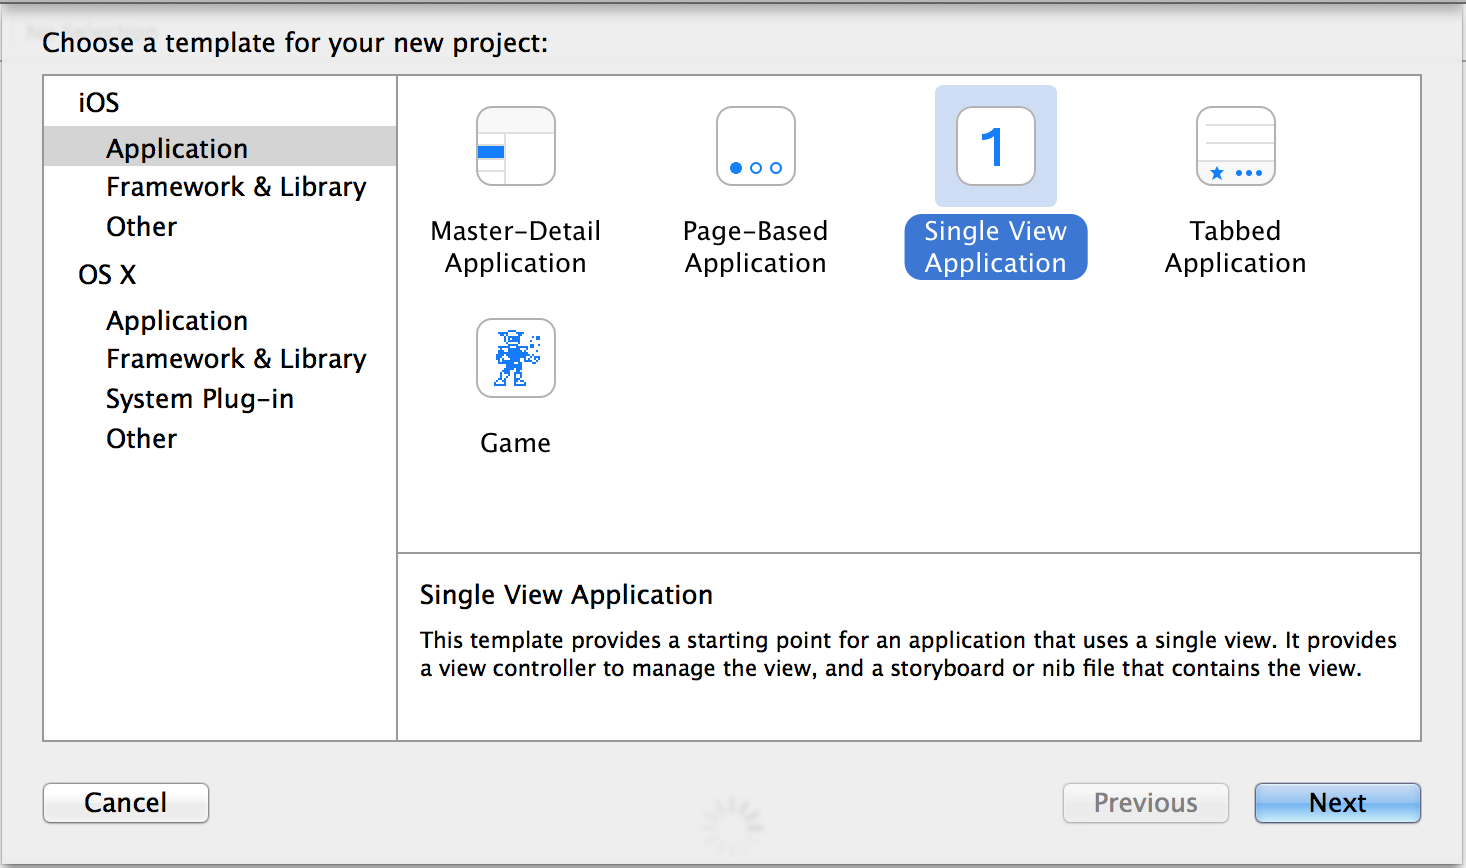
Launch Xcode 6 and you'll be greeted with a project selection template screen. The project template screen allows you to create different types of projects depending on your requirements. For the purposes of this project, select Single View Application and click Next, as shown in Figure 1.
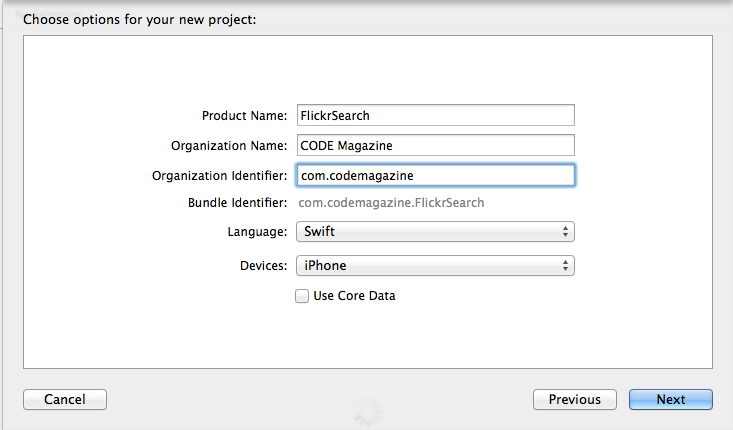
On the next screen, enter the information about the app and make sure to select Swift as the language, as shown in Figure 2.
Click Next and specify the location where you would like your project to be saved. This creates an Xcode project with all the required startup files.
Open the Main.storyboard file and you'll see the default view controller. Select the view controller and press Delete to remove it from the storyboard. Also, delete the accompanying ViewController.swift from the project. Now, drag and drop the Table View Controller from the Toolbox on the storyboard. You'll be using the Table View Controller for the Flickr Search application.
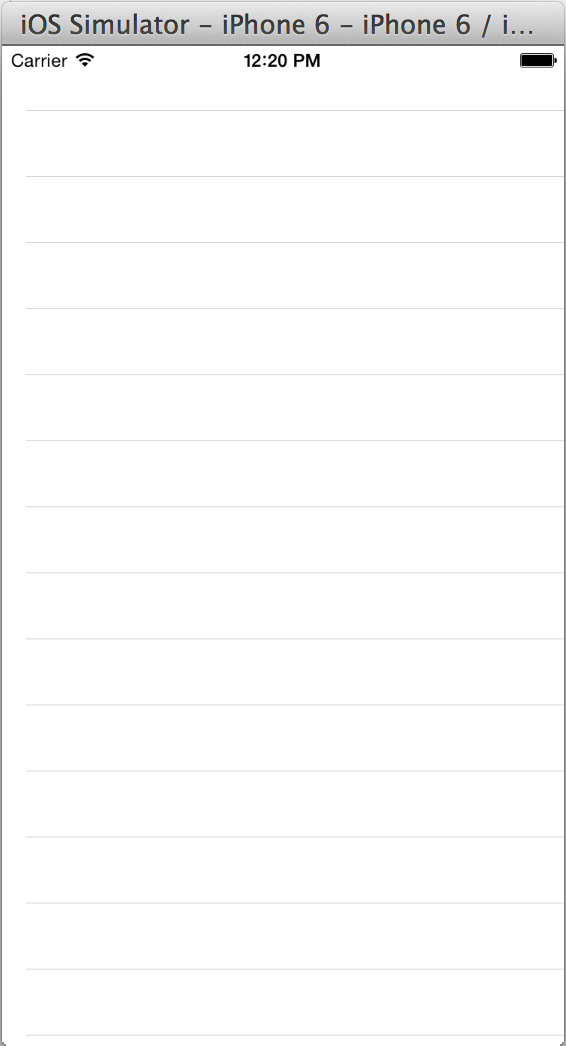
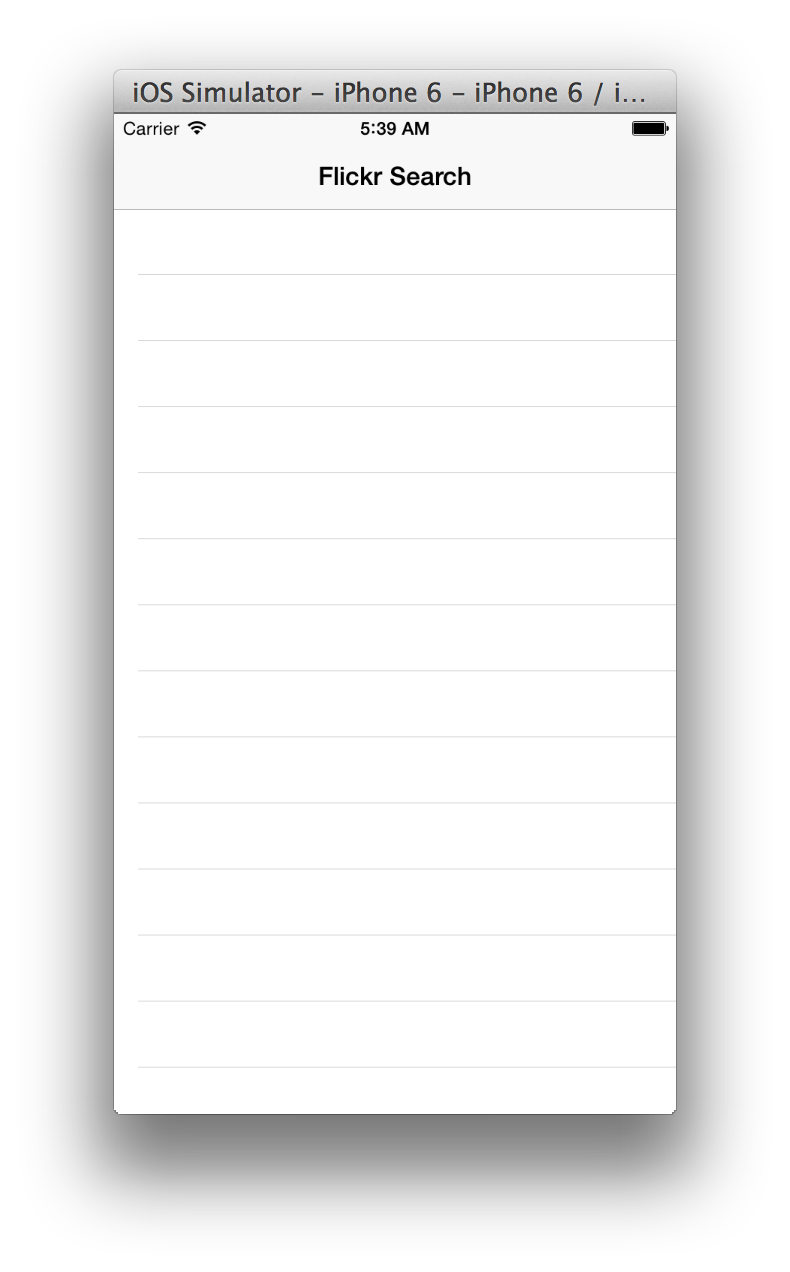
At this time, you can run your application. Press Command + R to run the application in the simulator. You'll see the empty table view displayed, as shown in Figure 3.
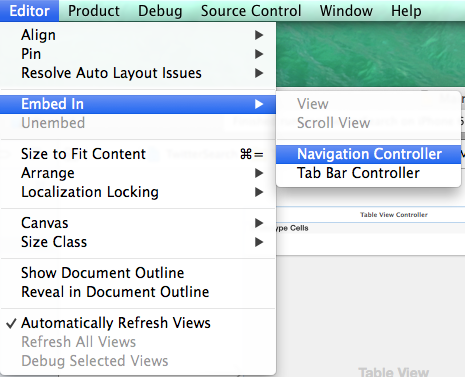
Let's give the app a little more personality by adding a navigation bar. The navigation bar can be added using the Editor toolbar option, as shown in Figure 4.
The navigation bar allows you to give a nice title to your application. Set the navigation bar title in the Storyboard to Flickr Search. This time, the application appears with the navigation bar, as shown in Figure 5.
Fetching Flickr Feeds
In the past, developers used third-party libraries to invoke network requests. In iOS 7, the NSURLSession API was introduced, which performed the heavy lifting and allowed developers to initiate and consume requests easily without depending on a third-party library. Flickr also provides an easy-to-use API that returns the response in JSON format.
Begin by adding a new controller to your project. Name the controller FlickrTableViewController and make sure that it inherits from UITableViewController. Inside the FlickrTableViewController, call the setup method defined in Listing 1 from within the viewDidLoad method.
Listing 1: Calling the Setup method
func setup() {

    let flickrURL = "http://api.flickr.com/services/feeds/photos_public.gne?
        tags=vegetables&tagmode=any&format=json&jsoncallback=?"

    let session = NSURLSession.sharedSession()

    (session.dataTaskWithURL(NSURL(string :flickrURL)!,
        completionHandler: {
            (data :NSData!, response, error) -> Void in

            let result = NSString(data: data, encoding: NSUTF8StringEncoding)

            println(result!)

        })).resume()

}
In Listing 1, you're using the NSURLSession class to fetch the feeds from the provided URL. Once you receive the data back, you encode it using NSUTF8StringEncoding and display it in the console, as shown in Figure 6.
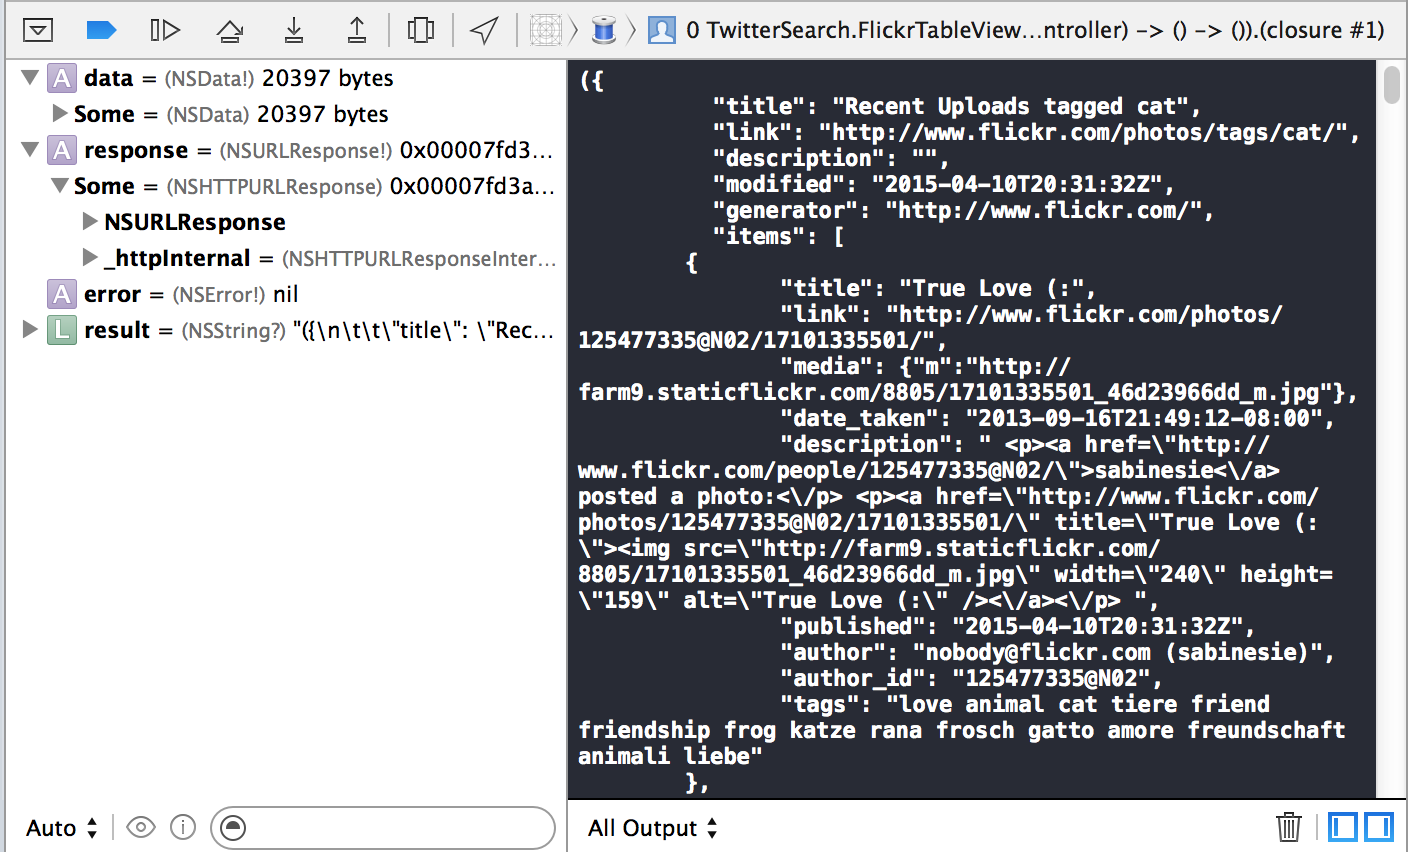
Displaying feeds on the console is a quick way to find out if the Flickr API and the provided URL are responding appropriately. The next step is to instantiate a class with feeds data and use it in the application.
You can also use any network tool to make sure that the feed URL returns valid responses.
Populating the Flickr Feed Class
The Flickr feed class you're going to implement in this section will serve as a container for all the feeds that will later be displayed in the user interface. The implementation is shown in the following code:
import UIKit
class FlickrFeed: NSObject {

    var title :NSString?
    var media :NSString?
}
The FlickrFeed class consists of two properties, Title and Media. The Title property will be used to hold the title of the Flickr feed entity and the Media property will be used to hold the image associated with the feed. The implementation in Listing 2 shows the updated set up method.
Listing 2: The updated set up method
func setup() {

    self.feeds = NSMutableArray()

    if let flickrURL = NSURL(string:
        "https://api.flickr.com/services/feeds/photos_public.gne?
            tags=gardenning&tagmode=any&format=json&nojsoncallback=1") {

        NSURLSession.sharedSession().dataTaskWithURL(flickrURL,
        completionHandler: {(data :NSData!, response: NSURLResponse!,
        error: NSError!) -> Void in

            let result = NSString(data: data, encoding: NSUTF8StringEncoding)

            var error:NSError? = nil

            let list :NSDictionary? = NSJSONSerialization.JSONObjectWithData(
                data, options: NSJSONReadingOptions.AllowFragments, error:
                &error) as NSDictionary?

            let items = list!.valueForKey("items") as NSArray

            for item in items
                {
                    let dictionaryItem = item as NSDictionary

                    let feed = FlickrFeed()

                    feed.name = dictionaryItem.valueForKey("title") as NSString!
                    feed.media = dictionaryItem.valueForKeyPath(
                        "media.m") as NSString!

                    self.feeds?.addObject(feed)
                }

                dispatch_async(dispatch_get_main_queue(), {
                    () -> Void in self.tableView.reloadData()
                })


        }).resume()
    }
}
The NSJSONSerialization class is used to convert the returned data into a JSON object. Later you'll iterate through the returned list and initialize the FlickrFeed instance. You used the valueForKey method to extract the values of the Title and the Media keys, which are used to construct the FlickrFeed instance. Finally, refresh the UITableView by calling the reloadData method on the main thread.
The reloadData method triggers multiple events on the UITableView control. The two events you're interested in are numberOfRowsInSection and cellForRowAtIndexPath. The numberOfRowsInSection event dictates how many rows will appear in the UITableView control. In this case, the number of rows returned is equal to the number of feeds. Listing 3 shows the implementation of the numberOfRowsInSection.
Listing 3: Returning the total number of feeds
    override func tableView(tableView: UITableView,
        numberOfRowsInSection section: Int) -> Int {
            // #warning Incomplete method implementation.
            // Return the number of rows in the section.
            return self.feeds!.count
    }
The next method, cellForRowAtIndexPath, is the heart of the UITableView control. This method is responsible for returning table cells that will display on the user interface. The cellForRowAtIndexPath is dependent on the numberOfRowsInSection method and will be called for each row in the feeds collection. Listing 4 shows the implementation of the cellForRowAtIndexPath method.
Listing 4: Returning the default UITableViewCell
override func tableView(tableView: UITableView,
    cellForRowAtIndexPath indexPath: NSIndexPath) -> UITableViewCell {

    let cell = tableView.dequeueReusableCellWithIdentifier("Cell",
        forIndexPath: indexPath)

    let feed = self.feeds![indexPath.row] as FlickrFeed

    cell.textLabel?.text = feed.name

    return cell
}
In the code in Listing 4, you're using the default UITableViewCell of the UITableView control. First, you select the feed from the feeds collection that you populated earlier. Next, update the text label of the cell by assigning the feed name. Finally, return the newly created cell to the UITableView control. Figure 7 shows the result.
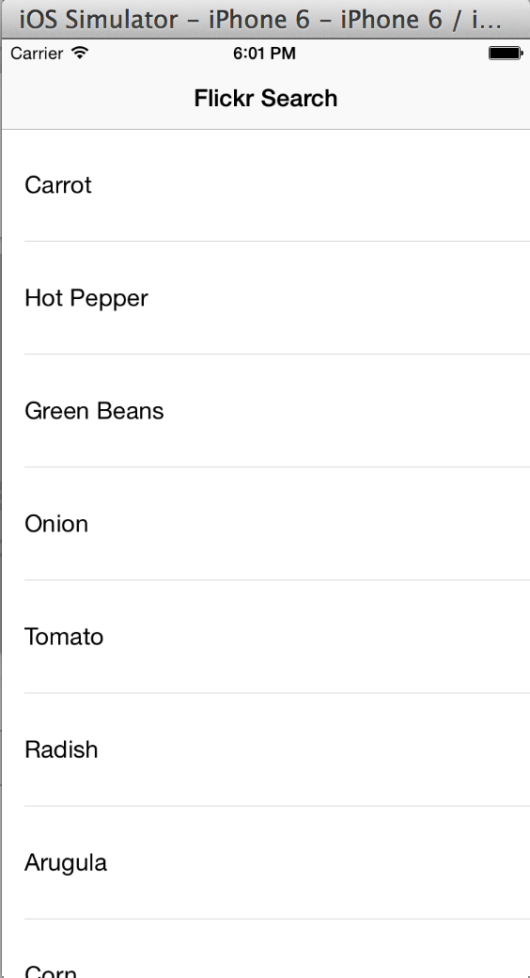
The default cell implementation consists of a text label. This is ideal if you only want to display a text label. Unfortunately, this scenario is a little more complicated, including the image to be displayed on the left-hand side of the phone's screen. You'll accomplish this by creating a custom UITableViewCell.
Creating a Custom UITableViewCell
A custom UITableViewCell allows you to create a custom layout for the UITableView appearance. A custom UITableViewCell can be created by inheriting from the UITableViewCell class. Add a new file to the project and name it FlickrFeedTableViewCell. Make sure that the new class inherits from UITableViewCell. Figure 8 shows the dialog box for adding a new item to the project.

Next, add nameLabel and mediaImageView properties to the custom class, as shown in Listing 5.
Listing 5: Adding properties to the FlickrFeedTableViewCell
import UIKit

class FlickrFeedTableViewCell: UITableViewCell {

    @IBOutlet weak var nameLabel :UILabel?
    @IBOutlet weak var mediaImageView :UIImageView?

    override func awakeFromNib() {
        super.awakeFromNib()
        // Initialization code
    }

    override func setSelected(selected: Bool, animated: Bool) {
        super.setSelected(selected, animated: animated)

        // Configure the view for the selected state
    }

}
At this point, the table view in the Storyboard has no idea about your newly created FlickrFeedTableViewCell. Open the Storyboard and set the class of the table view cell to your class. Figure 9 shows the FlickrFeedTableViewCell class assigned to the table view cell.

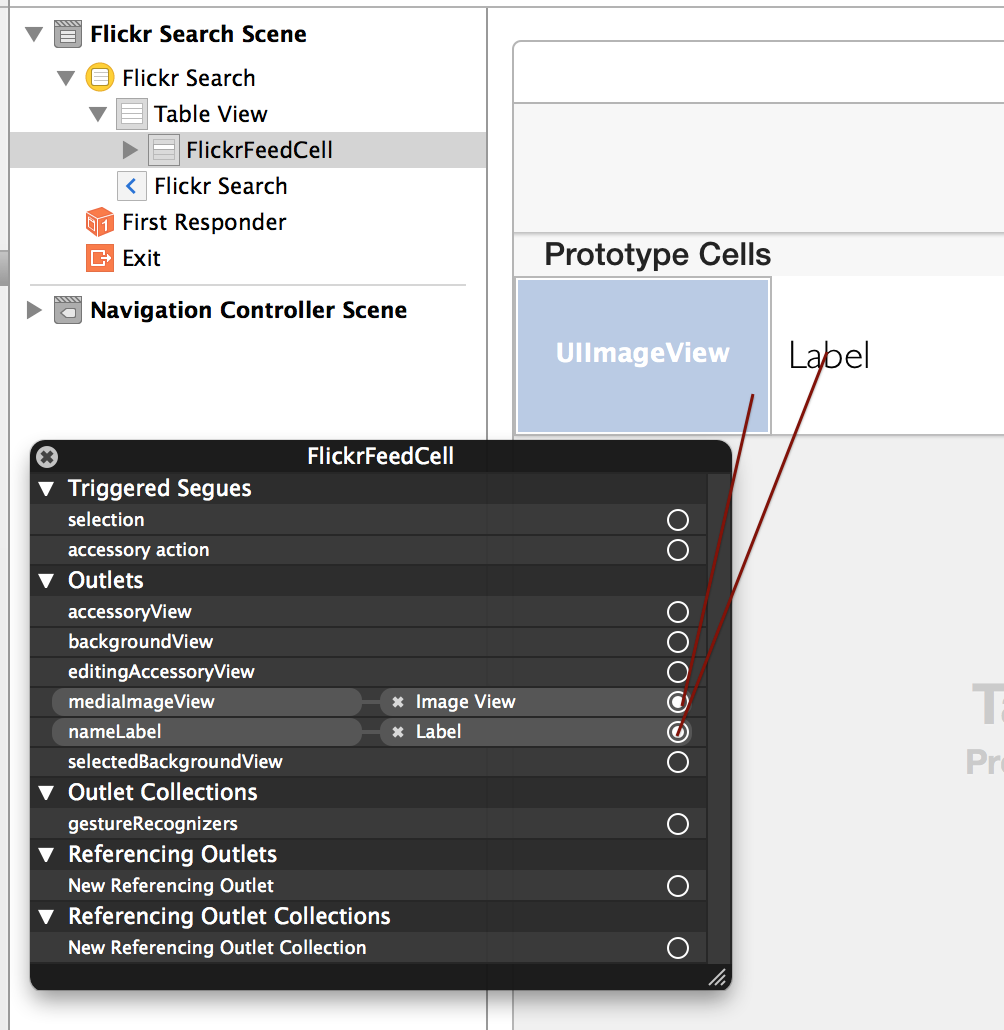
The next step is to connect the IBOutlets from the FlickrFeedTableViewCell class to the cell exposed in the Storyboard. This step is shown in Figure 10:
Finally, you need to update the code in your view controller to reflect the custom table view cell. Instead of using the default UITableViewCell, you'll use FlickrFeedTableViewCell, as shown in Listing 6.
Listing 6: Binding to the FlickrFeedTableViewCell properties
override func tableView(tableView: UITableView,
    cellForRowAtIndexPath indexPath: NSIndexPath) -> UITableViewCell {

    let cell = tableView.dequeueReusableCellWithIdentifier(
        "FlickrFeedCell", forIndexPath: indexPath) as FlickrFeedTableViewCell

    let feed = self.feeds![indexPath.row] as FlickrFeed

    cell.nameLabel?.text = feed.name

    cell.imageView?.image = UIImage(data: NSData(contentsOfURL:
    NSURL(string: feed.media)!)!)


    return cell
}
In Listing 6, you've used the UIImage method contentsOfURL to fetch the images from the URL you received from the feed. Run the code and you'll witness a beautiful display of flowers, as shown in Figure 11.
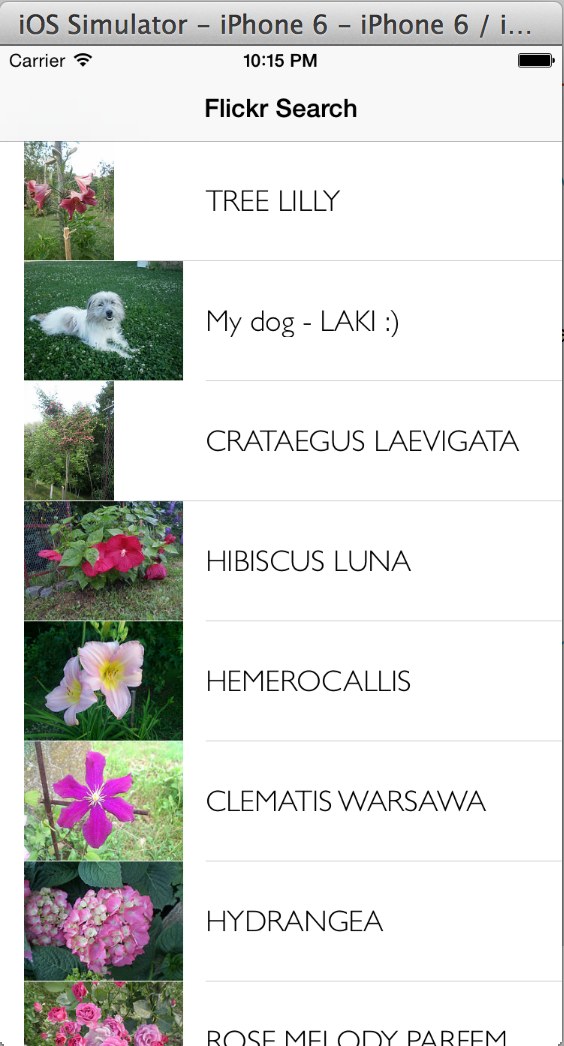
Unfortunately, once you start scrolling through the list, you'll realize a big problem. The page barely scrolls and creates an unusable experience. This is because you're downloading the images on the main user interface thread, which blocks the calls to update the user interface.
There are multiple ways of fixing this. One solution is to implement code to fetch the images on a background thread instead of the main thread. But why reinvent the wheel? Luckily, the solution already exists in a third-party library called AFNetworking.
AFnetworking is primarily implemented in the Objective-C language. The library has been ported to the Swift language under a new name, “Alamofire”.
Integrating AFNetworking Library
AFNetworking is primarily a networking library but it also contains helpful UIImageView extension methods, which allow you to fetch images asynchronously. Simply download AFNetworking from Github and drop it into your project. Since AFNetworking is an Objective-C library, Xcode immediately recognizes it and asks to create a bridging header file. The bridging header is used to import the Objective-C files into the Swift world. Open the bridging header file and use the import statement to fetch all of the required files for your project. The code in the next snippet shows the bridge header file:
//
//  Use this file to import your target's public
// headers that you would like to expose to Swift.
//
#include       "AFNetworking.h"
#include       "UIImageView+AFNetworking.h"
Once all the required Objective-C files are imported in the bridging header file, you're ready to use them in your application. Listing 7 shows the code in the cellForRowAtIndexPath method contained in the view controller to reflect the usage of the new UIImageView extension method.
Listing 7: The AFNetworking UIImageView extension
override func tableView(tableView: UITableView,
   cellForRowAtIndexPath indexPath: NSIndexPath) -> UITableViewCell {

    let cell = tableView.dequeueReusableCellWithIdentifier("FlickrFeedCell",
        forIndexPath: indexPath) as FlickrFeedTableViewCell

    let feed = self.feeds![indexPath.row] as FlickrFeed

    cell.nameLabel?.text = feed.name

    cell.mediaImageView?.setImageWithURL(NSURL(string: feed.media)!)

    return cell
}
The bridging header allows us to use the code between Objective-C and Swift interchangeably.
Run the application again and enjoy the butter-smooth scrolling! The user no longer has to wait for the images to be downloaded because all the images are downloaded in the background thread.
Adding the Search Bar
At present, you're only pulling the results from Flickr for the term Flowers. This will surely make your gardening buddies happy but you'll want to expand the app to other users too. In this section, you'll add a search bar to the application. The search bar allows the users to retrieve the feeds based on their specific search term.
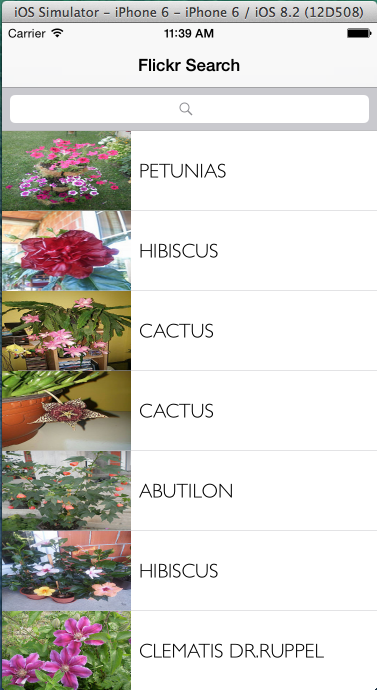
It's really simple. You just drag and drop the search bar control inside the header of the table view control. The great thing about the search bar control is that you don't even need to adjust the position; it just snaps perfectly into the table view header, as shown in Figure 12.
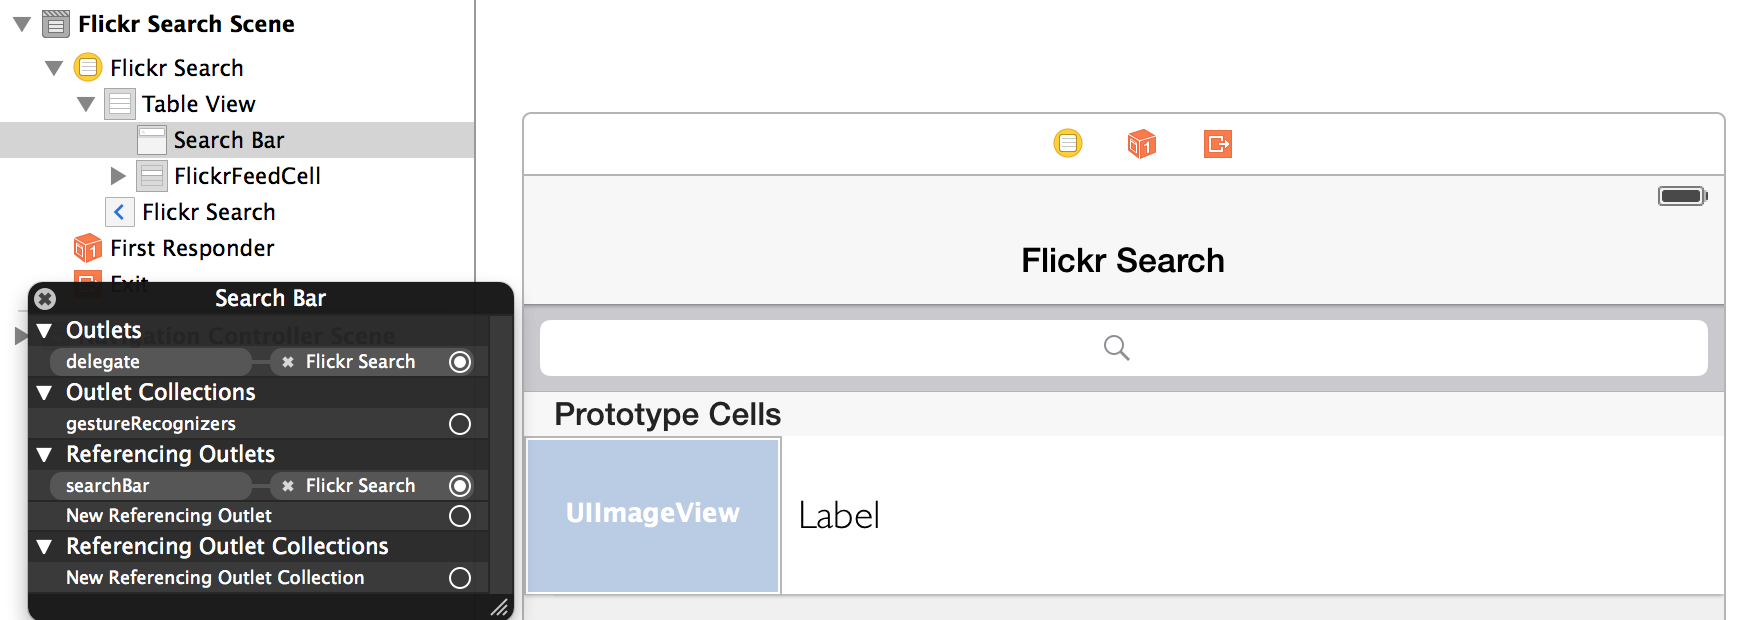
The next step is to enable the communication between the search bar and the view controller. This is accomplished by creating outlets in the view controller that connects to the controls on the story board. You also need to make sure that the delegate from the search bar points back to the view controller. This enables the view controller to receive the events generated by the search bar control. Figure 13 shows the connecting outlets and delegates.
You also need to update the FlickrTableViewController to use the UISearchBarDelegate. This enables you to catch all the events generated by the search bar delegate. The next snippet shows the FlickrTableViewController inheriting the UISearchBarDelegate.
class FlickrTableViewController: UITableViewController,UISearchBarDelegate
The UISearchBarDelegate consists of a lot of methods that users can implement at their convenience. You're interested in the searchBarSearchButonClicked event that's triggered once the user clicks the search button. Once the search button is clicked, you replace the old search string with the new string and send a request to Flickr to retrieve the updated information. The searchBarSearchButtonClicked implementation is shown in Listing 8.
Listing 8: Implementing the searchBarSearchButtonClicked event
func searchBarSearchButtonClicked(searchBar: UISearchBar) {

    println("\(searchBar.text)")

    flickrURL = flickrURL.stringByReplacingOccurrencesOfString(
        "searchTerm", withString: searchBar.text, options: nil, range: nil)

    setup(flickrURL)

    searchBar.resignFirstResponder()
}
An important thing to notice is the flickrURL that's being passed to the setup method. The setup method issues a request using the flickrURL parameter and processes the result. Once the result is ready, the table view is reloaded and the new search results are displayed on the screen. The complete implementation of setup method is shown in Listing 9.
Listing 9: Implementation of the setup method
func setup(flickrURL :NSString) {

    self.feeds = NSMutableArray()

    if let url = NSURL(string: flickrURL) {

        NSURLSession.sharedSession().dataTaskWithURL(url, completionHandler: {
                (data :NSData!, response: NSURLResponse!,
                error: NSError!) -> Void in

                let result = NSString(data: data, encoding: NSUTF8StringEncoding)

                var error:NSError? = nil

                let list :NSDictionary? =
                    NSJSONSerialization.JSONObjectWithData(
                       data, options: NSJSONReadingOptions.AllowFragments,
                        error: &error) as NSDictionary?

                let items = list!.valueForKey("items") as NSArray

                for item in items
                {
                    let dictionaryItem = item as NSDictionary

                    let feed = FlickrFeed()

                    feed.name = dictionaryItem.valueForKey("title") as NSString!
                    feed.media = dictionaryItem.valueForKeyPath(
                        "media.m") as NSString!

                    self.feeds?.addObject(feed)
                }

                dispatch_async(dispatch_get_main_queue(), { () -> Void in
                    self.tableView.reloadData()
                })


        }).resume()
    }
}
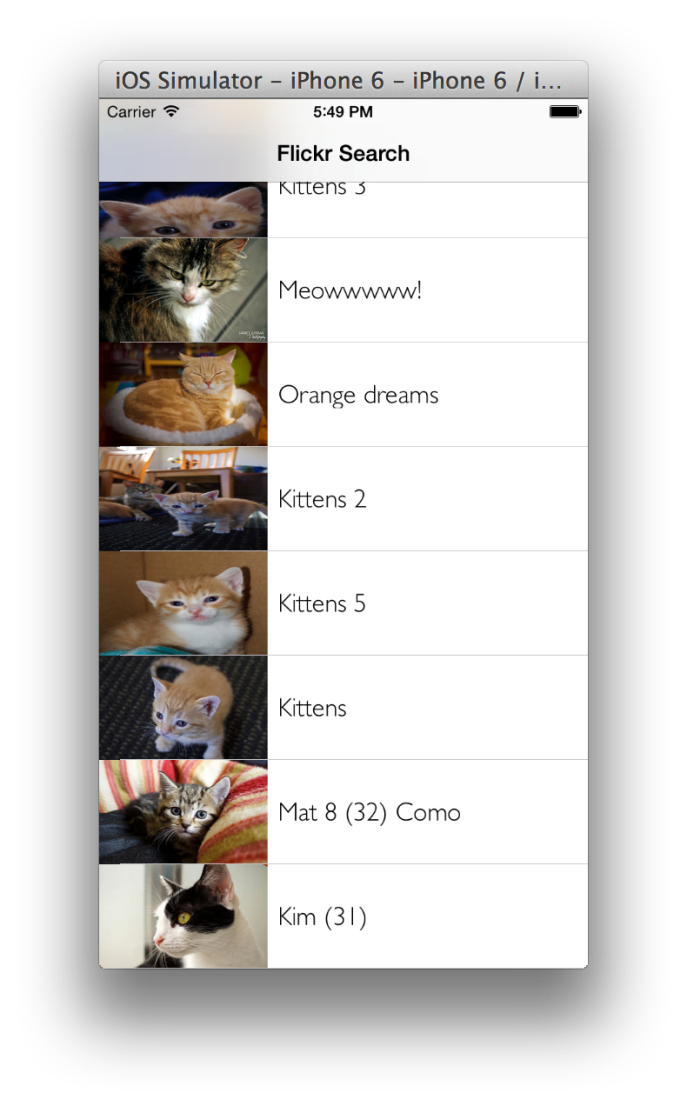
To test the search functionality, run the app in the simulator and type a keyword in the search bar. Figure 14 shows the result of searching for the keyword “cats.”
Conclusion
Swift is constantly evolving as a language and it's clear that Apple is doing everything they can to make it the default language for iOS developers. The interoperability between Swift and Objective-C allows developers to write their new features in the Swift language and still leverage the legacy code written in Objective-C. In this article, you learned the practical aspects of the Swift language by creating a Flickr Search application. You looked at a lot of features including initiating network requests, consuming JSON, and downloading images on the background thread. If you're thinking of starting a new iOS project, Swift would be a wise choice.
Swift is constantly changing as a language. Every update either adds new features or changes the existing one. It used to be quite challenging to keep up with all the changes but now the language has settled down. This has allowed more iOS developers to jump on the Swift bandwagon and follow the path laid out by Apple.
