


In my last article, Using Ajax and REST APIs in .NET 5, I introduced you to using JavaScript and Ajax in HTML to communicate with a REST API developed in .NET 5. This article is going to continue from where you left off and finish creating a page that allows you to display a list of product data, and to add, edit, and delete products. If you use JavaScript, jQuery, Angular, React, or almost any front-end framework, you most likely use Ajax to get and modify data from a server. Most of those front-end frameworks have their own wrapper around the XMLHttpRequest object. What you're learning in this series of articles is how to use this object natively. I'm always a big fan of understanding what goes on under the hood as I believe it makes me a better programmer. If you're reading this article, and you read the last one, then you believe the same. So, let's create a CRUD page using JavaScript and the XMLHttpRequest object.
Download Starting Projects
To follow along with this article, download the projects created in the last article. You should also read the previous article, so you know how these projects were created. There were three projects created in the last article, a .NET 5 Web API project, a .NET 5 MVC project, and a Node server project. You need the .NET 5 Web API project loaded up and running, and then either the MVC or the Node project. The MVC and Node projects are used to run your HTML page, so choose the one with the technology you're most familiar developing with. Download the projects at www.pdsa.com/downloads and click on the link entitled “CODE Magazine - Using Ajax and REST APIs in .NET 5”.
In addition to the source code, you also need the Microsoft AdventureWorksLT sample database. I've placed a version of it on my GitHub account that you can download at https://github.com/PaulDSheriff/AdventureWorksLT. Install this database into your SQL Server.
Start Both Projects
After you've downloaded the sample projects to your hard drive, the first project to load is the Web API project. Open the WebAPI folder in VS Code, open the appsettings.json file, and modify the connection string as needed to be able to connect to the AdventureWorksLT database that you installed. Click on the Run > Start Debugging menus to load and run the .NET Web API project. Next, open another instance of VS Code and load the code from either the \AjaxSample-MVC or the \AjaxSample-Node folder.
If you're using a node application, open a terminal window and type npm install. Then type npm run dev to start the Web server running and to have it display the index page in your browser.
If you're using the .NET MVC application, click on the Run > Start Debugging menus to load and run the .NET MVC project. The index page should now be displayed in your browser window.
Try It Out
Go to your browser for the front-end Web server (localhost:3000) and you should see a page that looks like Figure 1. Open the Browser Tools in your browser, usually accomplished by clicking the F12 key. Click the Get Products button and you should see the product data retrieved from the Product table in the AdventureWorksLT database and displayed in your console window.
List All Products
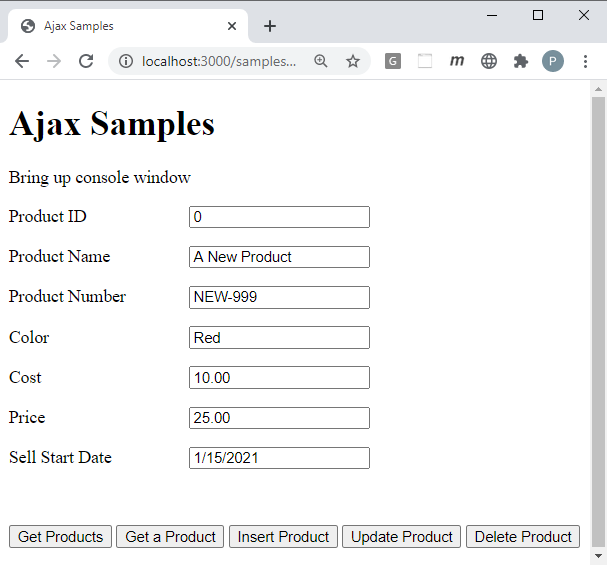
Instead of displaying the list of product data in the console window, let's modify the page to display the product data in a table, as shown in Figure 2. Instead of writing code in JavaScript to build a table, let's use a templating engine to help build the table. I've been using mustache.js (https://www.npmjs.com/package/mustache) for years, so that's my preferred templating engine. If you haven't used mustache before, you can read a tutorial at https://bit.ly/3uPs90e. However, I'll show you exactly what to do, so you don't need to fully understand mustache to still follow along.
Open the index page and add a new <script> tag before the other <script> tags that are already in the index page. This new <script> tag references the mustache.js file from the https://cdnjs.com/ site.
<script src="https://cdnjs.cloudflare.com/ajax/libs/mustache.js/4.1.0/mustache.min.js</script>
Add Styles for the HTML Table
To get your table to look like the one in Figure 2, you need to add some styles. Open the sites.css file in the \styles folder and add the styles shown in Listing 1.
Listing 1: Add styles to format the HTML table.
table {border-collapse: collapse; }

table,th,td {border: 1px solid black;}
th,td {padding: 0.5em;}

tbody tr:nth-child(odd) {background-color: lightgray;}

tbody tr:nth-child(even) {background-color: white;}
.text-right {text-align: right;}
Modify the HTML
Open the index page and locate the <h1> element that has the words “Ajax Samples” in it. Replace the text with “Product Information,” as shown below.
<h1>Product Information</h1>
Just below the <h1> element is a <p> tag with the text “Bring up console window” in it. Remove this <p> tag completely from the index page. Next, locate the form HTML element. You need to assign an “id” attribute to the form as you're going to want to make this form appear and disappear depending on whether you're displaying the list of products or are adding or editing a single product. Modify the form element to look like the following code snippet.
<form id="detail" style="display:none;">
Now it's time to add the HTML table where you're going to display the list of product information. Just above the form element, add the code shown in Listing 2. The button used to add a product isn't hooked up to the add() function yet; you'll do that later in this article. In the table, be sure to include the <thead> and <tbody> elements. I know that many developers don't use these, but they're needed for the demo here.
Listing 2: Add a div tag with an add button and an HTML table in it.
<div id="list" style="display:none;">
    <div class="row">
        <button type="button" onclick="add();">Add Product</button>
    </div>

    <table id="products">
        <thead>
            <tr>
                <th>Product ID</th>
                <th>Product Name</th>
                <th>Product Number</th>
                <th>Color</th>
                <th class="text-right">Cost</th>
                <th class="text-right">Price</th>
            </tr>
        </thead>
        <tbody></tbody>
    </table>
</div>
Create the HTML Table Template
If you look at the JSON passed back from the Web API project, you see that it's an array of product objects. It's the properties from each of these objects you need to display in the HTML table. Using mustache.js, you create a template in a <script> tag to tell mustache how to display that data. Add a <script> tag just above the <script> tag in which your JavaScript is located. You need to add an “id” attribute to this tag and the “type” attribute, as shown in Listing 3.
Listing 3: Place a mustache template within a <script> tag.
<script id="dataTmpl" type="text/html">
    {{#list}}
    <tr>
        <td>{{productID}}</td>
        <td>{{name}}</td>
        <td>{{productNumber}}</td>
        <td>{{color}}</td>
        <td class="text-right">{{standardCost}}</td>
        <td class="text-right">{{listPrice}}</td>
    </tr>
    {{/list}}
</script>
The values within the double curly braces are the names of the properties in each product object in the array passed back from the Web API. The {{#list}} is the name of a variable that contains the JSON array of product objects. Don't worry, you're going to create that very soon.
Add Functions to the product.js File
The product.js file within the \scripts folder contains functions used to interact with the product data on the index page. You need to add two additional functions to display the list of product data as an HTML table. Both the form and the div element have set their style to “display:none”. This means that neither one is displayed when the page is loaded. After you build the product table, you want it to appear on the page, so create a function named displayList() in the product.js file to display the table.
function displayList() {
    document.getElementById("list").style.display = "block";
    document.getElementById("detail").style.display = "none";
}
Next, add a function named buildList() to use mustache to render the template you built in the <script> tag by feeding it the appropriate data. Open the product.js file and add the code shown in Listing 4.
Listing 4: The buildList() function uses mustache to render the HTML table.
function buildList(vm) {
    // Get template from script
    let template = document.getElementById("dataTmpl").innerHTML;

    // Call Mustache passing in the template and the object with the collection of data
    let html = Mustache.render(template, vm);

    // Insert the rendered HTML into the DOM
    document.getElementById("products").getElementsByTagName("tbody")[0].innerHTML = html;

    // Display List
    displayList();
}
The code in the buildList() function is passed in a JSON object that has a list property containing the array of product objects. Remember the {{#list}} token in the data template? This is how you match the name of a property to that data template. Next, the code retrieves the HTML from the <script> tag named “dataTmpl”. Pass both the HTML template and the vm object to the mustache render() method. This method loops through all the data in the array and creates the appropriate HTML for each product object. You then set this newly rendered HTML into the innerHTML property of the <tbody> of the table on your index page.
Connect It All Together
You now have almost all the various pieces built to support the building of the HTML table. First, you need the JSON object with the list property to hold the product array. Open the index page and, just after the ‘use strict’ statement in your JavaScript, add a variable named vm. This variable is your “view model” class with the list property that you pass to the buildList() function.
let vm = {
   "list": []
};
Within the if() statement of the get() function, replace the code within the if() with the lines of code shown below.
function get() {
    let req = new XMLHttpRequest();
    req.onreadystatechange = function () {
        if (this.readyState === XMLHttpRequest.DONE
                && this.status === 200) {
            vm.list = JSON.parse(this.response);
            buildList(vm);
                }
    };
    req.open("GET", URL);
    req.send();
}
This new code takes the JSON string passed back from the Web API server and parses it into a JSON array. That array is placed into the vm.list property. The view model object is passed to the buildList() function where mustache is used to create the HTML from the template and this array of product data.
The final piece of refactoring is to call the get() function after the index page has completely loaded. Add the following code to call the get() function from the window.onload.
window.onload = function () {get();}
Try It Out
Save all the changes and go to your browser. If you've done everything correctly, you should see a page that looks like Figure 2. If you don't see this page, check the console window for any errors you may have accidently typed in.
Get a Single Product
Now that you have the list of product data displaying in an HTML table, it's time to retrieve a single product from the Web API and display that in the HTML form built in the last article. Open the index page and replace the empty getProduct() function with the code in the following snippet.
function getProduct(productId) {
    let req = new XMLHttpRequest();
    req.onreadystatechange = function () {
        if (this.readyState === XMLHttpRequest.DONE
              && this.status === 200) {
            setInput(JSON.parse(this.response));
            displayDetail();
             }
    };
    req.open("GET", URL + "/" + productId);
    req.send();
}
The code above is very similar to the get() function, except you pass a productId value after the URL. An example of this might be http://localhost:5000/api/product/706. The value 706 is what's passed into this function as the productId. The response from the Web API call is a single product object expressed as JSON. Parse that JSON string into a real JavaScript object and pass that object to the setInput() function written in the last article. This function is in the product.js file and is used to put each property from the product object into the appropriate input elements within the form.
The last thing the getProduct() function does is to call a function named displayDetail(). Open the product.js file and add a new function called displayDetail() to hide the HTML table and make the form with the product detail visible.
function displayDetail() {
    document.getElementById("list").style.display = "none";
    document.getElementById("detail").style.display = "block";
}
All you need to do now is to somehow pass a product ID from the table to the getProduct() function. Open the index page and locate the <table> element you added. Add a new table header before all the other headers, as shown in the code below.
<th>Action</th>
Next, locate the <script id="dataTmpl"> element and before all the other <td> elements, create a new <td> element before the other <td> elements. Add the code shown below to create a new button and for each button's click event, call the getProduct() function passing in the product ID for that product object.
<td>
    <button type="button" onclick="getProduct({{productID}});">Edit</button>
</td>
Try It Out
Save all the changes in your pages and go back to the browser and you should now see an Edit button in the left-most column of the table. Click on any of those buttons and you should be shown the detail information for that product in the input elements of the form. To get back to the list of product data, click the Get Products button.
Prepare the Index Page for CRUD
In the last article, I set the stage for CRUD, but I didn't want to build the complete HTML table along with presenting the basics of building the Web API and using the XMLHttpRequest object. Now, it's time to refactor the index page to add a button for adding a new product, and two buttons within the table for editing and deleting individual products. First, locate the <div> with the infoMessage and errorMessage labels and move it from its current location to below the <h1> element.
<div class="row">
      <label id="message" class="infoMessage"></label>
      <label id="error" class="errorMessage"></label>
 </div>
Next, remove all the buttons within the <div class="row"> that's the last row in the form element. Add the following buttons back into this row where you just deleted the other buttons. The Save button is used to save updates to an existing product or to a new product. The Cancel button is used to go back to the list of products in the HTML table.
<button type="button" id="saveButton" onclick="save();">Save</button>
<button type="button" id="cancelButton" onclick="cancel();">Cancel</button>
Because you've deleted the buttons to delete a product, you must replace that functionality somewhere. Just like you created an Edit button on each row of the product table, you need to do the same for deleting a product. Add a Delete button within the <td> of the data template just after the Edit button, as shown in the code below.
<td>
<button type="button" onclick="getProduct({{productID}});">Edit</button>
<button type="button" onclick="deleteProduct({{productID}});">Delete</button>
</td>
Earlier in this article, you created an Add button that calls an add() function used to display a blank form for inputting a new product. You also have a function that calls the getProduct() to display an existing product in the form. When the user clicks on the Save button, how do you know whether the user wants to insert a new product or update an existing product? An easy way to accomplish this is to add a mode property to the view model variable. You can toggle this mode property between three values “list”, “edit”, and “add”. Modify the view model variable and add the “mode” property and initialize it to “list”.
let vm = {
    "list": [],
    "mode": "list"
};
Add the add() function somewhere in your JavaScript code on the index page. This function sets the mode property of the view model variable to “add”. It then calls the clearInput() function to display blank product data in the input fields of the form. Finally, it calls displayDetail() to make the input form visible and to hide the table of product data.
function add() {
    vm.mode = "add";
    clearInput();
    displayDetail();
}
Add a save() function to the JavaScript on the index page. This function checks the mode property of the view model variable to determine whether to call the insertProduct() or the updateProduct() function.
function save() {
    if(vm.mode === "add") {
        insertProduct();
    } else if(vm.mode === "edit") {
      updateProduct();
    }
}
Add a cancel() function to the JavaScript on the index page. This function sets the mode property back to “list” and calls the get() function to get all the data from the server again and displays that data in the HTML table.
function cancel() {
    vm.mode = "list";
    get();
}
When you click on the Edit button, you need to set the mode to “edit” in the view model variable. This way, when you click on the Save button, the code calls the updateProduct() function. Locate the getProduct() function and add the following code at the top of the function.
function getProduct(productId) {
    vm.mode = "edit";

    // REST OF THE CODE HERE}
The last thing you need to do is to modify the deleteProduct() function to accept a productId variable. You learn how to delete a product just a little later in this article.
function deleteProduct(productId) {
}
Try It Out
Save all your changes and go back to the browser and you should now see both Edit and Delete buttons in the left-most column of the table. Click on the Edit button to be sure it still displays existing product information. You can now click on the Cancel button to return to the list of product data. Click on the Add button to see a set of blank input fields on the product form.
Insert a Product
You add a new product to the SQL Server database by calling the Post() method in the Web API server. You call this method from the index page by adding the code shown in Listing 5 to the empty insertProduct() function. The first line in this function calls the getFromInput() function to build the product object to be submitted to the Post() Web API method. The rest of the Ajax code is similar to what you wrote before with just a few differences.
Listing 5: Change the verb to “POST” in the XMLHttpRequest object's open() method to insert data.
function insertProduct() {
    // Get product data from input fields
    let product = getFromInput();

    // Create XMLHttpRequest object
    let req = new XMLHttpRequest();

    // Hook up the onreadystatechange event
    req.onreadystatechange = function () {
        if (this.readyState === XMLHttpRequest.DONE &&
            this.status === 201) {
                // Get product object
                product = JSON.parse(this.response);

                // Display new product data
                setInput(product);

                // Display a success message
                displayMessage("Product inserted successfully.");

                // Hide buttons
                document.getElementById("saveButton").style.display = "none";
                document.getElementById("cancelButton").style.display = "none";

                // After a few seconds, redisplay product list
                setTimeout(() => {
                    // Display List
                    get();

                    // Clear message
                    displayMessage("");
                }, TIMEOUT);
            }
    };
    // Open the request object
    req.open("POST", URL);
    // Add Content-Type header
    req.setRequestHeader("Content-Type", "application/json");

    // Send the request to the server
    req.send(JSON.stringify(product));
}
The first difference is the call to the open() method on the XMLHttpRequest object. You pass in the verb “POST” as the first parameter. This maps to the Post() method in the Web API because the attribute [HttpPost()] is decorating the Post() method.
The second difference is that you add a header to the request object to set the content-type header to “application/json”. This informs the Web API that a JSON object is being passed in. The third difference is that when you call the send() method you stringify the product JSON object.
The last difference in this function is in the onreadystatechange event. You need to check for a status code of 201, as this is what you're sending back from the Post() method in the Web API. When you get the response property, use the JSON.parse() method to convert the response into a JSON object and put that object into the product variable.
After the data is successfully posted, call the setInput() function, passing in the product object to display any new data, such as the new Product ID on the input fields. The Save and Cancel buttons are then hidden to avoid the user attempting to click on either of them again. Finally after a delay of a certain number of seconds, the get() function is called to redisplay the list of products with the new product now included in that list. The number of seconds to delay is specified by a constant that you should add near the other constant in the index page.
const TIMEOUT = 3000;
Bring Back Buttons
Because you've now hidden the buttons after inserting, if you click on the Add button again, or on an Edit button, you need to bring back the buttons. Add the following two lines of code at the top of the getProduct() function.
function getProduct(productId) {
    // Display buttons
    document.getElementById("saveButton").style.display = "inline";
    document.getElementById("cancelButton").style.display = "inline";

    let req = new XMLHttpRequest();

    // REST OF THE CODE HERE
}
Try It Out
Save all changes to all files in the HTML project and go to your browser. You should see a page that looks like Figure 3. Fill in the product information that you wish to add, making sure to leave the Product ID field equal to a zero (0) value. Click the Save button and, if everything works correctly, you should see a value appear in the Product ID field. This lets you know that the product object was successfully inserted into the table. After a couple of seconds, the product table reappears with the new product you entered.
Error Handling
Up to this point, the code you've written doesn't check for any errors. You should always add error handling to your code. In the ajax-common.js file is a function called handleAjaxError(). This function should be called if an error occurs when making a Web API call. Modify the insertProduct() function to add some error handling. Locate the insertProduct() function and add the code shown in Listing 6 to this function.
Listing 6: Add some error handling to your insertProduct() function.
function insertProduct() {
    // Get product data from input fields
    let product = getFromInput();

    // Create XMLHttpRequest object
    let req = new XMLHttpRequest();

    // When the entire request fails it is probably a network error
    req.onerror = function () {
        handleAjaxError(new Error(
        'There was a network error.'));
    };
    // Hook up the onreadystatechange event
    req.onreadystatechange = function () {
        if (this.readyState === XMLHttpRequest.DONE
        && this.status === 201) {

        // REST OF THE CODE HERE

        } else if (this.readyState === XMLHttpRequest.DONE && this.status >= 400) {

        // Check for error
        handleAjaxError({
            "status": this.status,
            "statusText": this.statusText,
            "response": this.response,
            "responseText": this.responseText
        });

        displayError("Product NOT inserted. Please try again.");
        }
    };

    // REST OF THE CODE HERE
}
Try It Out
Save all the changes in your HTML project and go to the browser. Click on the Add Product button and enter any data you want but use the exact same Product Number that you inserted previously. The Product table won't allow duplicates in the ProductNumber field, so this generates an error. Click on the Save button and you should get an error message displayed on the screen in response to the HTTP status code 500 reported back from the Web API Post() method.
Update Product Data
If you wish to update a product that already exists in the AdventureWorksLT Product table, you need to call the Put() method in your Web API project. Add the code to the updateProduct() function shown in Listing 7 into the index page to make this call.
Listing 7: Use the PUT verb to update a product.
function updateProduct() {
    // Get product data from input fields
    let product = getFromInput();

    // Create XMLHttpRequest object
    let req = new XMLHttpRequest();

    // When the entire request fails it is probably a network error
    req.onerror = function () {
        handleAjaxError(new Error('There was a network error.'));
    };

    // Hook up the onreadystatechange event
    req.onreadystatechange = function () {
        if (this.readyState === XMLHttpRequest.DONE && this.status === 200) {
            // Get product object
            product = JSON.parse(this.response);

        // Display new product data
        setInput(product);

        // Display a success message
        displayMessage("Product updated successfully.");

        // Hide buttons
        document.getElementById("saveButton").style.display = "none";
        document.getElementById("cancelButton").style.display = "none";

        // After a few seconds, redisplay products
        setTimeout(() => {
            // Display List
            get();

            // Clear message
            displayMessage("");
        }, TIMEOUT);
        } else if (this.readyState === XMLHttpRequest.DONE && this.status >= 400) {
        // Check for error
        handleAjaxError({
            "status": this.status,
            "statusText": this.statusText,
            "response": this.response,
            "responseText": this.responseText
        });

        displayError("Product NOT updated. Please try again.");
        }
    };

    // Open the request object
    req.open("PUT", URL + "/" + product.productID);

    // Add Content-Type header
    req.setRequestHeader("Content-Type", "application/json");

    // Send the request to the server
    req.send(JSON.stringify(product));
}
There are a few differences between the insertProduct() and the updateProduct() function. The first is the Put() method, which returns a HTTP status code of 200 instead of 201. The next difference is that you pass the verb “PUT” to the open() method. The second parameter to the open() method adds the product ID to the URL. Other than these differences, the code is almost the same between inserting and update a product.
Try It Out
Save all the changes in your HTML project. Go to the browser and click the Edit button next to the new product you entered previously. Modify the Color, the Cost, or the Price values and click on the Save button to see if all the changes you entered work correctly.
Delete Product Data
Now that you've inserted and updated product data, let's learn to delete a product from the table. Add the code shown in Listing 8 to the deleteProduct() function on the index page. In this function, confirm from the user that they really wish to delete the product ID they selected. If they answer affirmatively, the code is similar to the code for inserting and updating. The big difference is the call to the open() method passes the verb “DELETE” as the first parameter, and the product ID is passed on the URL line.
Listing 8: Use the DELETE verb to delete a product.
function deleteProduct(productId) {
    if (confirm("Delete product " + productId + "?")) {
        // Create XMLHttpRequest object
        let req = new XMLHttpRequest();

        // When the entire request fails it is probably a network error
        req.onerror = function () {
            handleAjaxError(new Error('There was a network error.'));
        };

        // Hook up the onreadystatechange event
        req.onreadystatechange = function () {
            if (this.readyState === XMLHttpRequest.DONE && this.status === 200) {
                // Display success message
                displayMessage("Product was deleted");

                 // Display list
                 get();

                 // Clear Message
                 setTimeout(() => {
                     displayMessage("");
                 }, TIMEOUT);
            } else if (this.readyState === XMLHttpRequest.DONE && this.status >= 400) {
                // Check for error
                handleAjaxError({
                    "status": this.status,
                    "statusText": this.statusText,
                    "response": this.response,
                    "responseText": this.responseText
                });
            }
        };
        // Open the request object
        req.open("DELETE", URL + "/" + productId);

        // Send the request to the server
        req.send();
    }
}
Try It Out
Save all the changes in your HTML project and go to the browser. Click on the Delete button next to the new product you previously entered. Answer the prompt to delete the product you wish to delete. The page refreshes with the product list that no longer has your new product in it. A message displays, specifying that the product was deleted. After a couple of seconds, that message will disappear.
Simplify the XMLHttpRequest Code
Looking at the Ajax code in your index page, notice that the functions for getting and modifying the data are almost identical to one another. If you see similar code in your projects, you should always try to make it generic. This Ajax code can be made generic by creating a function named ajax() in the ajax-common.js file. Open the ajax-common.js file and add the function shown in Listing 9. This function accepts five arguments that are described in Table 1.
Listing 9: Create a generic ajax() function that uses callbacks to indicate success or failure.
function ajax(verb, url, data, resolve, reject) {
    // Create XMLHttpRequest object
    let req = new XMLHttpRequest();

    // When the entire request fails it is probably a network error
    req.onerror = function () {
        if(reject) {
            reject(new Error("There was a network error."));
        }
    };

    // Setup state change event
    req.onreadystatechange = function () {
        if (this.readyState === XMLHttpRequest.DONE) {
            // Check status property to see what is going on
            if (this.status >= 200  && this.status < 400) {
                if (resolve) {
                    resolve(JSON.parse(this.response));
                }
            } else if (this.status >= 400) {
                if(reject) {
                    reject({
                        "status": this.status,
                        "statusText": this.statusText,
                        "response": this.response,
                        "responseText": this.responseText
                    });
                }
            }
        }
    };
    // Open Request
    req.open(verb, url);

    // Set headers for JSON
    req.setRequestHeader("Content-Type", "application/json");

    // Check to see if we need to pass data
    if (data) {
        // Submit the request with data
        req.send(JSON.stringify(data));
    }  else {
        // Submit the request
        req.send();
    }
}
Get All Products
Now that you've created this generic ajax() function, all of your Ajax calls can be greatly simplified. Open the index page and locate the get() function and modify it to look like the following snippet. The fourth and fifth parameters are callback functions to handle success and failure respectively.
function get() {
    ajax("GET", URL, null,
        function (data) {
            vm.list = data;
            buildList(vm);
        },
        function (error) {
            handleAjaxError(error);
        });
}
Get a Single Product
Locate the getProduct() function and simplify the code to use the new ajax() function, as shown in Listing 10. What this function does hasn't changed; it still retrieves a single product object. However, how it accomplishes this task is simplified and is much easier to read.
Listing 10: Simplify the getProduct() function using the generic ajax() function.
function getProduct(productId) {
    vm.mode = "edit";

    // Display buttons
    document.getElementById("saveButton").style.display = "inline";
    document.getElementById("cancelButton").style.display = "inline";

    ajax("GET", URL + "/" + productId, null, function (data) {
        setInput(data);
        displayDetail();
    },
    function (error) {
    handleAjaxError(error);
    });
}
Insert a Product
Locate the insertProduct() function and change it to use the new ajax() function, as shown in Listing 11. Once again, you can see how much easier this code is to read because you don't have all the XMLHttpRequest object code to deal with.
Listing 11: Simplify the insertProduct() function using the generic ajax() function.
function insertProduct() {
    let product = getFromInput();

    ajax("POST", URL, product, function (data) {
        // Get product object
        product = data;

        // Display new product data
        setInput(product);

        // Display a success message
        displayMessage("Product inserted successfully.");

        // Hide buttons
        document.getElementById("saveButton").style.display = "none";
        document.getElementById("cancelButton").style.display = "none";

        // After a few seconds, redisplay products
        setTimeout(() => {
            // Display List
            get();
            // Clear message
            displayMessage("");
        }, TIMEOUT);
    },
    function (error) {
        handleAjaxError(error);

        displayError("Product NOT inserted. Please try again.");
    });
}
Update a Product
Locate the updateProduct() function and simplify the code by using the new ajax() function, as shown in Listing 12.
Listing 12: Simplify the updateProduct() function using the generic ajax() function.
function updateProduct() {
    let product = getFromInput();

    ajax("PUT", URL + "/" + product.productID, product,
        function (data) {
            // Get product object
            product = data;

            // Display new product data
            setInput(product);

            // Display a success message
            displayMessage("Product updated successfully.");

            // Hide buttons
            document.getElementById("saveButton").style.display = "none";
            document.getElementById("cancelButton").style.display = "none";

            // After a few seconds, redisplay products
            setTimeout(() => {
                // Display List
                get();

                // Clear message
                displayMessage("");
            }, TIMEOUT);
        },
        function (error) {
            handleAjaxError(error);
            displayError("Product NOT updated. Please try again.");
        });
}
Delete a Product
Locate the deleteProduct() function and modify it to use the new ajax() function, as shown in Listing 13.
Listing 13: Simplify the deleteProduct() function using the generic ajax() function.
function deleteProduct(productId) {
    if (confirm("Delete product " + productId + "?")) {
        ajax("DELETE", URL + "/" + productId, null,
            function (data) {
                // Display success message
                displayMessage("Product was deleted");

                // Display list
                get();

                setTimeout(() => {
                    // Clear message
                    displayMessage("");
                }, TIMEOUT);
            },
            function (error) {
                handleAjaxError(error);

                displayError("Product NOT deleted. Please try again.");
            }
        );
    }
}
Try It Out
Save all changes you made in the HTML project and go to the browser and click on each of the buttons to ensure that you can still add, edit, and delete products. NOTE: If you run the page and you don't get any results, press Ctrl-5 to force a full refresh of the page. Sometimes the .js files get cached and aren't downloaded after you make changes.
Summary
In this article, you learned to use the XMLHttpRequest object and the mustache templating engine to build a CRUD page. In addition, you learned to add error handling to your code. When you find yourself creating a lot of duplicate code, try to find ways to make that code more generic by creating a function to call as you did by creating the ajax() function. Creating this generic function greatly simplifies the use of the XMLHttpRequest object throughout your project. In the next article, you'll learn to use Promises to wrap up the calls to the XMLHttpRequest object and see a built-in API call Fetch that also uses Promises.
Table 1: The arguments you can pass to the ajax() function.
| ARGUMENT | DESCRIPTION |
| verb | An HTTP verb such as GET, POST, PUT, DELETE, etc. |
| url | The URL where the resource you wish to call is located. |
| data | The data to send to the API call. This argument is optional. |
| resolve | A callback that is called to indicate that the Ajax call was successful. This argument is optional. |
| reject | A callback that is called to indicate that the Ajax call was not successful. This argument is optional. |
