


Developing for iOS is a joyful and fun adventure in learning Objective-C and the Apple frameworks. Nowhere else is it so easy and quick to go from an idea to an app you can hold in your hand on an iPhone, iPad, or iPod touch. With your code behind the glass touchscreen, you can turn these devices into anything you can think of. An iOS device can become a flight simulator, an interactive book, or just about anything else you can imagine. In this chapter, you take the first steps in developing for iOS by learning about the iOS Software Development Kit (SDK) and how to get the Xcode toolset installed on your Mac. (It is easy.) In the next chapter, you dive in, create your first iOS app, and get it running on the iOS Simulator.
The iOS family includes the iPhone, the iPad, and the iPod touch. Despite their relatively diminutive proportions compared to desktop systems, they use increasingly powerful multicore CPUs to run iOS, a first-class version of OS X. iOS comes with a rich and varied SDK that enables you to design, implement, and realize a wide range of applications. For your projects, you can take advantage of the multitouch interface and powerful onboard features using Xcode, Apple’s integrated development environment (IDE). In this chapter, you learn about Apple’s various iOS Developer Programs and how you can join. Ready? Onward to the next step: getting the Xcode application installed on your Mac.
Installing Xcode
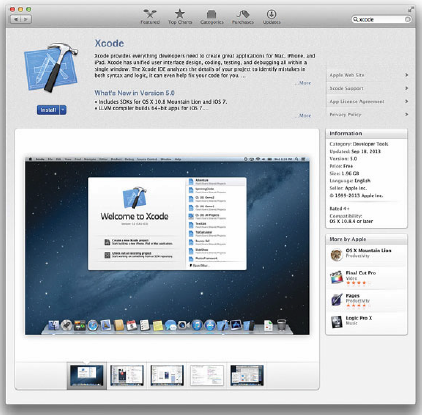
The first step in developing for the iOS platform is to get Xcode : the IDE from Apple. Xcode is the tool you use for writing Objective-C applications and compiling them for iOS devices. Apple has recently made installing Xcode as easy as possible by providing Xcode as a free download from the Mac App Store, as shown in Figure 1-1.
To install Xcode, follow these steps:
- Launch the Mac App Store application on your Mac.
- Search for Xcode.
- Click the Free button to install Xcode.
While Xcode is downloading and being installed, you can read the rest of this chapter and learn about the iOS SDK. That is all it takes to install Xcode and get on your way. The rest of this chapter covers the iOS SDK, the devices, and the development programs Apple offers. In Chapter 2, “Objective-C Boot Camp,” you start your journey into the Objective-C language and application development in iOS.
About the iOS SDK
The iOS SDK comprises all the libraries you need to write iOS apps, as well as the iOS Simulator for you to try out your apps on your Mac. The SDK is included with the Xcode tool, which is used for creating iOS and Mac applications.
You can register for free for the Apple Online Developer Program and download and explore the full iOS SDK programming environment. However, as discussed in the next section, this program doesn’t let you deploy your applications to an actual iOS device, such as the iPhone or iPad. If you want to do that, you need to register and become a member of Apple’s iOS Developer Program. There are four program choices, described in Table 1-1.
Each program offers access to the same iOS SDK, which provides ways to build and deploy your applications. The audience for each program is specific. Keep in mind that if your company wants to deploy apps in the normal App Store, all you need is the iOS Developer Program-Company. The Enterprise option is available to you only if your company wants to deploy apps in a private in-house App Store. The following sections discuss the various iOS Developer Programs in more detail.
What You Get for Free
The free program is for anyone who wants to explore the full iOS SDK programming environment but isn’t ready to pay for further privileges. The free program limits your deployment options to the iOS Simulator. Although you can run your applications in the simulator, you cannot install those applications to a device or sell them in the App Store.
Although each version of the simulator moves closer to representing iOS, you should not rely on it for evaluating your application. An app that runs rock solid on the simulator might be unresponsive or even cause crashes on an actual device. The simulator does not, for example, support vibration or accelerometer readings. These and other features present on devices are not always available in the simulator. A more detailed discussion about the simulator and its differences from a real device follows later in this chapter, in the section “Simulator Limitations.”
While you can download Xcode for free and without registering, joining a full program gives you access to much more, including the ability to run your code on devices, access to early releases, and even the ability to ask questions of Apple developer support engineers.
iOS Developer Program (Individual and Company)
To receive device and distribution privileges, you pay a program fee, currently $99/year, for the standard iOS Developer Program. You can join as an individual or as a company. When you have paid, you gain access to App Store distribution and can test your software on actual iOS hardware. This program adds ad hoc distribution as well, allowing you to distribute prerelease versions of your application to a set number of registered devices. The standard program provides the most general solution for the majority of iOS programmers who want to be in the App Store. If you intend to conduct business by selling applications, this is the program to sign up for.
The standard iOS Developer Program also offers early access to beta versions of the SDK. This is a huge advantage for developers who need to prepare products for market in a timely manner and to match Apple’s OS and device upgrade dates. As an example, program members gained access to early versions iOS 7 and Xcode 5 in June 2013.
Developer Enterprise Program
The Enterprise Program, currently $299/year, is meant for in-house application distribution. It’s targeted at companies with 500 employees or more. Enterprise memberships do not offer access to the Apple public App Store. Instead, you can build your own proprietary applications and distribute them to your employees’ hardware through a private storefront. The Enterprise
Program is aimed at large companies that want to deploy custom applications such as ordering systems to their employees.
Developer University Program
Available only to higher education institutions, the Developer University Program is a free program aimed at encouraging universities and colleges to form an iOS development curriculum. The program enables professors and instructors to create teams with up to 200 students, offering them access to the full iOS SDK. Students can share their applications with each other and their teachers, and the institution can submit applications to the App Store.
Registering
Register for a free or paid program at the main Apple developer site: http://developer.apple.com/programs/register">http://developer.apple.com/programs/register. Regardless of which program you sign up for, you must have access to a Mac running a current version of Mac OS X. It also helps to have at least one-and preferably several-iPhone, iPad, and/or iPod touch units. These are for testing to ensure that your applications work properly on each platform, including legacy units. What better excuse for buying that iPhone, iPad, or iPod touch you’ve been wanting...err, needing for business purposes?
Often, signing up for paid programs involves delays. After registering, it can take time for account approval and invoicing. When you actually hand over your money, it may take another 24 to 72 hours for your access to advanced portal features to go live. There is a very short delay for individual registration, and the delay is longer for companies.
Registering for iTunes Connect, so you can sell your application through the App Store, is a separate step. Fortunately, this is a process you can delay until after you’ve finished signing up for a paid program. With iTunes Connect, you must collect banking information and incorporation paperwork prior to setting up your App Store account. You must also review and agree to Apple’s distribution contracts. Apple offers full details at http://itunesconnect.apple.com">http://itunesconnect.apple.com. Bear in mind that it can take several days until you are able to upload apps, so do not delay signing up for too long.
iTunes U and Online Courses
When you have registered for any level of iOS development with Apple, you will have access to the World Wide Development Conference (WWDC) videos that Apple releases each year. These high-quality presentations, given by Apple’s own engineers, provide great insight into many of the features in iOS and examples of how to use them. In addition, there are many iPhone programming courses available for free on iTunes University (iTunes U inside iTunes) that you can use as a companion to this book.
The iOS SDK Tools
Xcode typically runs a few gigabytes in size and installs an integrated suite of interactive design tools onto your Macintosh. This suite consists of components that form the basis of the iOS development environment and includes the following parts:
- Project Editor- This is the heart of Xcode and provides a home for most of the features, including project file and component management, syntax-aware source editing for both the Objective-C language and iOS SDK, as well as a visual editor and a full debugger. A separate window gives access to the full range of documentation for iOS, Xcode, and other supporting documentation.
- Interface Builder (IB)- IB is accessed through the project editor and provides a rapid prototyping tool for laying out user interfaces (UIs) graphically, and linking those prebuilt interfaces to your Xcode source code. With IB, you use powerful visual design tools to add the visual elements of your app and then connect those onscreen elements to objects and method calls in your application. In addition to individual screens, you can lay out all your application screens in one document and define the ways each screen moves to the next. You learn about this in Chapter 3, “Introducing Storyboards.” In Chapter 4, “Auto Layout,” you learn how to use IB with another powerful feature of iOS. Auto layout is an advanced rule-based system that enables you to specify the visual relationships between views instead of worrying about pixel-perfect placement. With it, you can create one interface that adapts to different screen orientations and sizes.
- Simulator- The iOS Simulator runs on a Macintosh and enables you to create and test iOS apps on your desktop. You can test programs without connecting to an actual iPhone, iPad, or iPod touch. The simulator offers the same API (Application Programming Interface) used on iOS devices and provides a preview of how your concept designs will look and behave. When working with the simulator, Xcode compiles Intel x86 code that runs natively on the Macintosh rather than ARM-based code used on the iPhone. Keep in mind that performance in the simulator is likely very different than on a physical device as it is running with a very different CPU, GPU (graphics processor), and storage/disk format. Your app is likely to be much faster in the simulator and have no memory or communications problems.
- Performance Tools- As you run your app in the simulator or on a device, runtime debug gauges give an overview of performance including memory and CPU use. Instruments provides even more detail, profiling how iPhone applications work under the hood. It samples memory usage and monitors performance, enabling you to identify and target problem areas in your applications and work on their efficiency. As you see in Chapter 14, “Instruments and Debugging,” if you tune your app as you develop, you will catch issues early and end up with the best performance. Instruments offers graphical timebased performance plots that show where your applications are using the most resources. It is built around the open-source DTrace package developed by Sun Microsystems and plays a critical role in making sure your applications run efficiently on the iOS platform. In addition, a static analyzer shows you places where your code might have problems. Simply run the analyzer on a single file or on your whole project to find unused variables, possible logic problems, potential memory leaks, and more.
- Debugger- Chapter 14 also covers the debugger. It helps you quickly find and fix problems in your code. With it, you can step through code and inspect values of variables, either in a separate display area or by just hovering the mouse pointer over the source code. You can set rich breakpoints, including conditional triggers and associated actions such as logging messages, playing source, or even running scripts. There is even a console for fine control.
- Other Features- Xcode provides a wide array of other features supporting the app development and deployment cycle including built-in support for branching source code control using Git, management of developer certificates and app entitlements, testing device management, and uploading apps to the store.
Together, the components of the iOS SDK enable you to develop your applications. From a native application developer’s point of view: You will spend most of your time editing and debugging source, creating the interface, and running your app in the simulator. You will also spend time tuning your code in instruments. In addition to these tools, there’s an important piece not on this list. This piece ships with the SDK, but is easy to overlook: Cocoa Touch.
Cocoa Touch is a library of classes provided by Apple for rapid iOS application development. Cocoa Touch, which takes the form of a number of API frameworks, enables you to build graphical event-driven applications with UI elements such as windows, text, and tables. Cocoa Touch and UIKit on iOS is analogous to Cocoa and AppKit on Mac OS X and supports creating rich, reusable interfaces on iOS.
Many developers are surprised by the code base size of iOS applications; they’re tiny. Cocoa Touch’s library support is the big reason for this. By letting Cocoa Touch handle all the heavy UI lifting, your applications can focus on getting their individual tasks done. The result is compact code, focused on the value provided by your app.
Cocoa Touch lets you build applications with a polished look and feel, consistent with those developed by Apple. Remember that Apple must approve your software. Apple judges applications on the basis of appearance, operation, and even content. Using Cocoa Touch helps you better approximate the high design standards set by Apple’s native applications.
Before you start creating apps, make sure you look at the Apple “iOS Human Interface Guidelines” available in the Xcode documentation in the “User Interface” group, or on the web at https://developer.apple.com/appstore/guidelines.html">https://developer.apple.com/appstore/guidelines.html. Also read through the legal agreement you signed for iTunes Connect. Breaking rules is highly likely to result in your app being rejected from the App Store.
